Managing Scheduled Reports
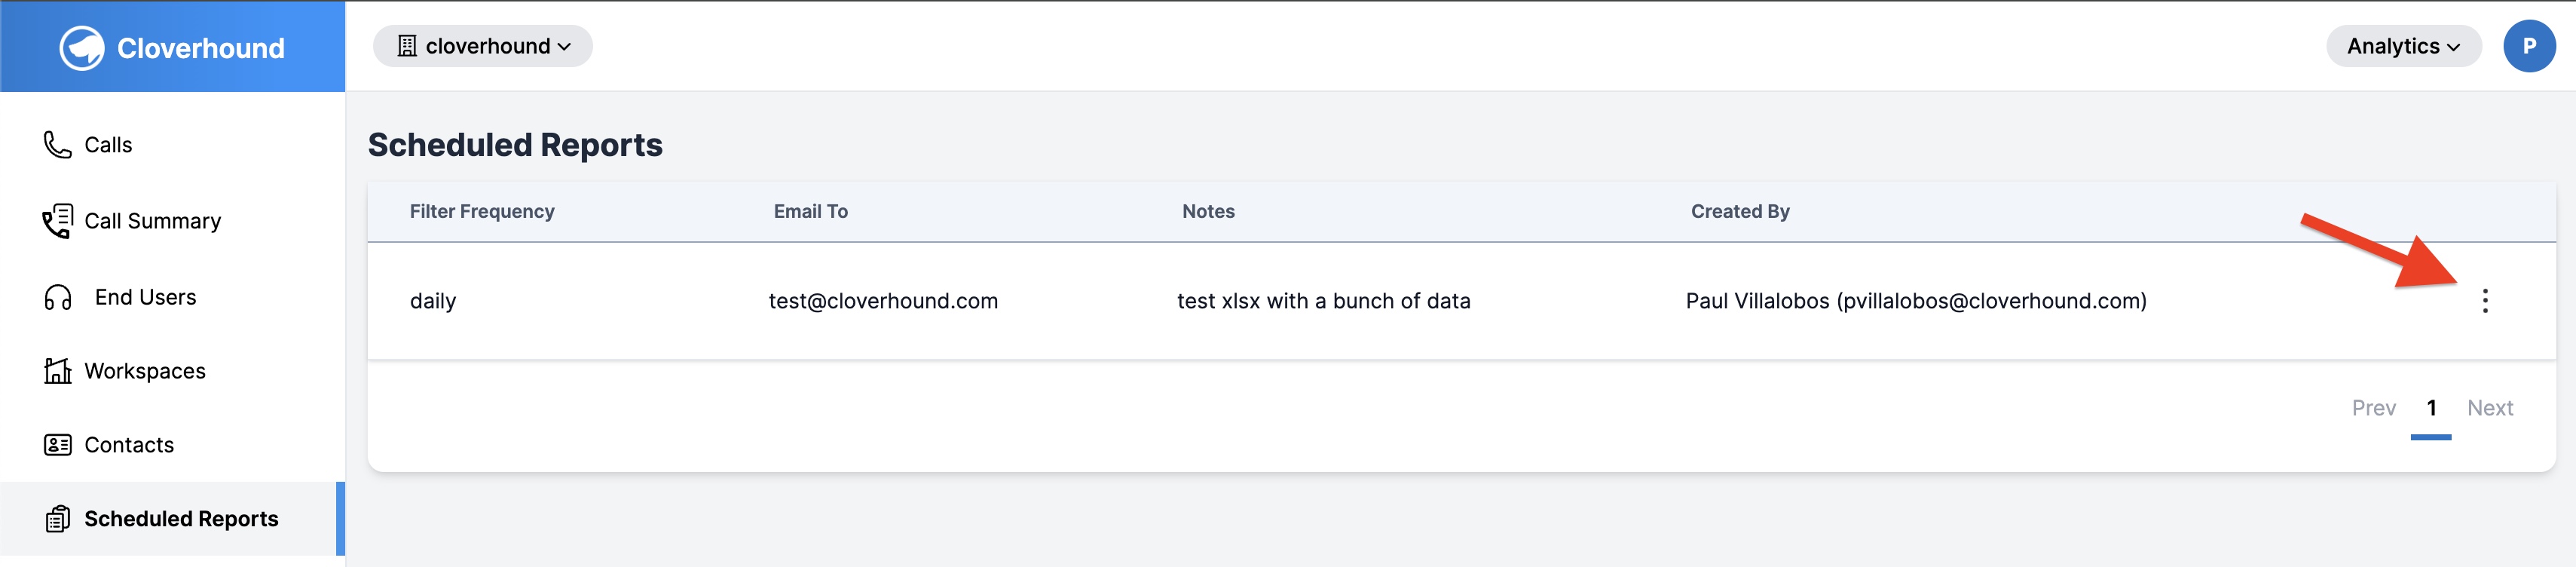
You can manage your scheduled reports through the Scheduled Reports tab in the Cloverhound Cloud platform. This tab displays a table of all your scheduled reports, and each report has options to edit or delete.
Accessing the Scheduled Reports Tab
To manage your scheduled reports:
- Navigate to the Scheduled Reports tab from the main menu.
- The table will display a list of all your scheduled reports, including details such as report name, frequency, status, and the next scheduled run time.
Using Filters
To help you find specific scheduled reports, you can use the Show Filters button:
- Click the Show Filters button located above the table.
- This will reveal filter options that allow you to narrow down your scheduled reports by various criteria such as:
- Report status (Active, Inactive, etc.)
- Frequency (Daily, Weekly, Monthly, etc.)
- Date ranges
- Report types
- Apply your desired filters to see only the reports that match your criteria.
- You can clear filters at any time to return to viewing all scheduled reports.
Editing Scheduled Reports
Each scheduled report in the table has a three-dot menu (also known as a "more options" menu). To edit a scheduled report:
- Locate the report you want to edit.
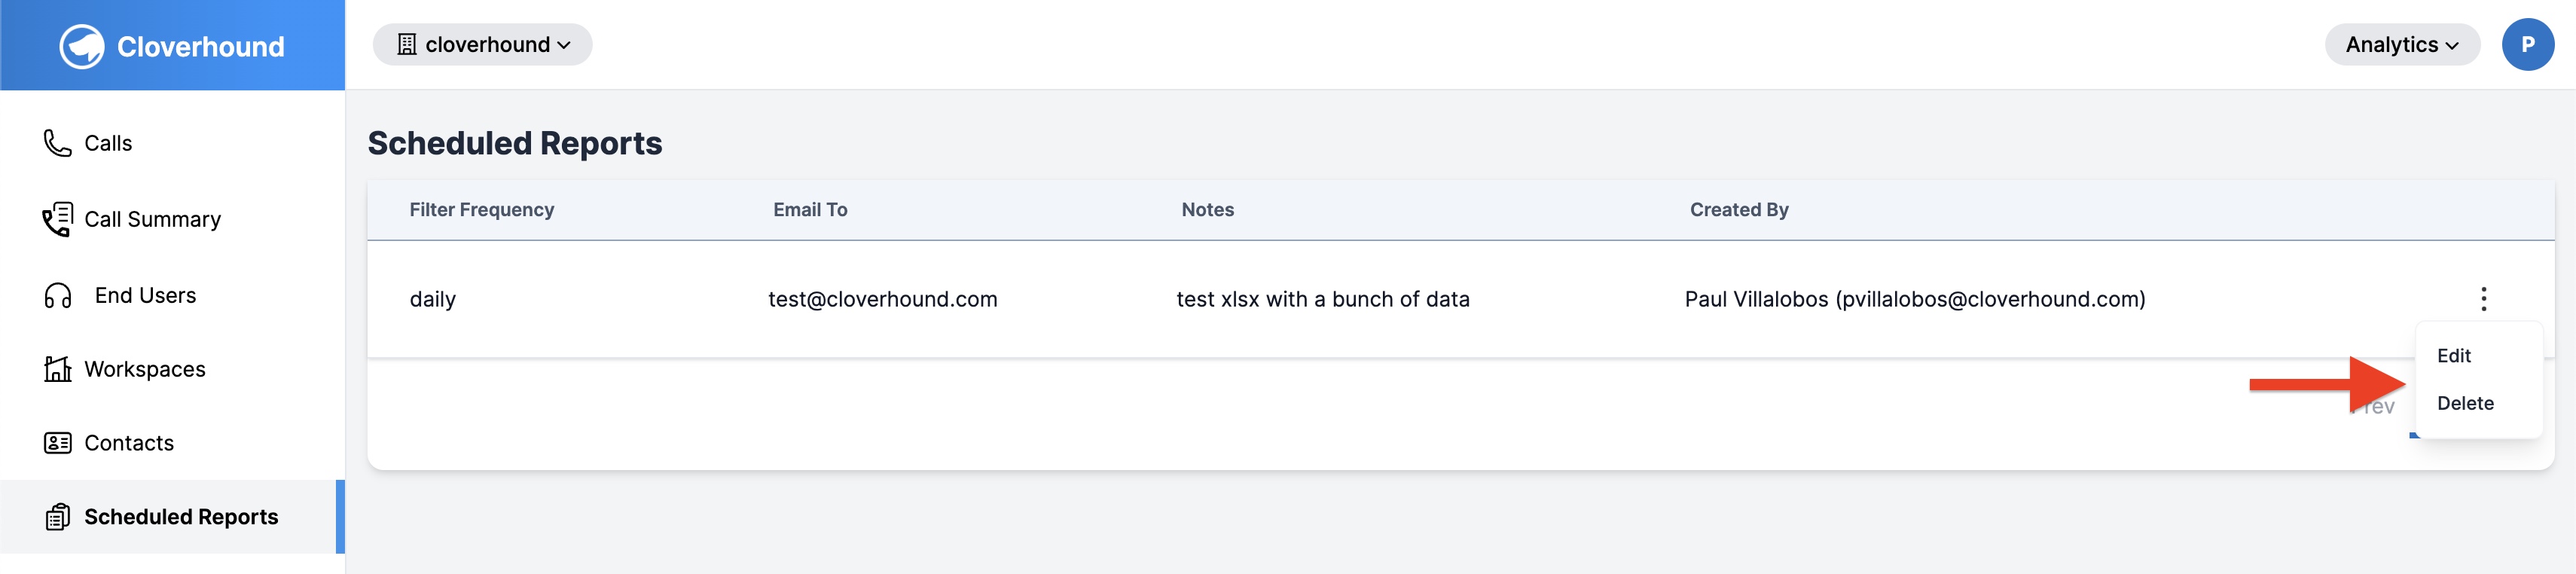
- Click on the three dots menu located next to the report.
- Select the Edit option from the dropdown.
- You’ll be redirected to the form where you can update the report’s details, such as frequency, format, recurrence, and other settings.
- Make your changes and save the updated report.
Deleting Scheduled Reports
To delete a scheduled report:
- Locate the report you want to delete.
- Click on the three dots menu located next to the report.
- Select the Delete option from the dropdown.
- A confirmation prompt will appear asking if you're sure you want to delete the report.
- Confirm the deletion to remove the scheduled report.
Note: Deleting a scheduled report is permanent and cannot be undone. Make sure you no longer need the report before deleting it.
By using the Scheduled Reports tab, you can easily manage your reports, making adjustments or removing them as necessary to ensure that your reporting needs are met.