Managing Prompt Locales
Prompt Locales are the per-language variants of a Prompt. Each locale holds either an audio file or a text-to-speech message for a specific language code (for example, en-US or es-MX), so the same Prompt can play the right content to callers based on their language. Prompt Locales live on the Prompt detail page, inside the Operations module.
Accessing Prompt Locales
-
Navigate to the Operations module and open the Entities page.
-
Open the Entity that owns the Prompt, then switch to the Prompts tab.
-
Click the Prompt's name to open its detail page. The page title reads Prompts Locales: <Prompt Name> and lists every locale defined for that Prompt.

Each row shows the Locale and Language, the Type (audio content type or text to speech), the Content (file name or text snippet), and the Provider (Webex for locales synced to Webex Contact Center, Local for locales stored in Cloverhound Cloud, or Text for text-to-speech). Use the search box to filter the list by locale code.
Adding Audio and Text-to-Speech Content
Uploading an Audio File
-
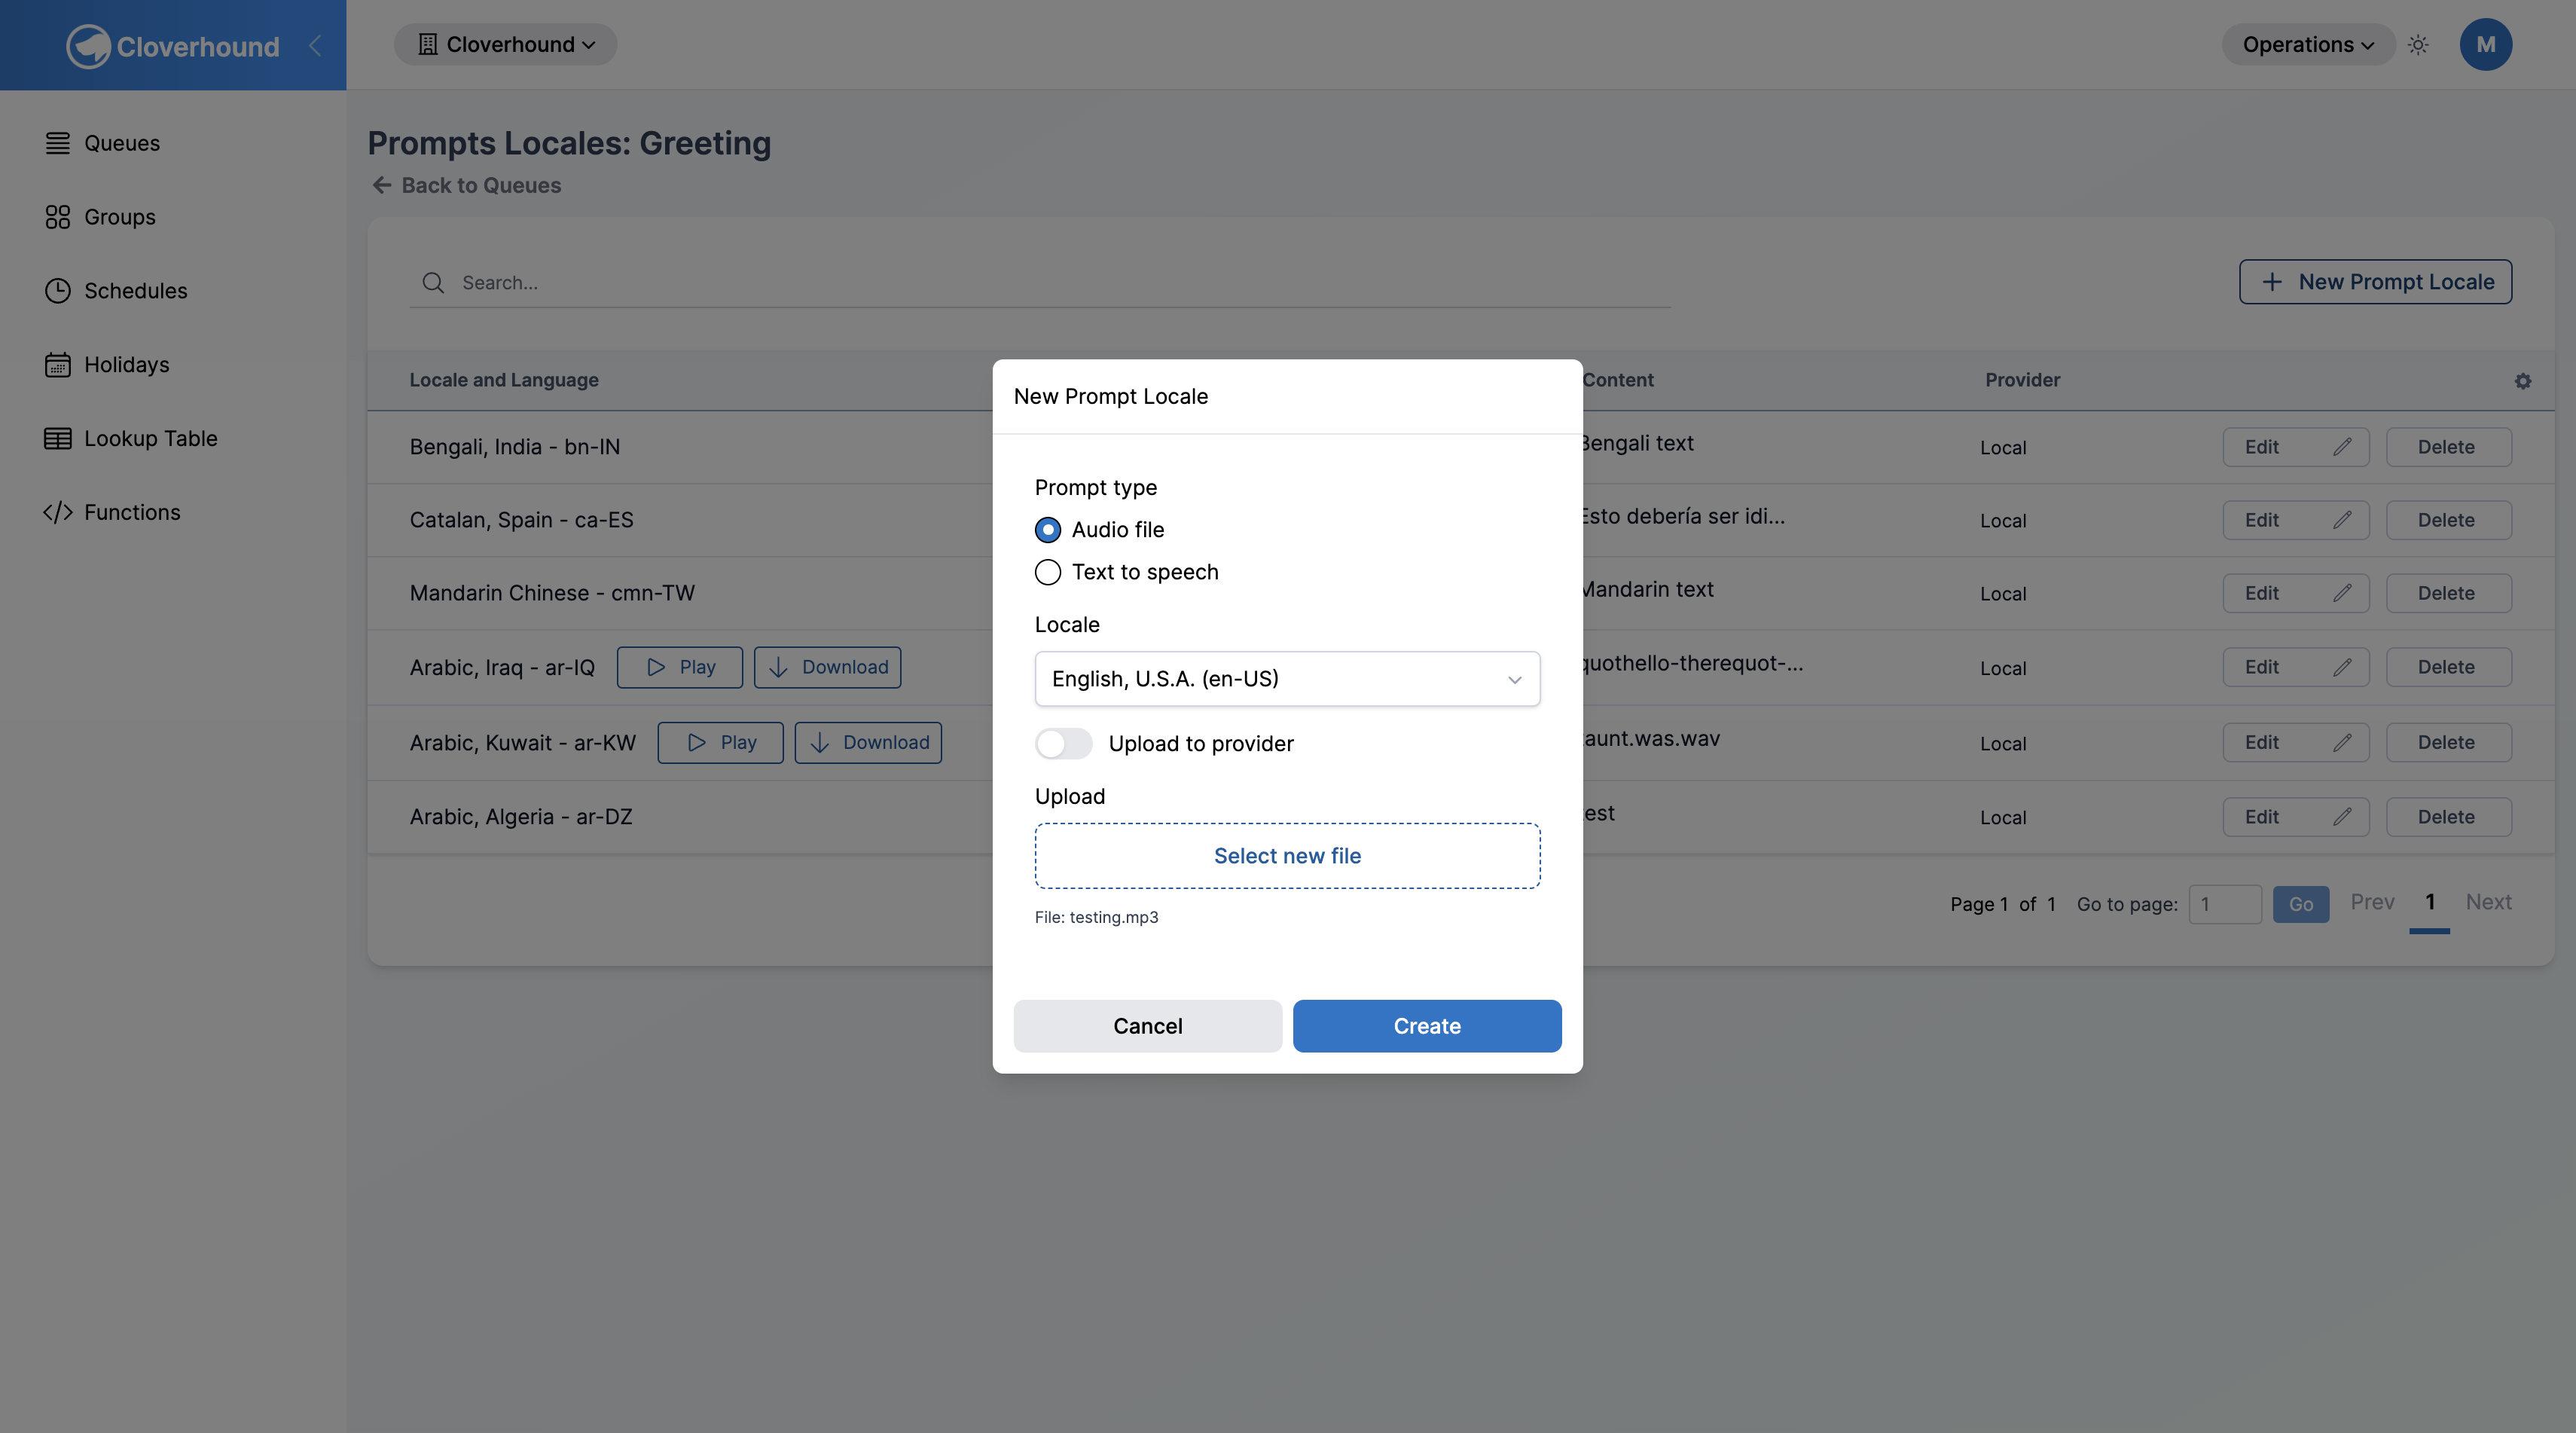
Click the + New Prompt Locale button.
-
Select Audio file as the prompt type.
-
Select a locale from the Locale dropdown. Locales already used by this prompt do not appear in the list.
-
Optionally, toggle Upload to provider on to store the file directly in Webex Contact Center instead of Cloverhound Cloud local storage.
-
Click Select File and choose an audio file from your computer.
-
Click Create.
Cloverhound Cloud converts uploaded files to a telephony-ready WAV format (G.711) before storing them, so the on-disk filename ends in .wav regardless of what you uploaded.
Audio files must be .mp3 or .wav, no larger than 10 MB, and use one of the content types audio/mpeg, audio/wav, or audio/x-wav. Uploads outside these limits are rejected with an "Invalid file" error.
Adding Text to Speech
-
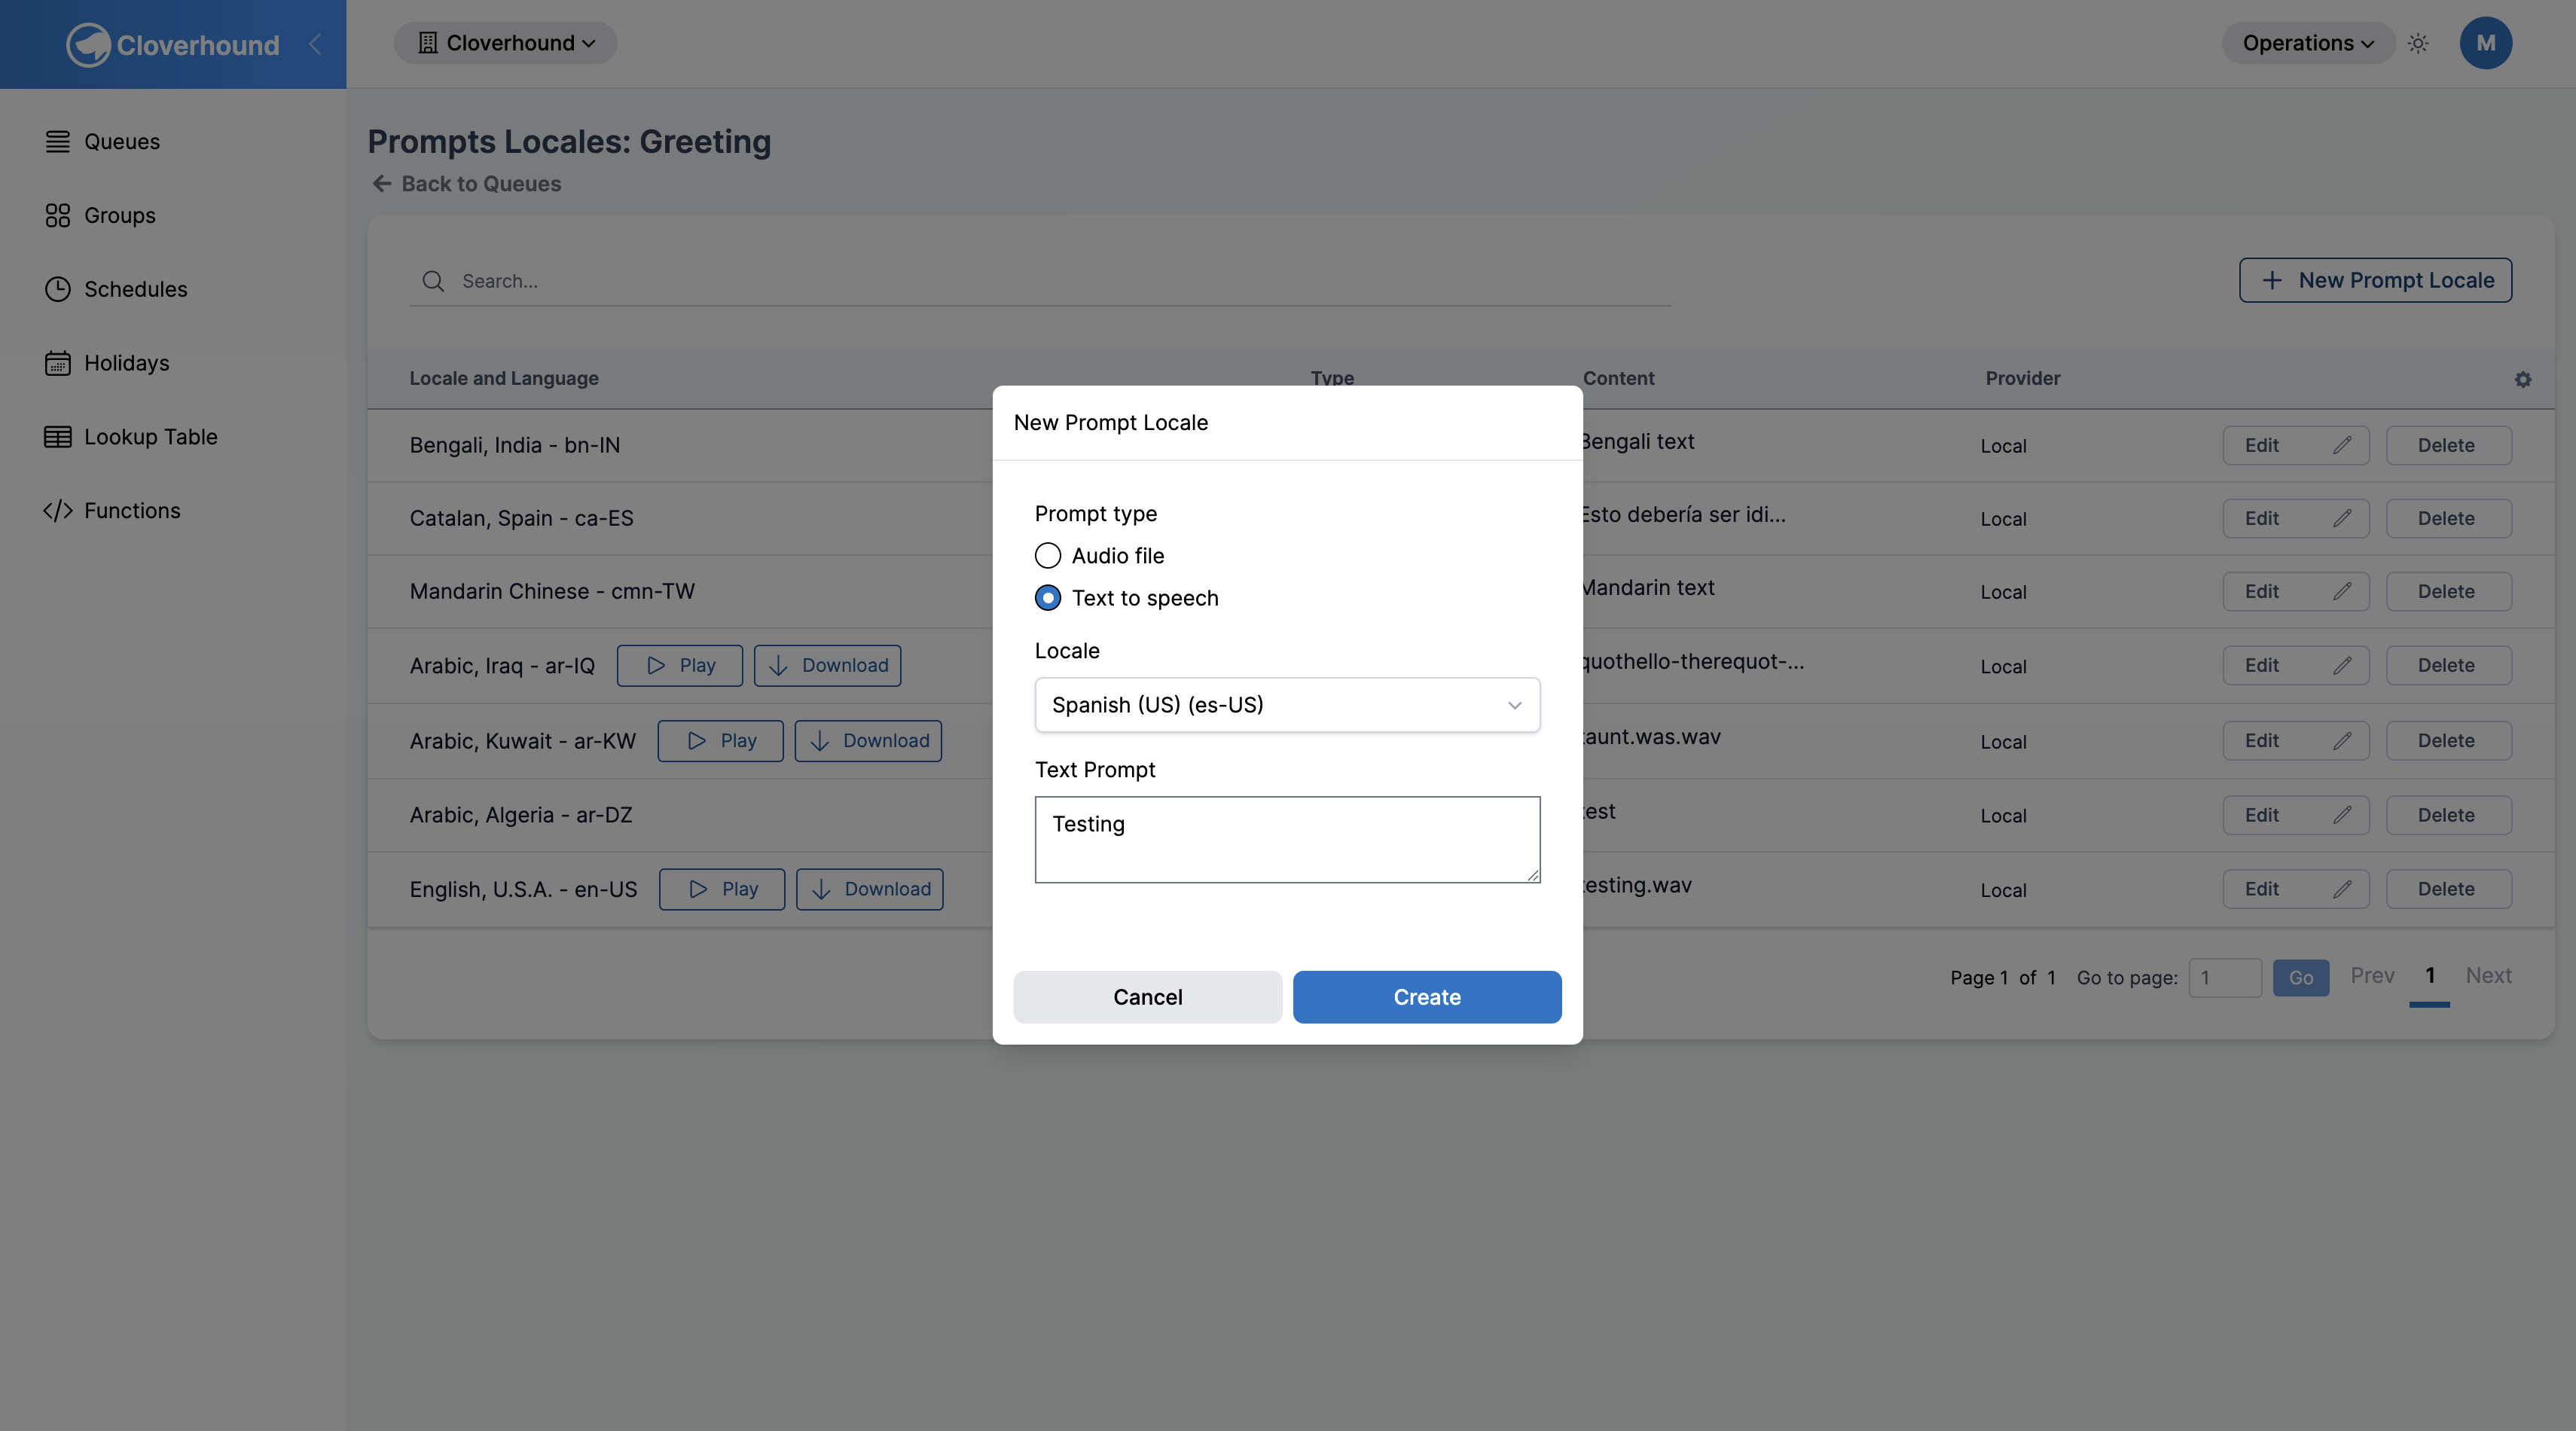
Click the + New Prompt Locale button.
-
Select Text to speech as the prompt type.
-
Select a locale from the Locale dropdown.
-
Type the message into the Text Prompt field.
-
Click Create.
Text-to-speech variants do not produce a downloadable file; the text is rendered into speech at call time.
Playing and Downloading Audio
Each audio locale row has controls next to the locale code:
-
Click Play to listen to the recording in the browser. Click again to pause. Only one locale plays at a time.
-
Click Download to open the audio file in a new tab, where you can save it locally.
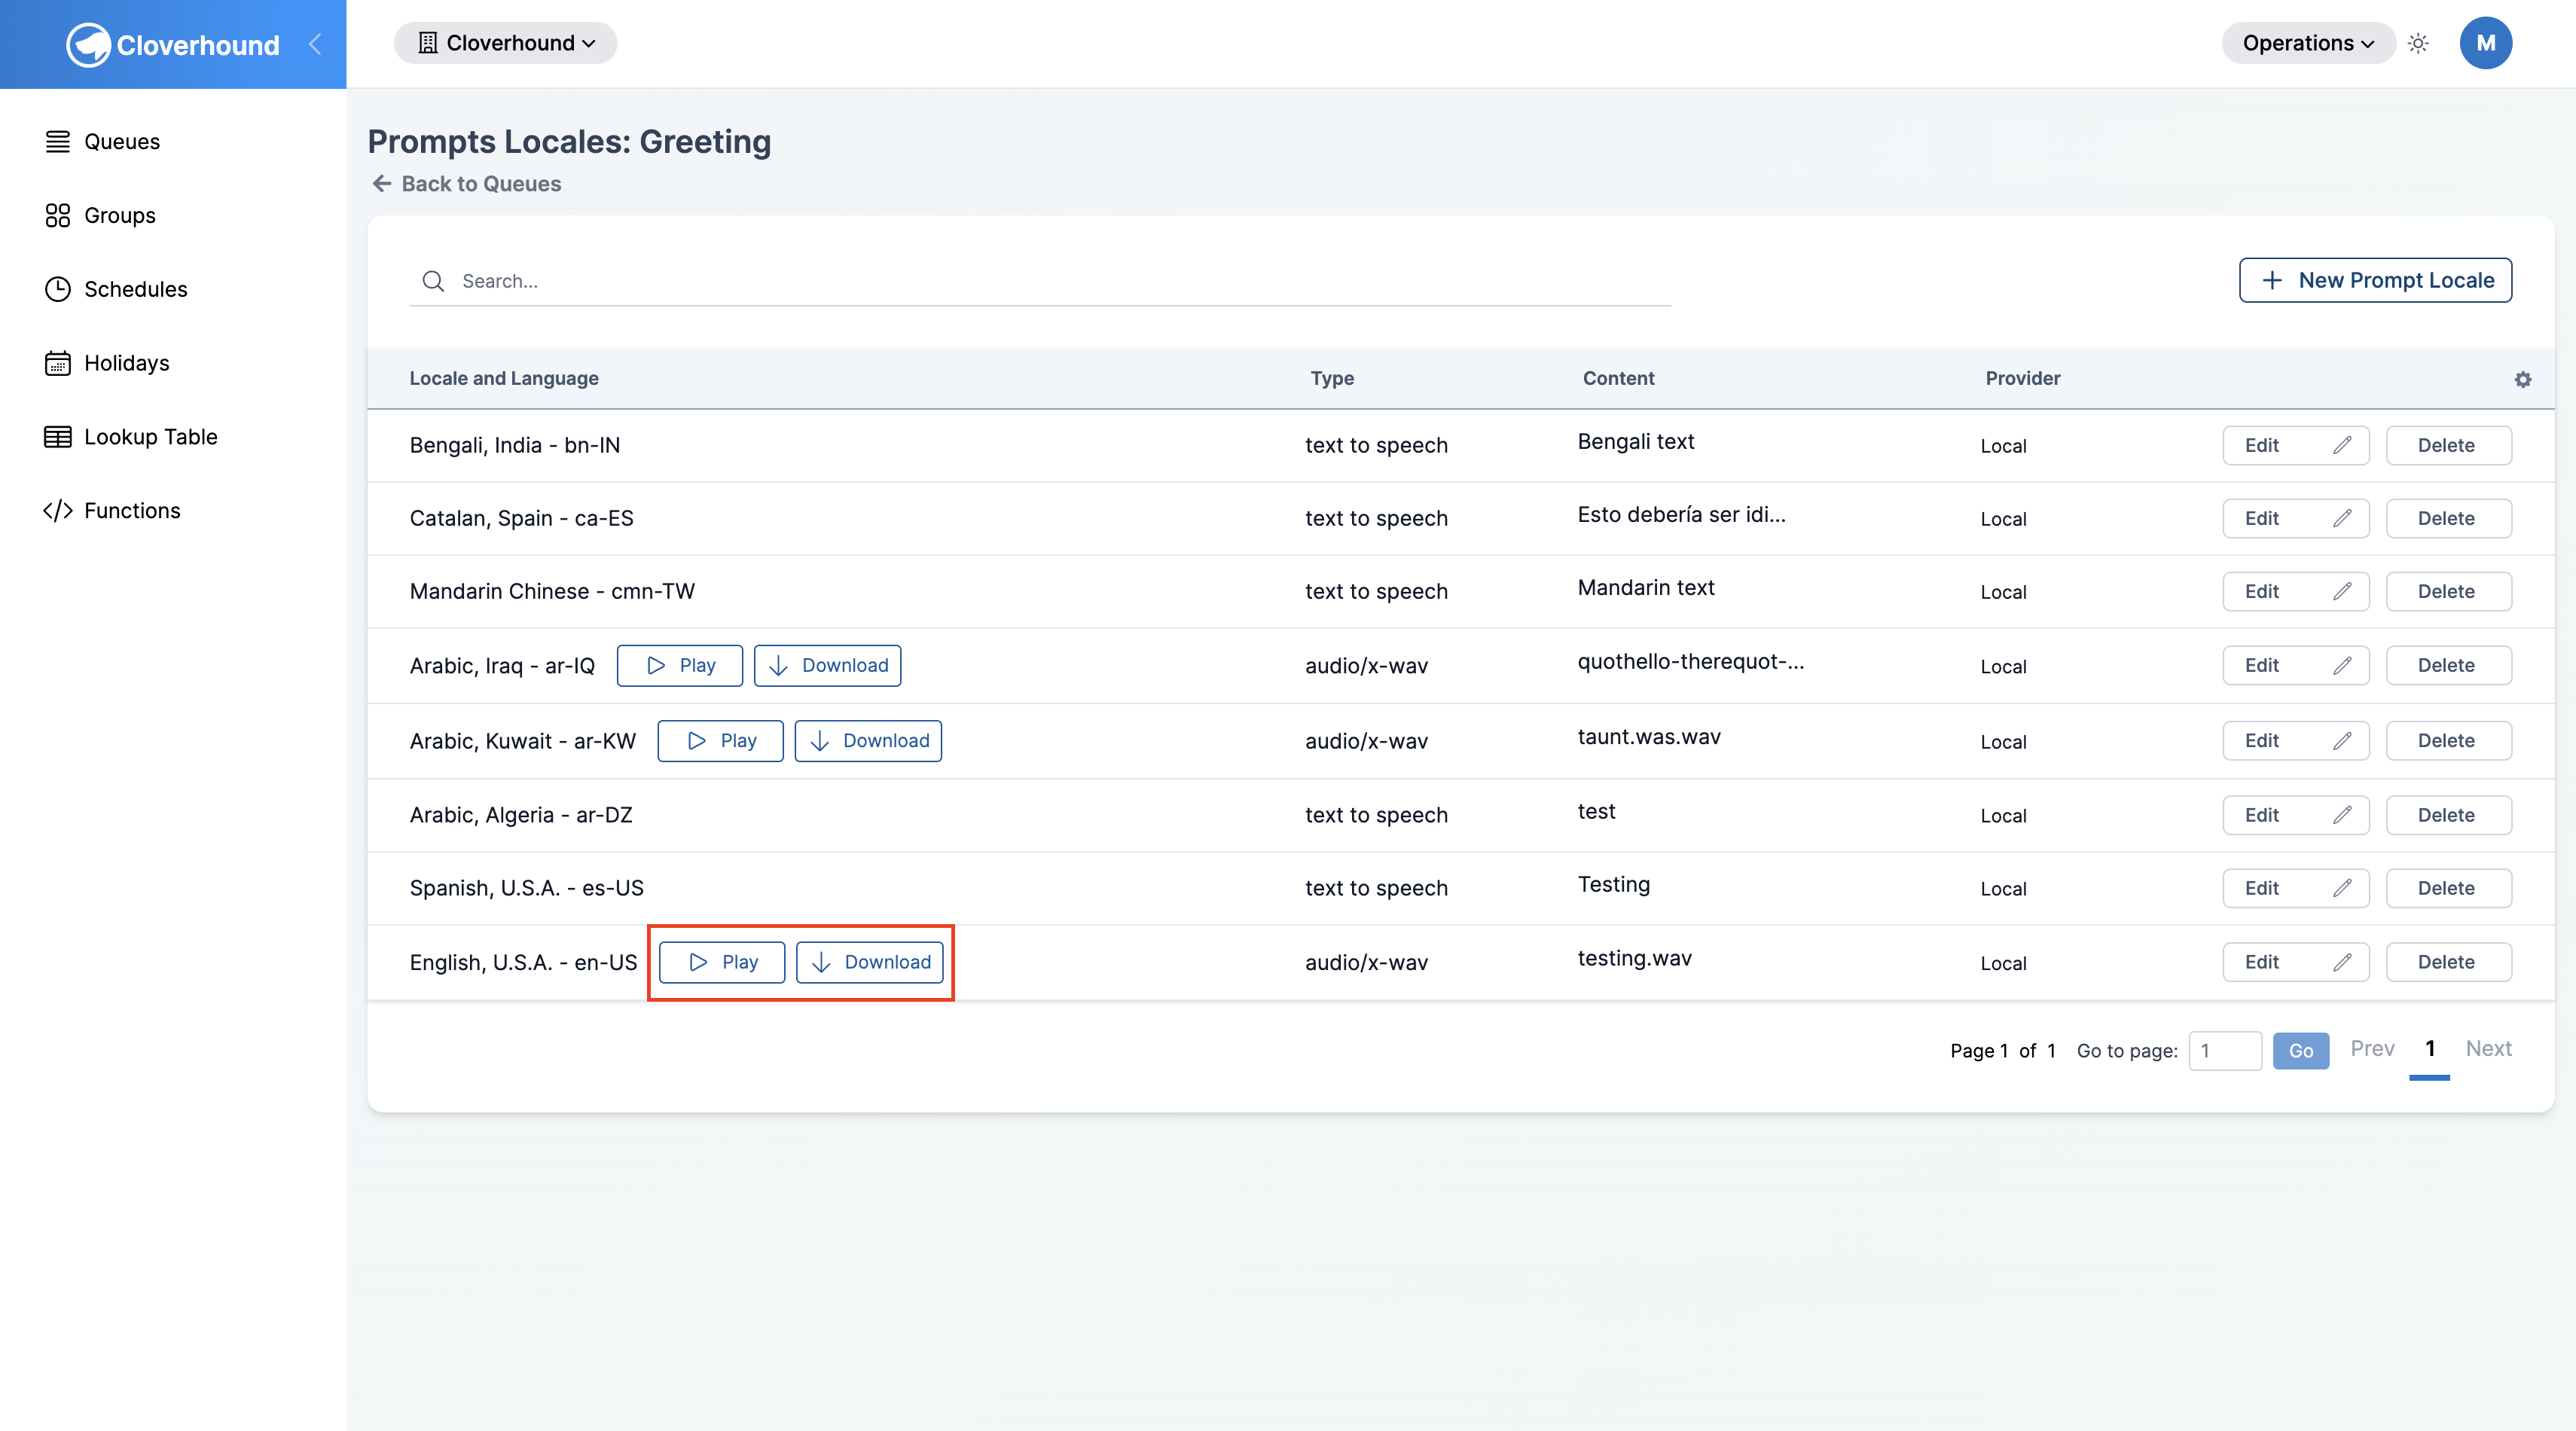
Text-to-speech locales do not show Play or Download controls.
Editing a Prompt Locale
- Click Edit on the locale row you want to change.
- Update any of the following:
- Switch between Audio file and Text to speech.
- Change the Locale.
- For audio locales, upload a new file or toggle Upload to provider to move the file between local storage and Webex Contact Center.
- For text locales, edit the Text Prompt content.
- Click Save to apply the changes.
Uploading a new audio file replaces the previous recording. Switching a locale from audio to text removes the stored audio file, including the Webex Contact Center copy if one existed.
Deleting a Prompt Locale
- Click Delete on the locale row you want to remove.
- Confirm the action in the dialog.
Deleting a locale removes its audio file (or text content) permanently, including any copy stored in Webex Contact Center. This cannot be undone. Delete a locale only when you are certain no Prompt configuration still depends on it.
Once you have added at least one locale, the parent Prompt can serve content to callers in every language you defined. See Managing Prompts for how to create the Prompts that hold these locales.