Managing Groups
Groups let you categorize entities (such as branches, stores, or phone-number records) by a shared label within the Operations module. Each group carries a name and any custom group fields your organization has defined, so you can tag groups with the attributes that matter to your business.
In this page you will learn how to:
- Create a new group.
- Search, edit, and delete existing groups.
- Populate the custom fields attached to a group.
- Assign entities to a group.
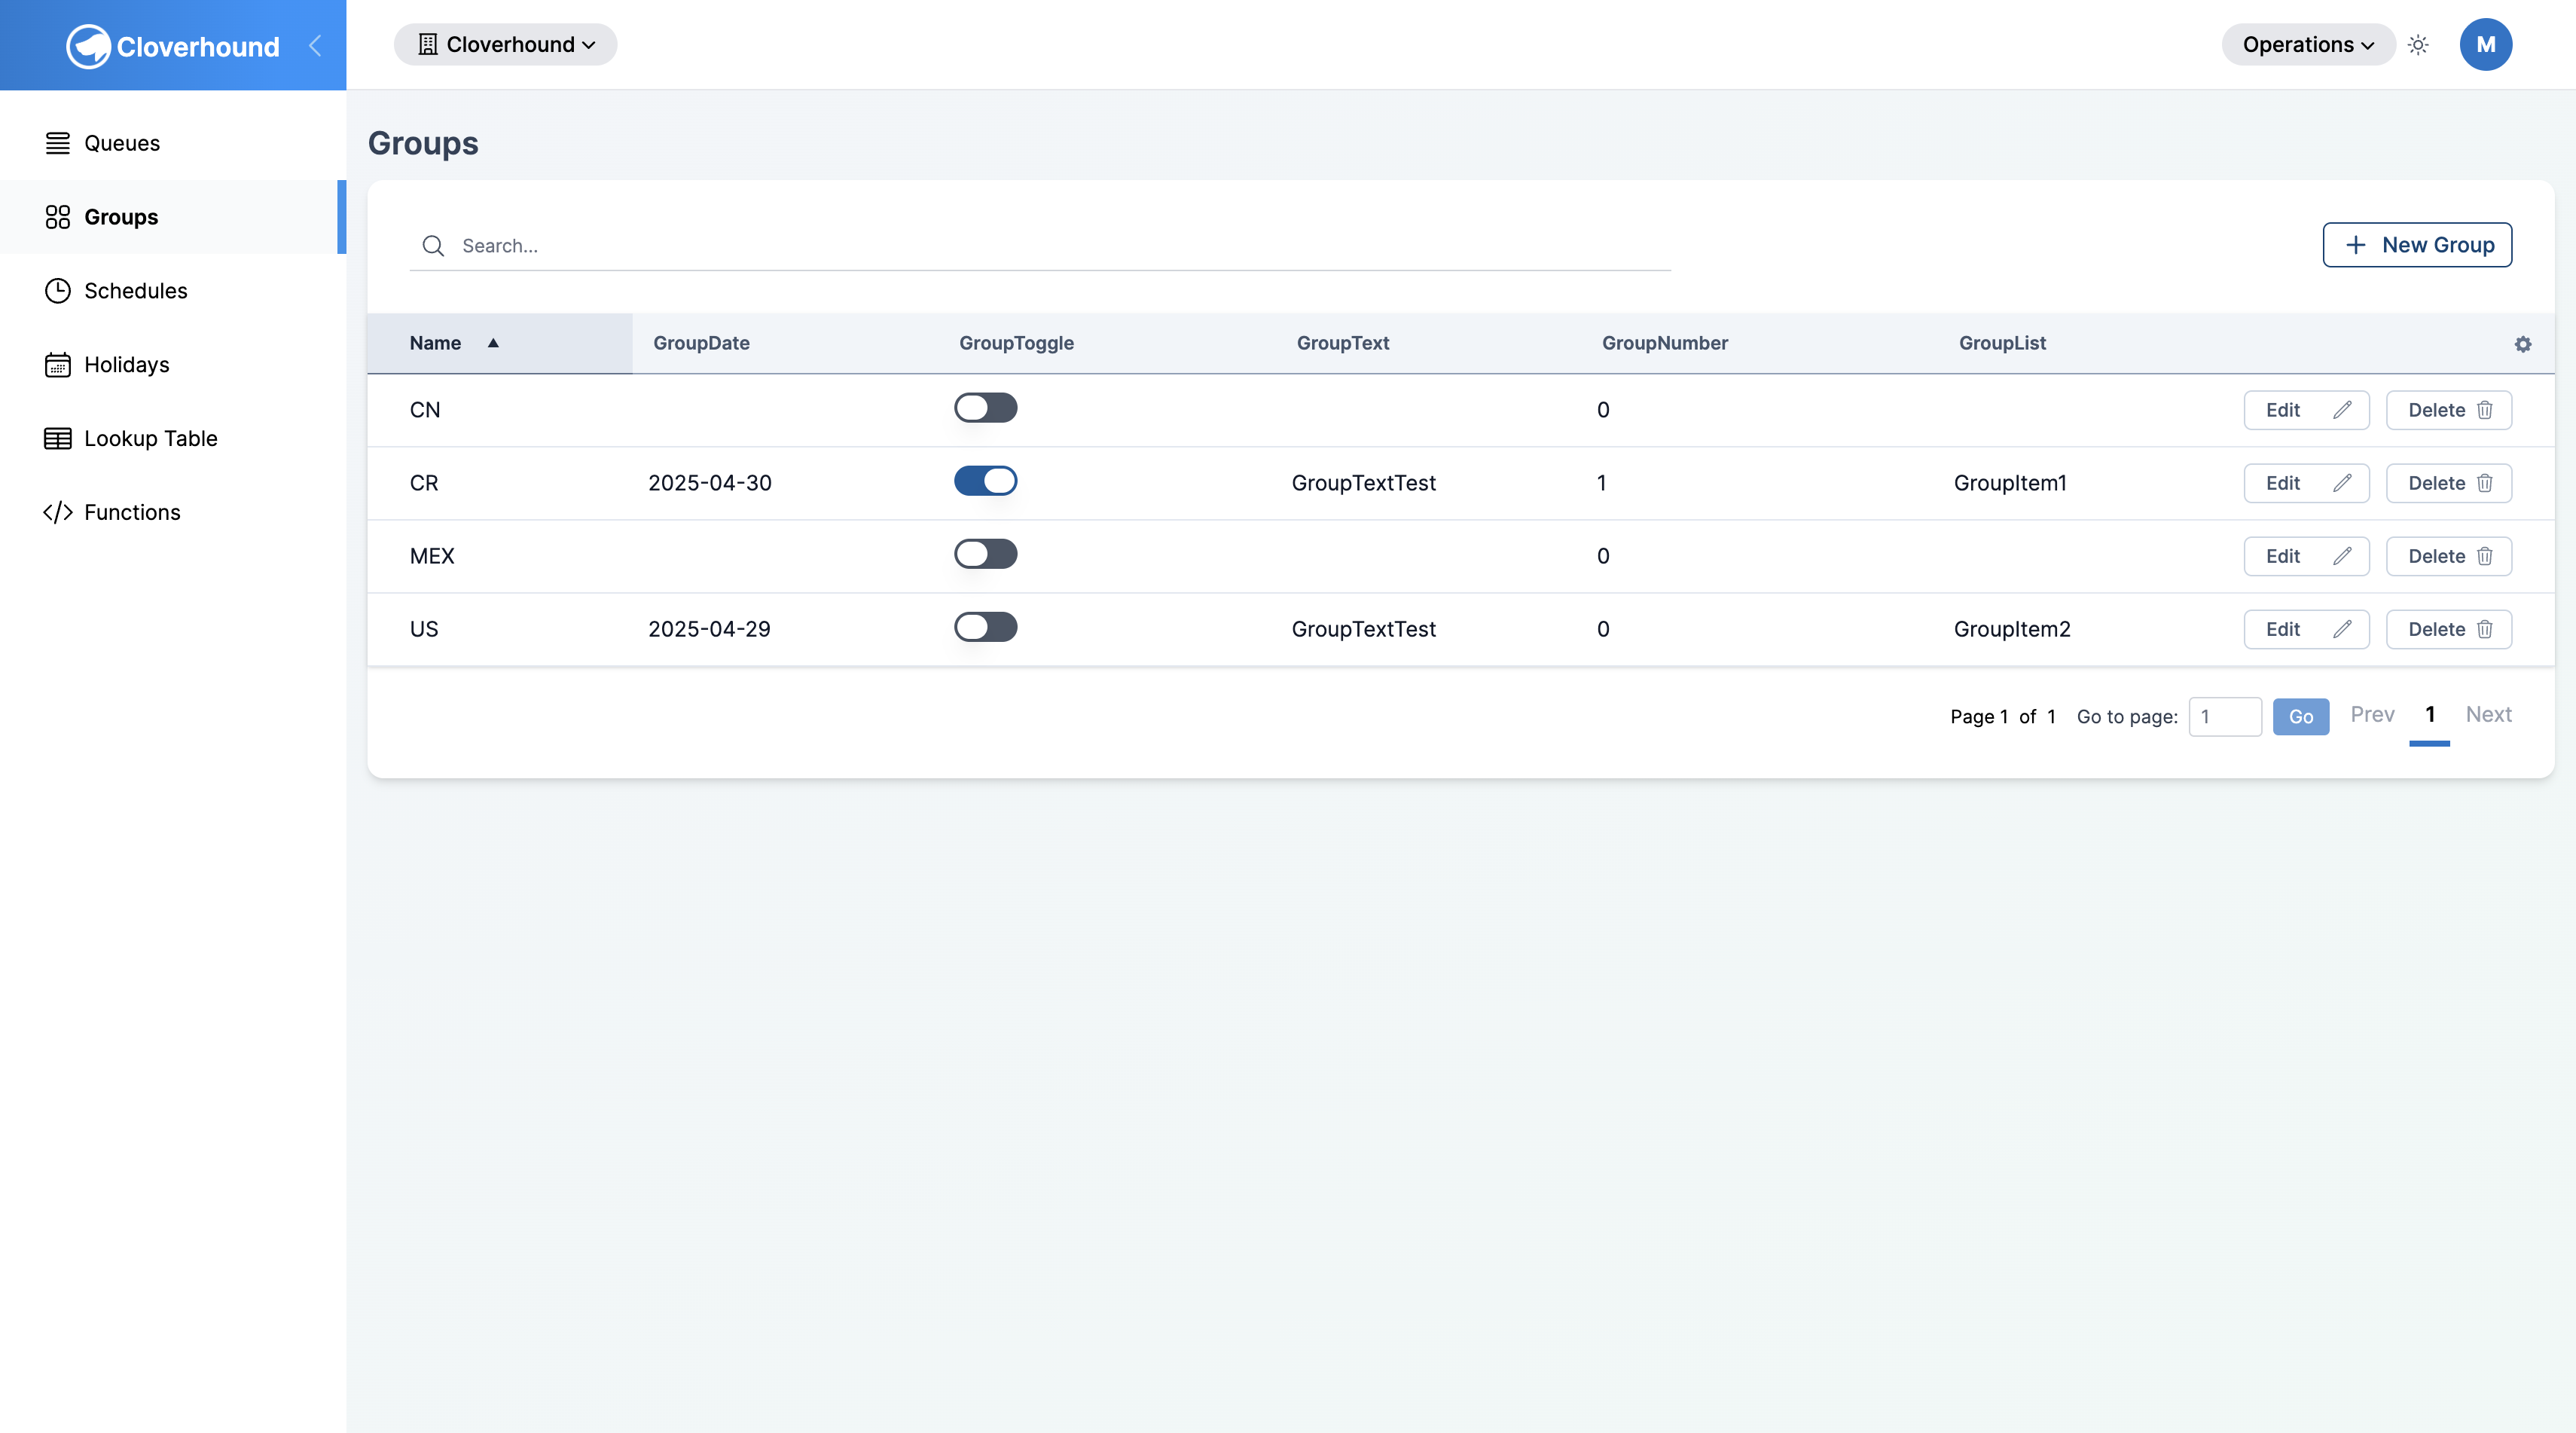
Accessing Groups
-
Navigate to the Operations module.
-
Open the Groups page. The page lists every group in your organization, along with a column for each active custom group field.
-
Use the search bar at the top of the table to filter the list by group name. The results update as you type.
-
Sort the table by clicking any column header. Groups are sorted by Name in ascending order by default.
-
Paginate through longer lists using the controls at the bottom of the table.
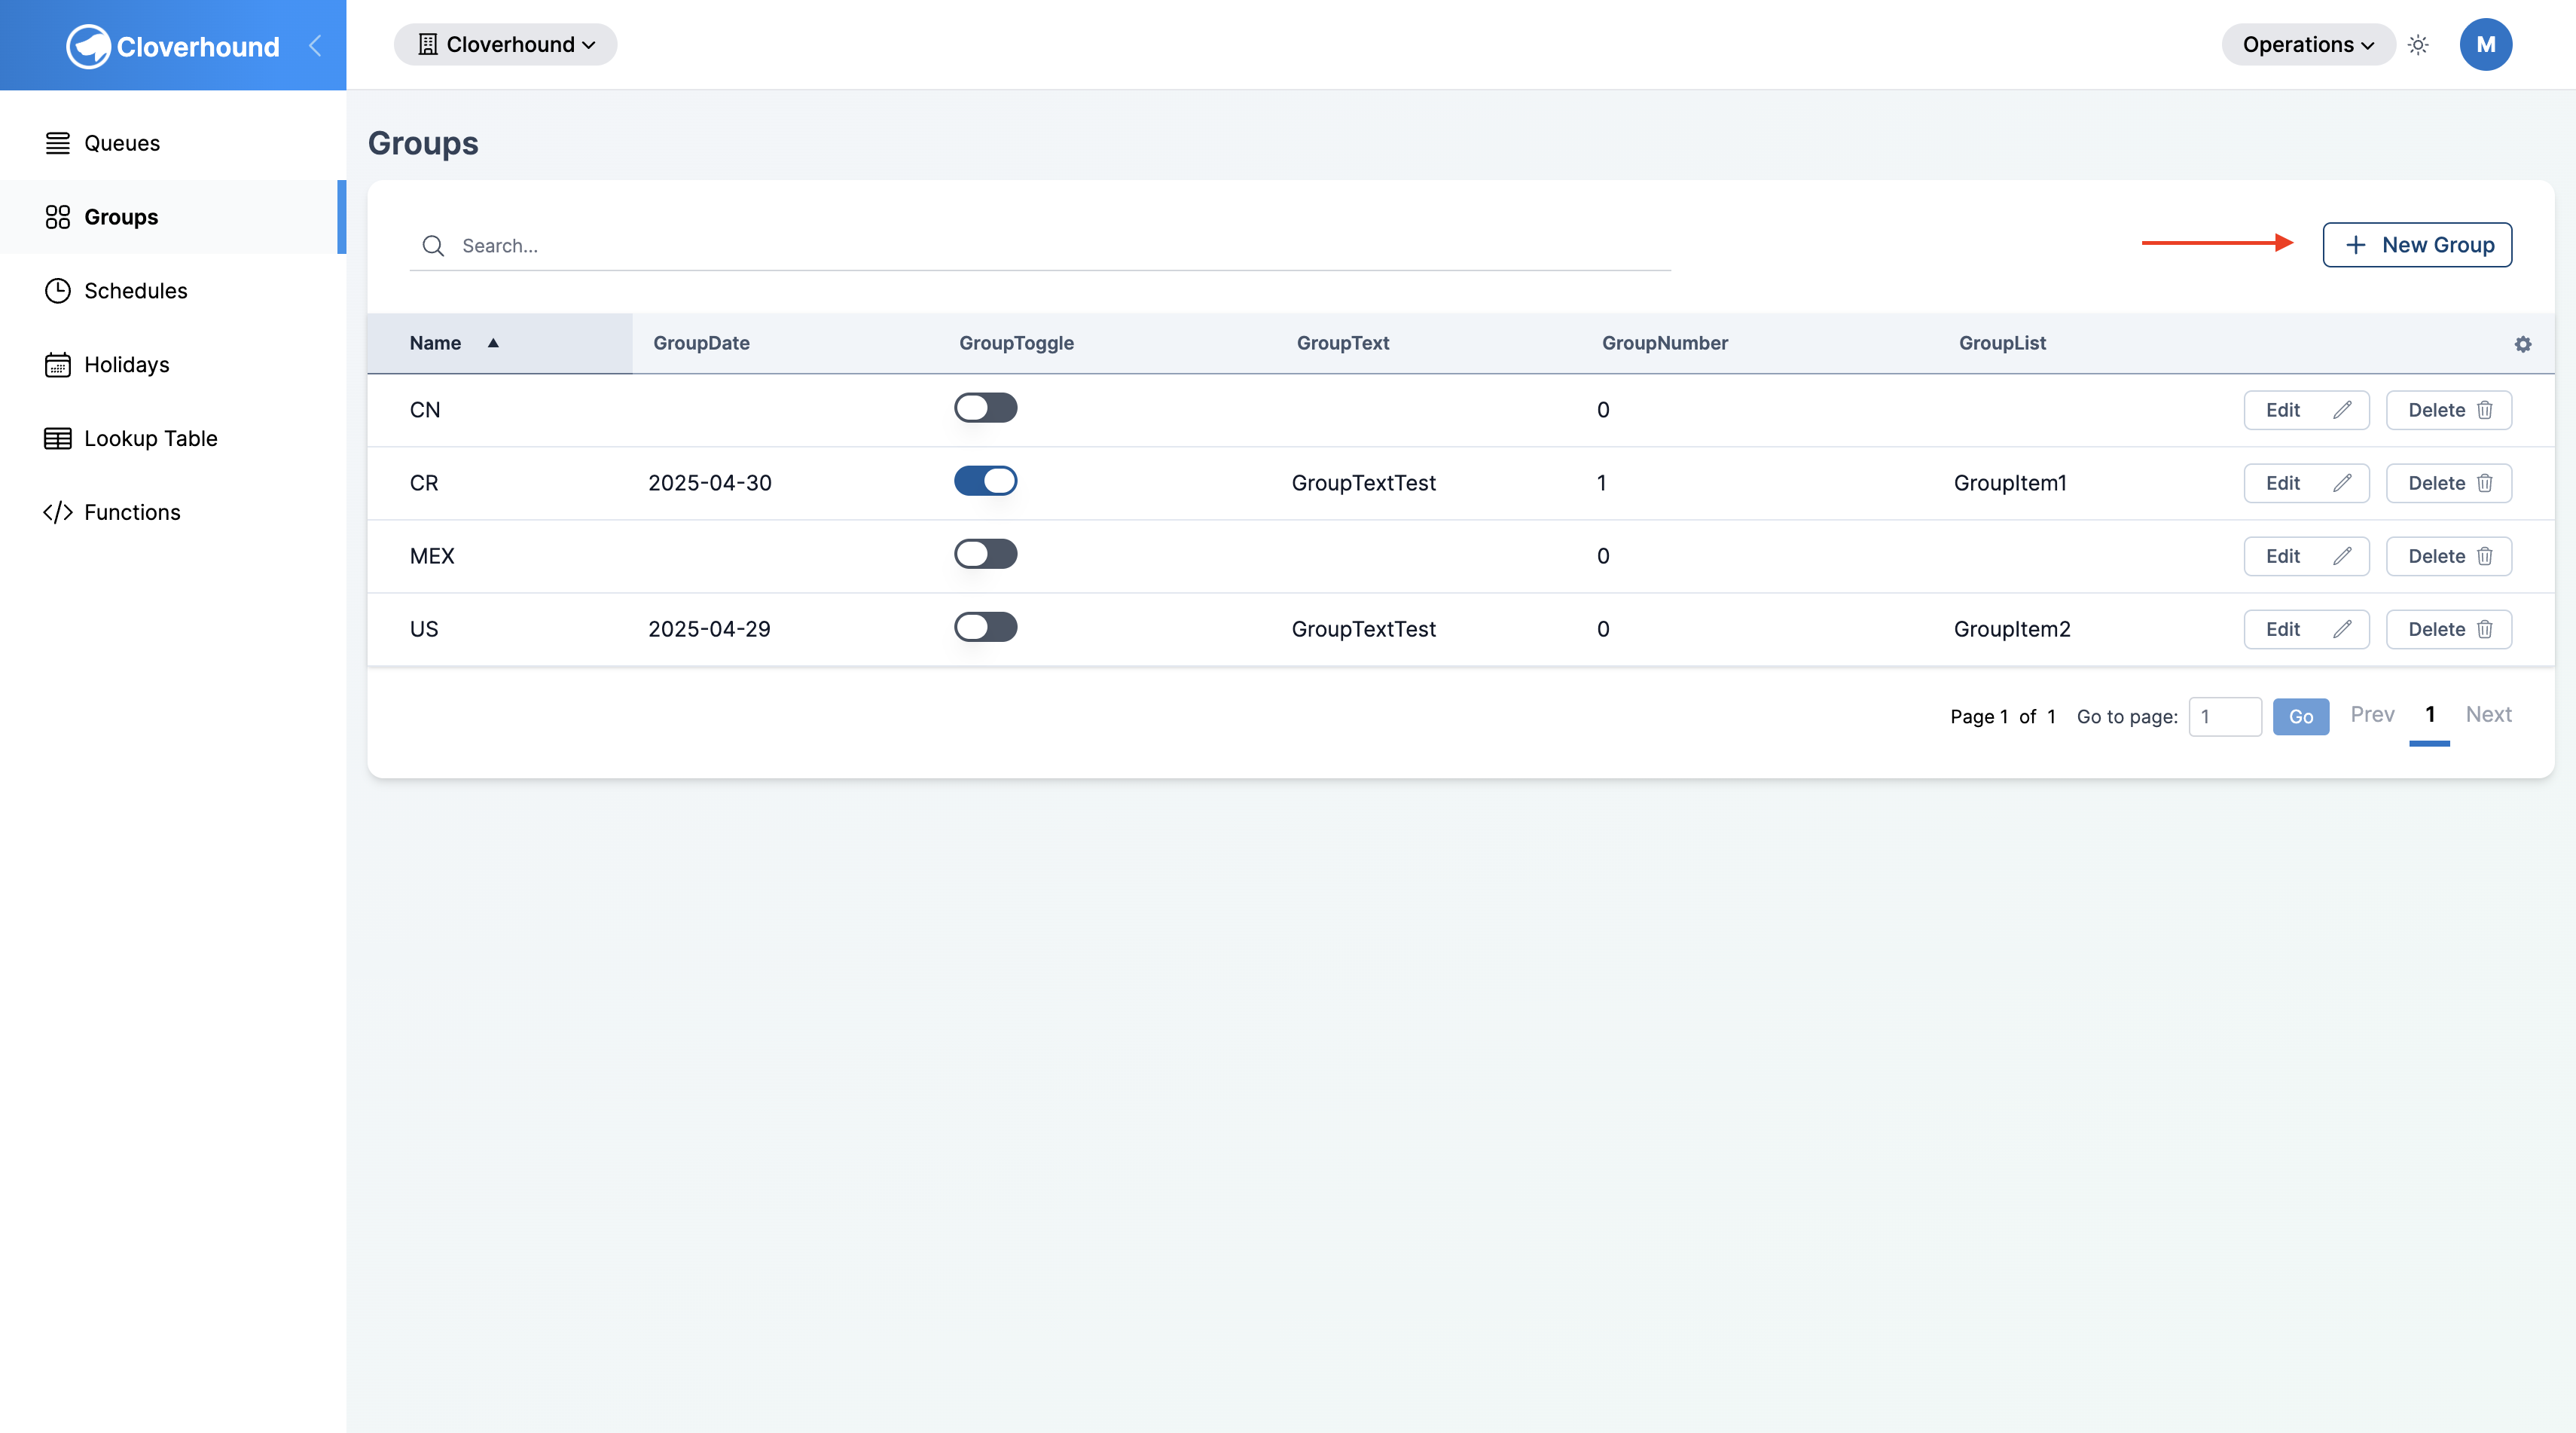
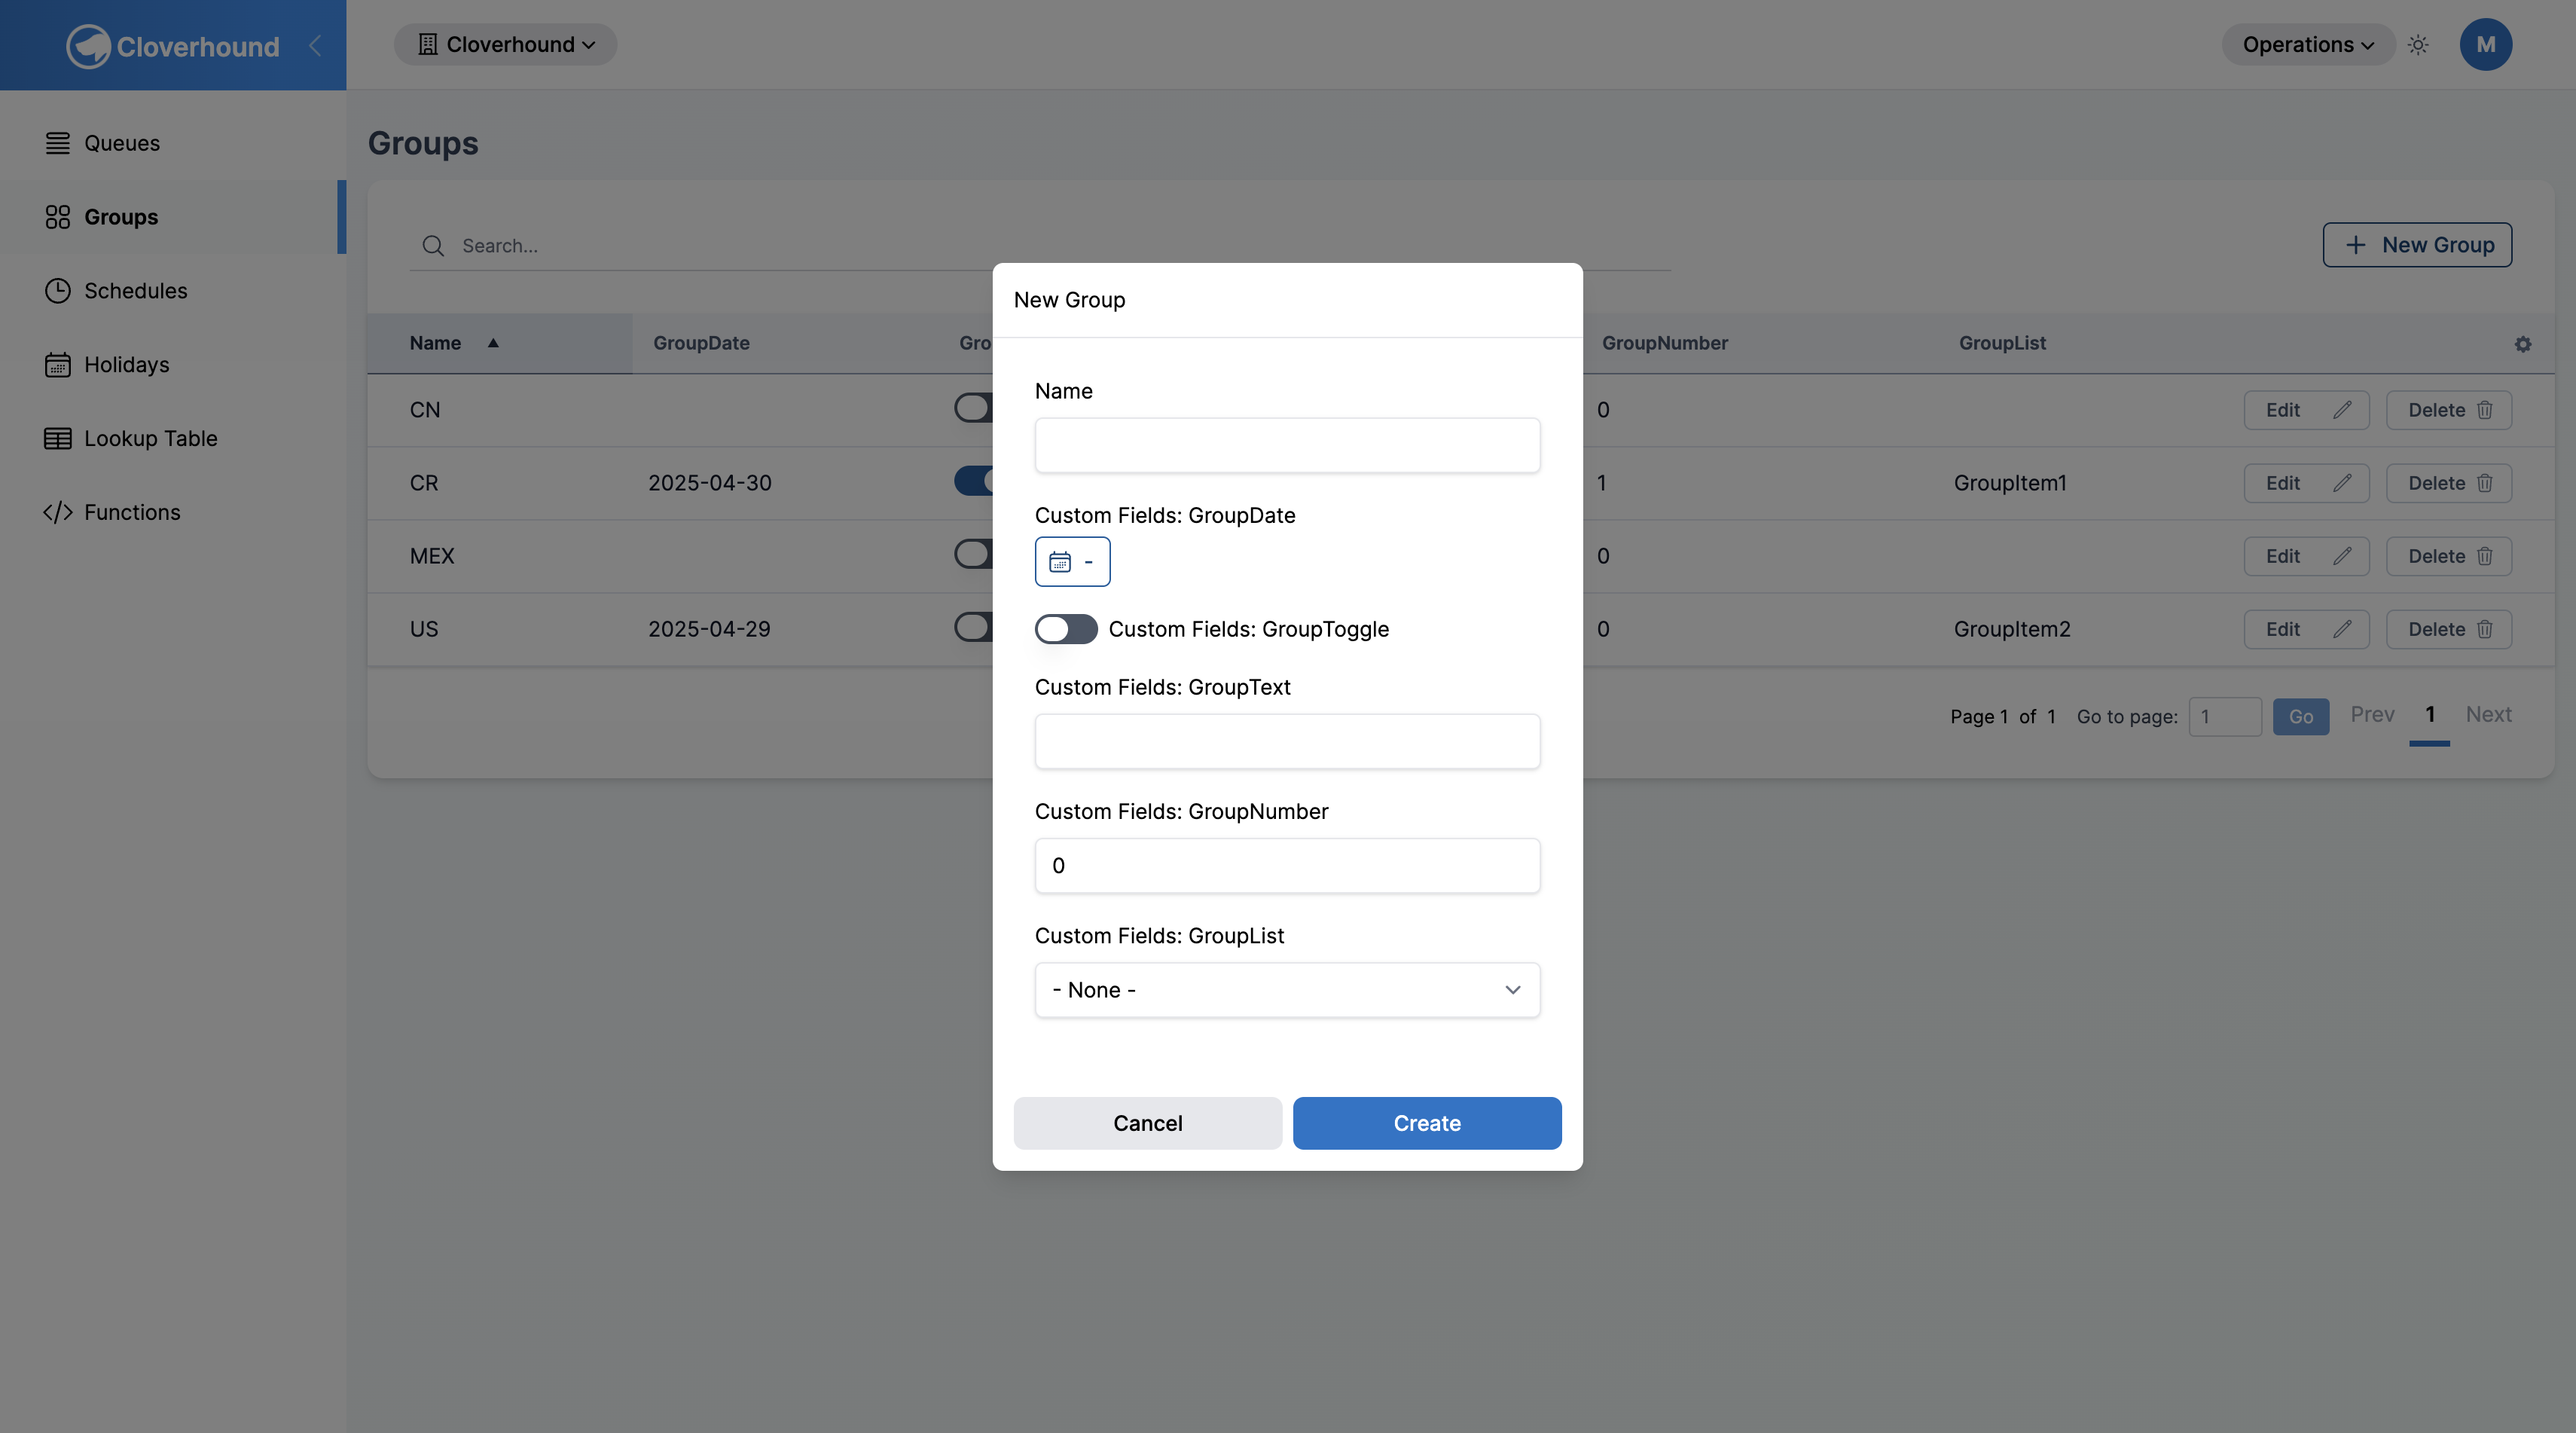
Creating a Group
-
Click the + New Group button in the top-right corner of the Groups page.
-
Fill out the form in the dialog that opens:
- Name — a unique name for the group. Group names must be unique within your organization.
- Custom Fields — one input per active custom group field. The input type depends on how the field was defined:
- Text or Number — a standard text or numeric input.
- Toggle — an on/off switch.
- Date — a date picker.
- List — a dropdown of the allowed values.
-
Click Create. The new group appears in the table immediately.
Custom group fields are defined once per organization, not per group. If a field you expected is missing from the form, see Custom Fields for how your organization configures them.
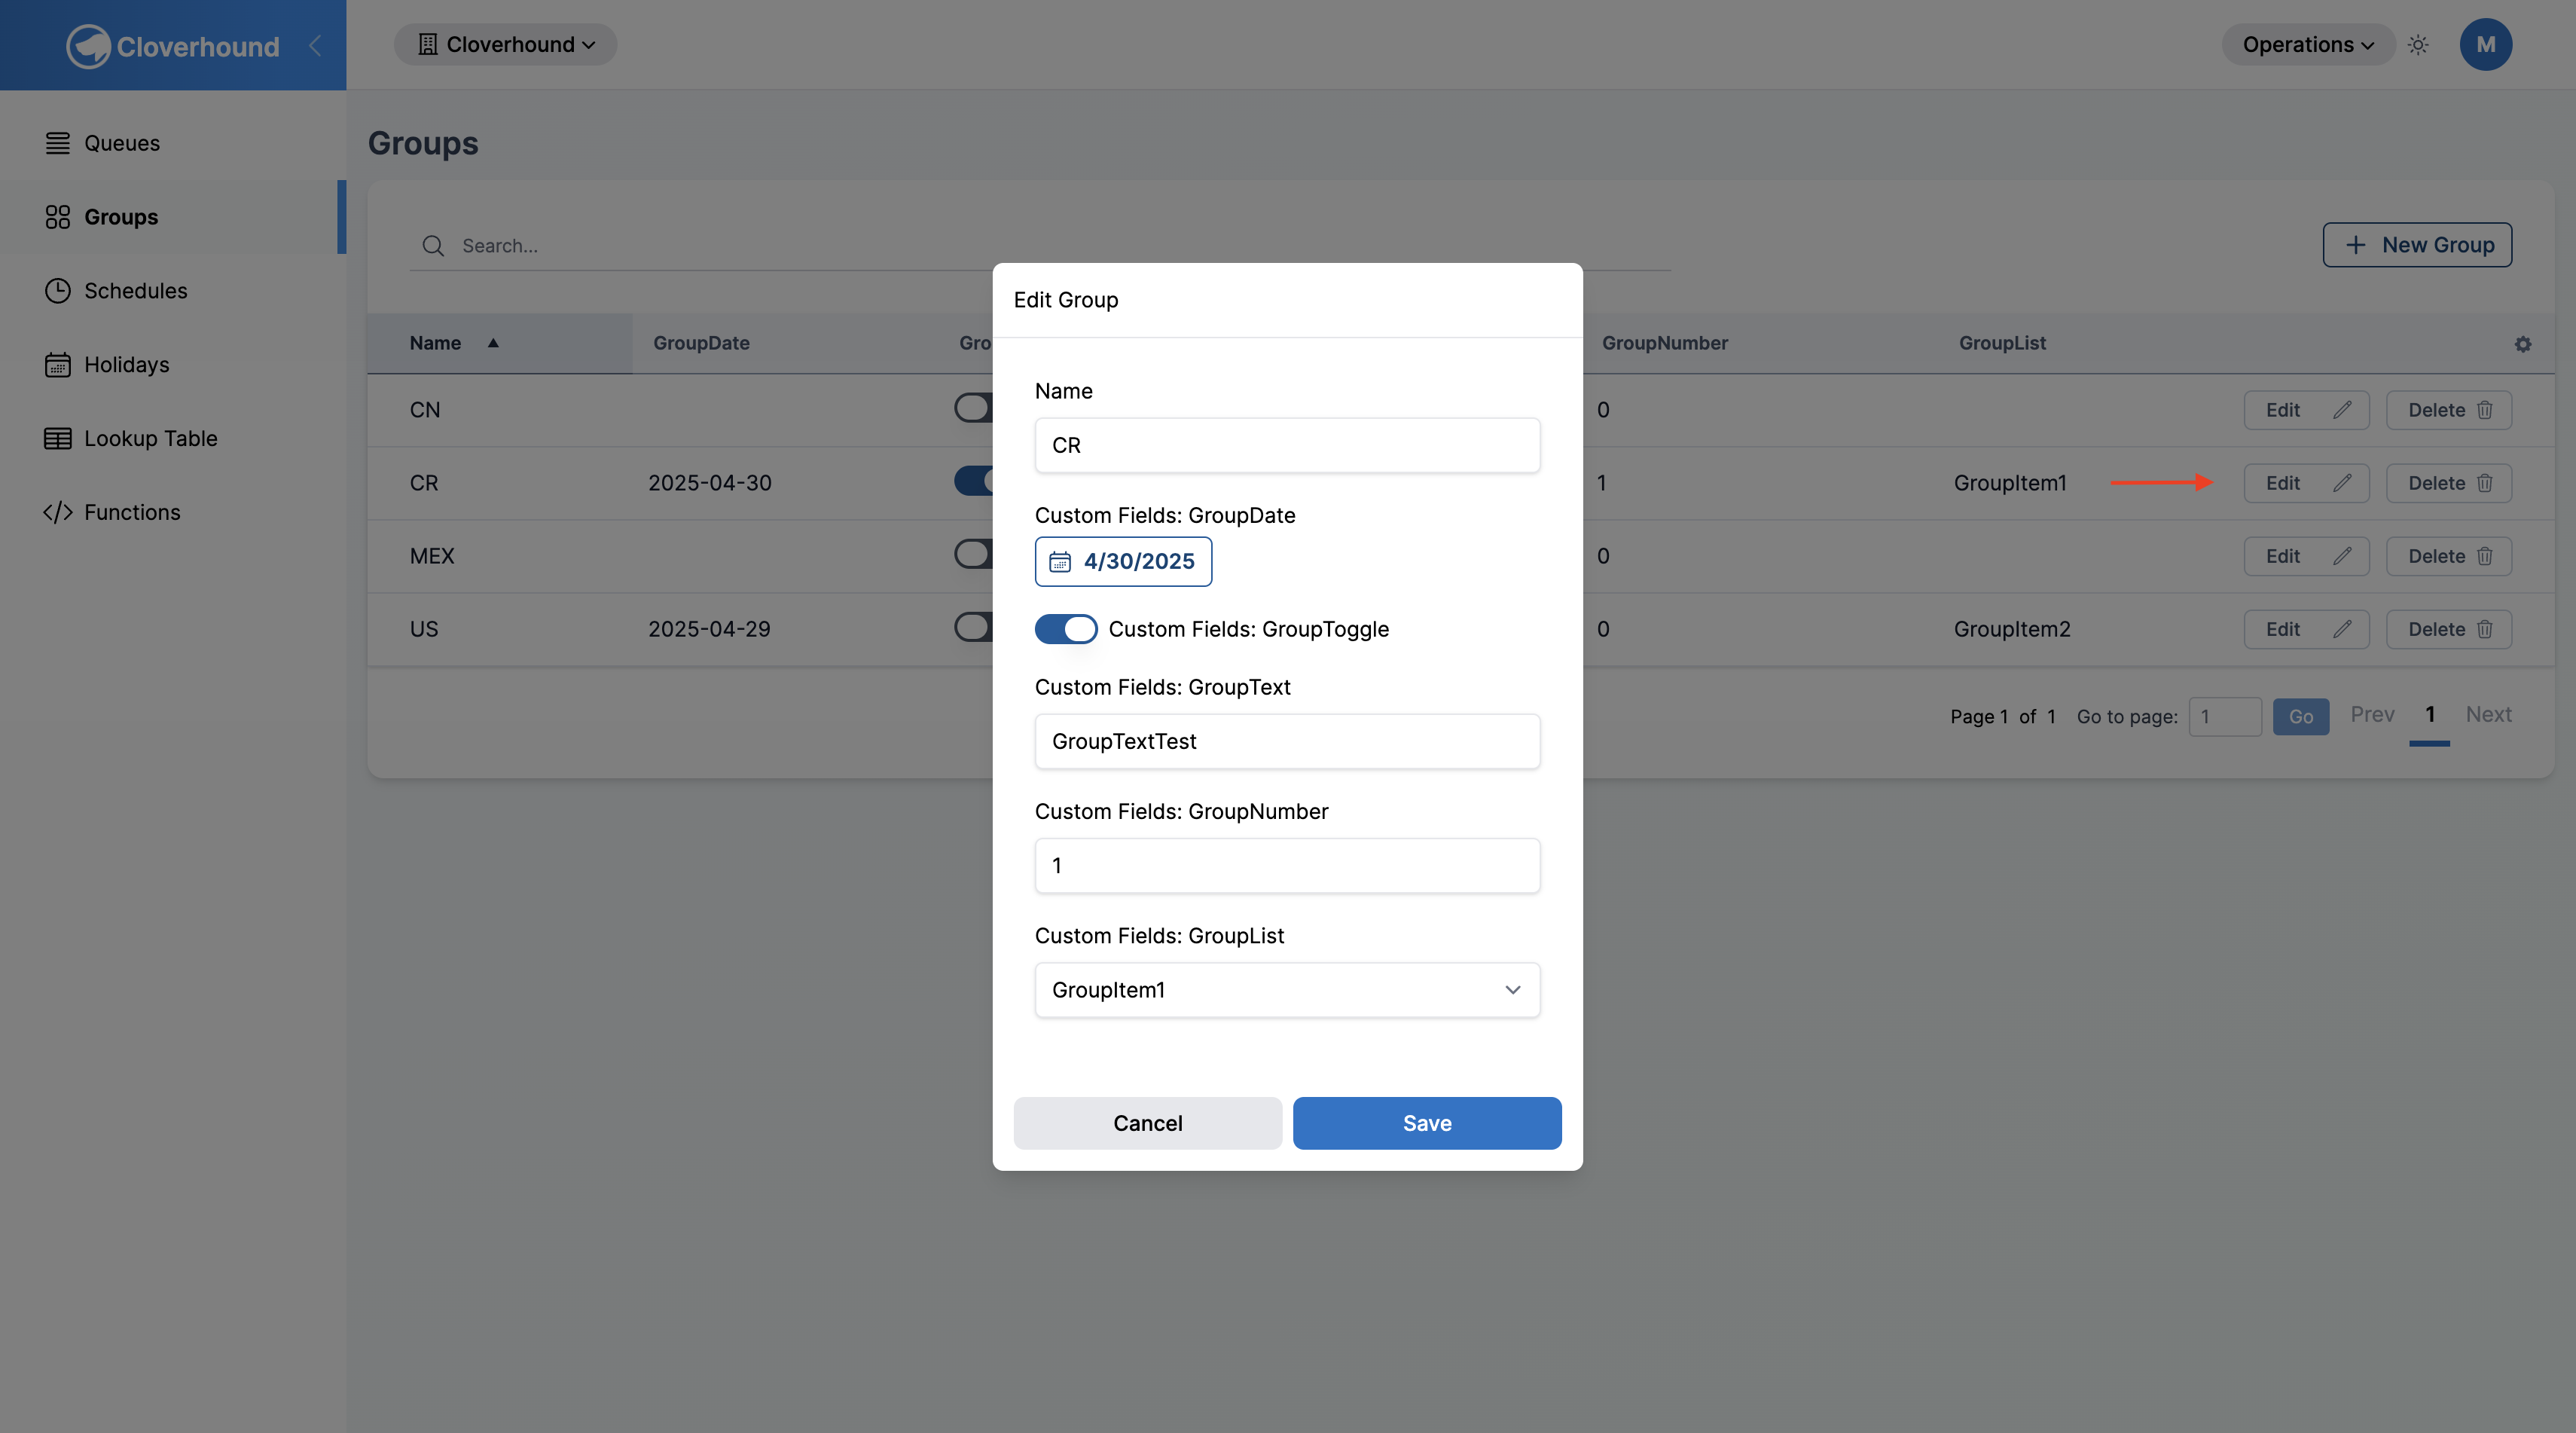
Editing a Group
-
Locate the group in the Groups table, using search if needed.
-
Click the Edit button on the group's row.
-
Update the Name or any custom field value in the dialog.
-
Click Save to apply your changes. The table refreshes with the new values.
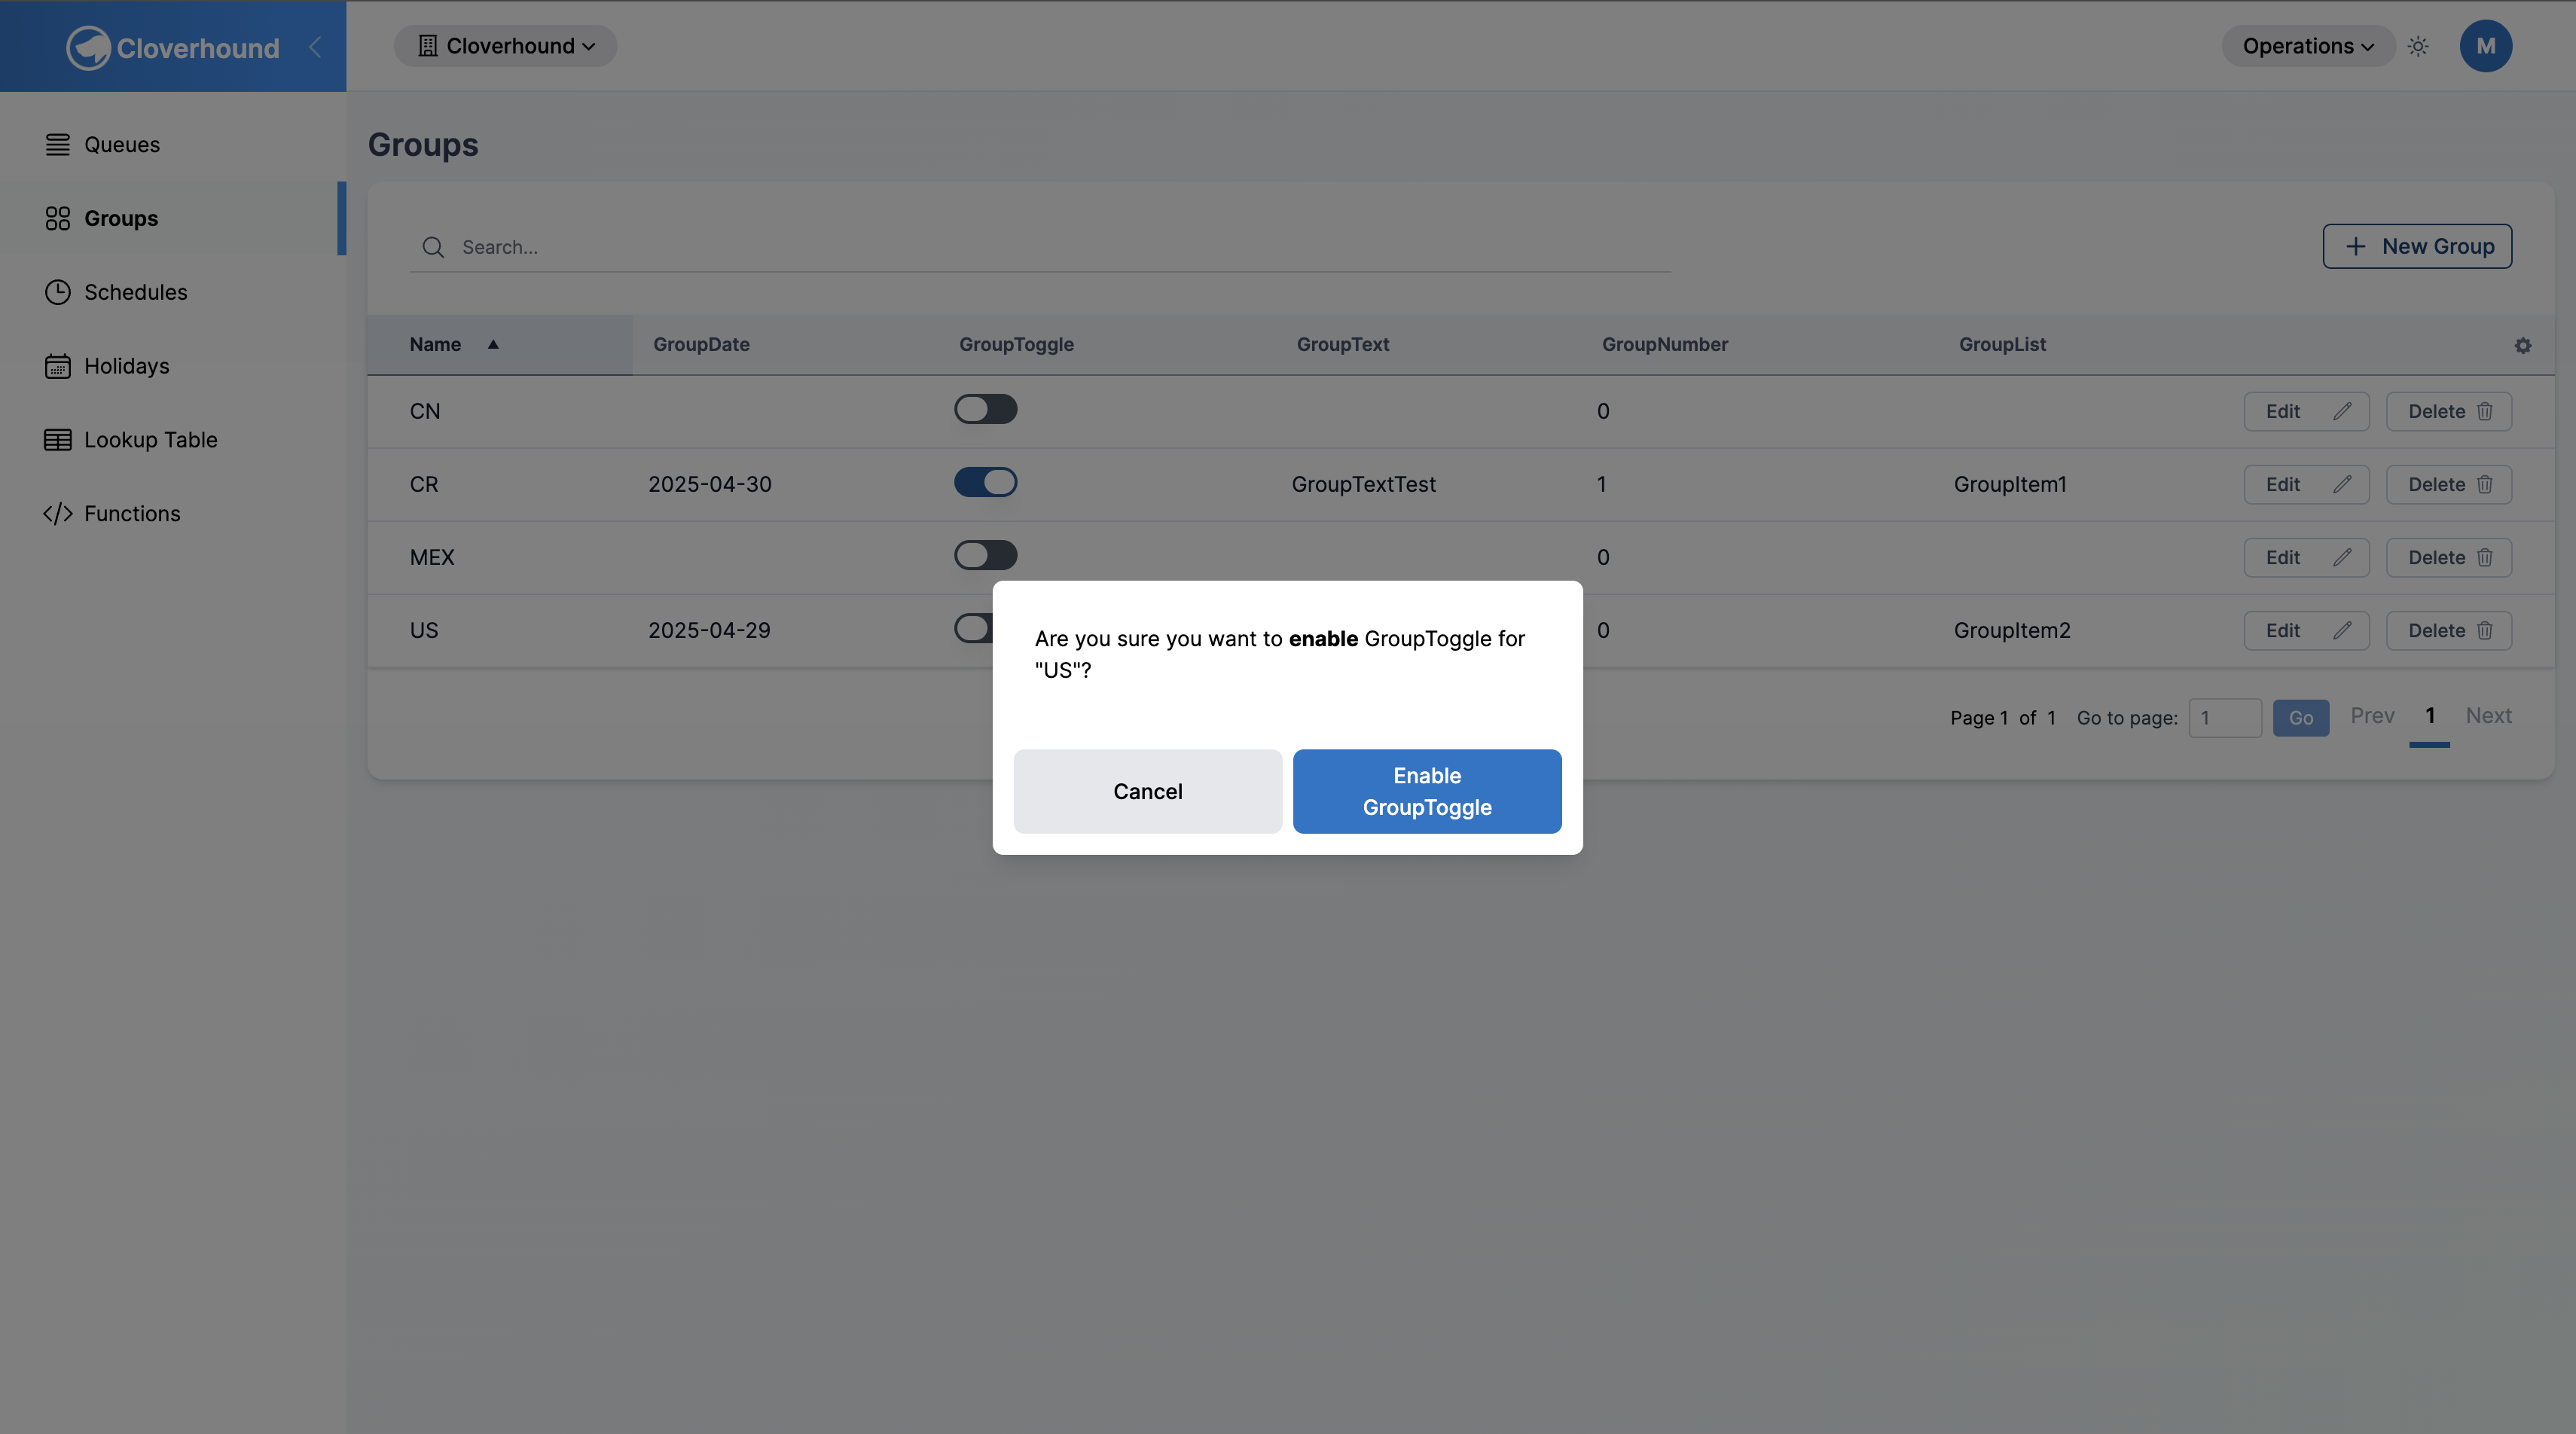
Toggling a Custom Field in Place
For custom fields of type Toggle, you can change the value directly from the table without opening the edit dialog.
-
Click the toggle control in the group's row.
-
Confirm the change in the prompt that appears. The new value saves as soon as you confirm.
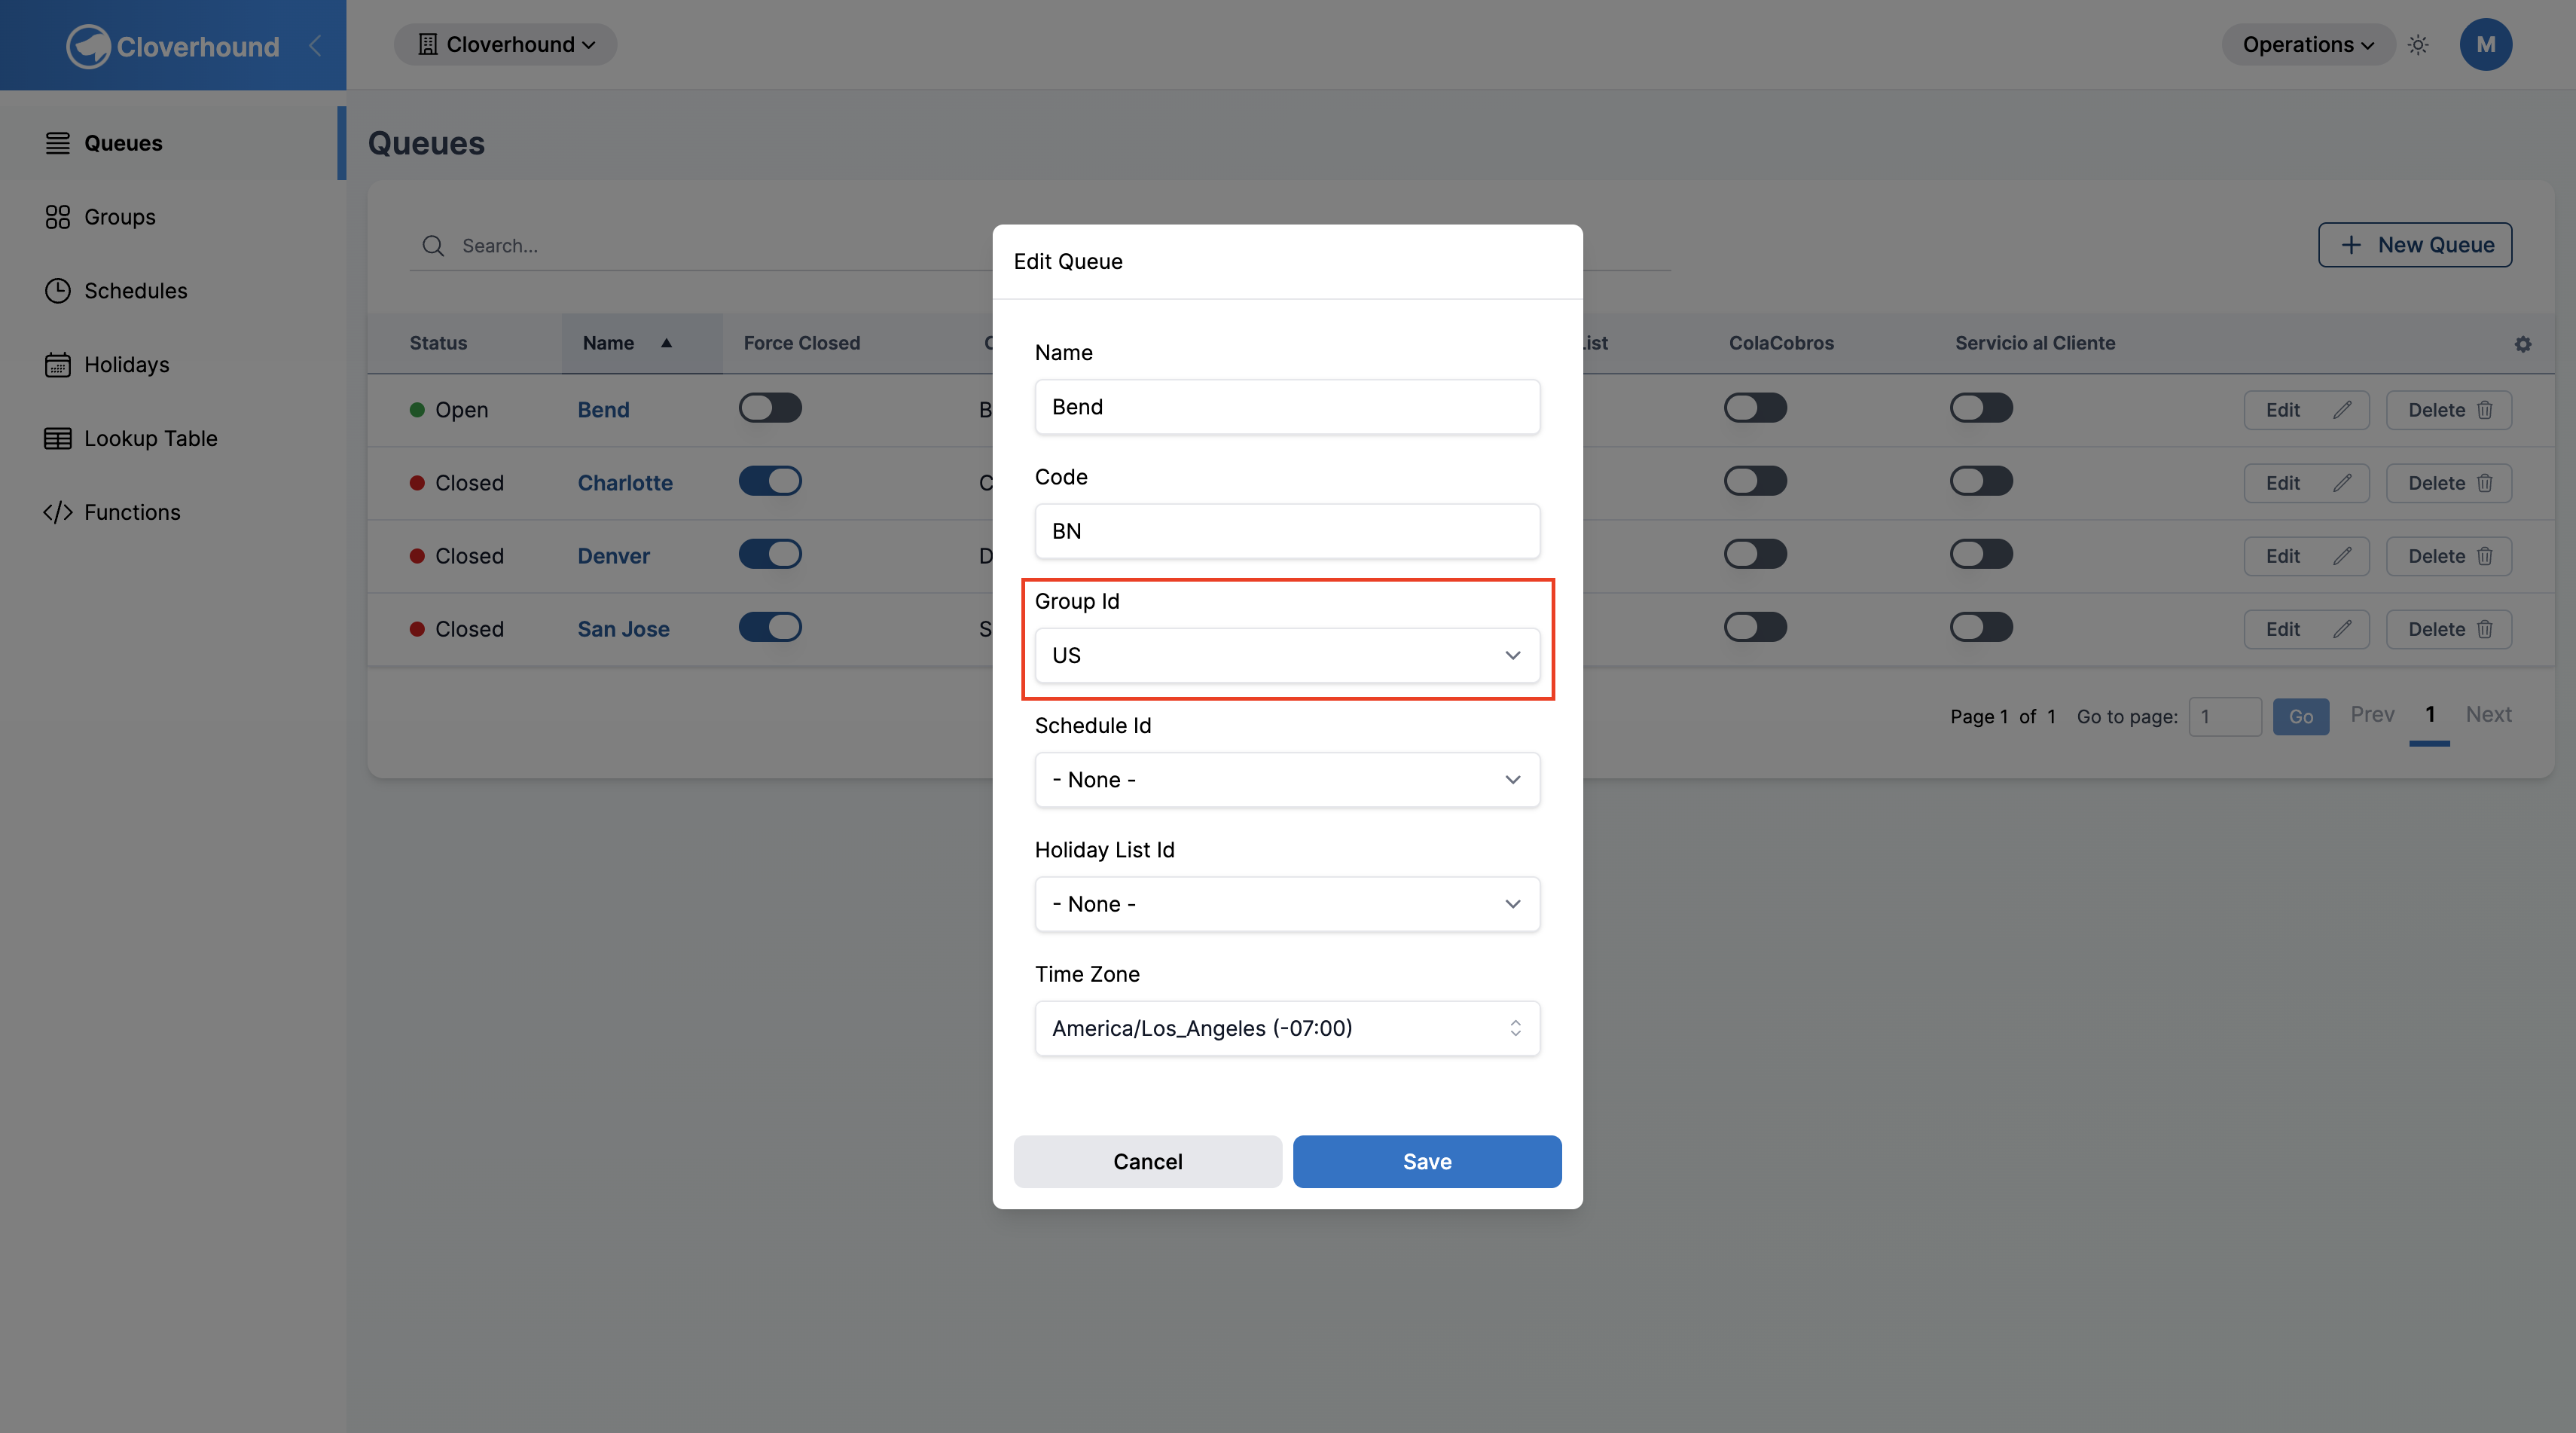
Assigning Entities to a Group
Groups themselves do not have a "members" panel. Entities are linked to a group from the entity, not from the group.
-
Navigate to the Entities page in the Operations module.
-
Create a new entity or edit an existing one. See Entity Management for the full flow.
-
Select the target group from the Group dropdown in the entity form.
-
Click Save. The entity is now associated with the group.
To move an entity to a different group, edit the entity again and pick a different value. To remove an entity from all groups, clear the Group dropdown on the entity form.
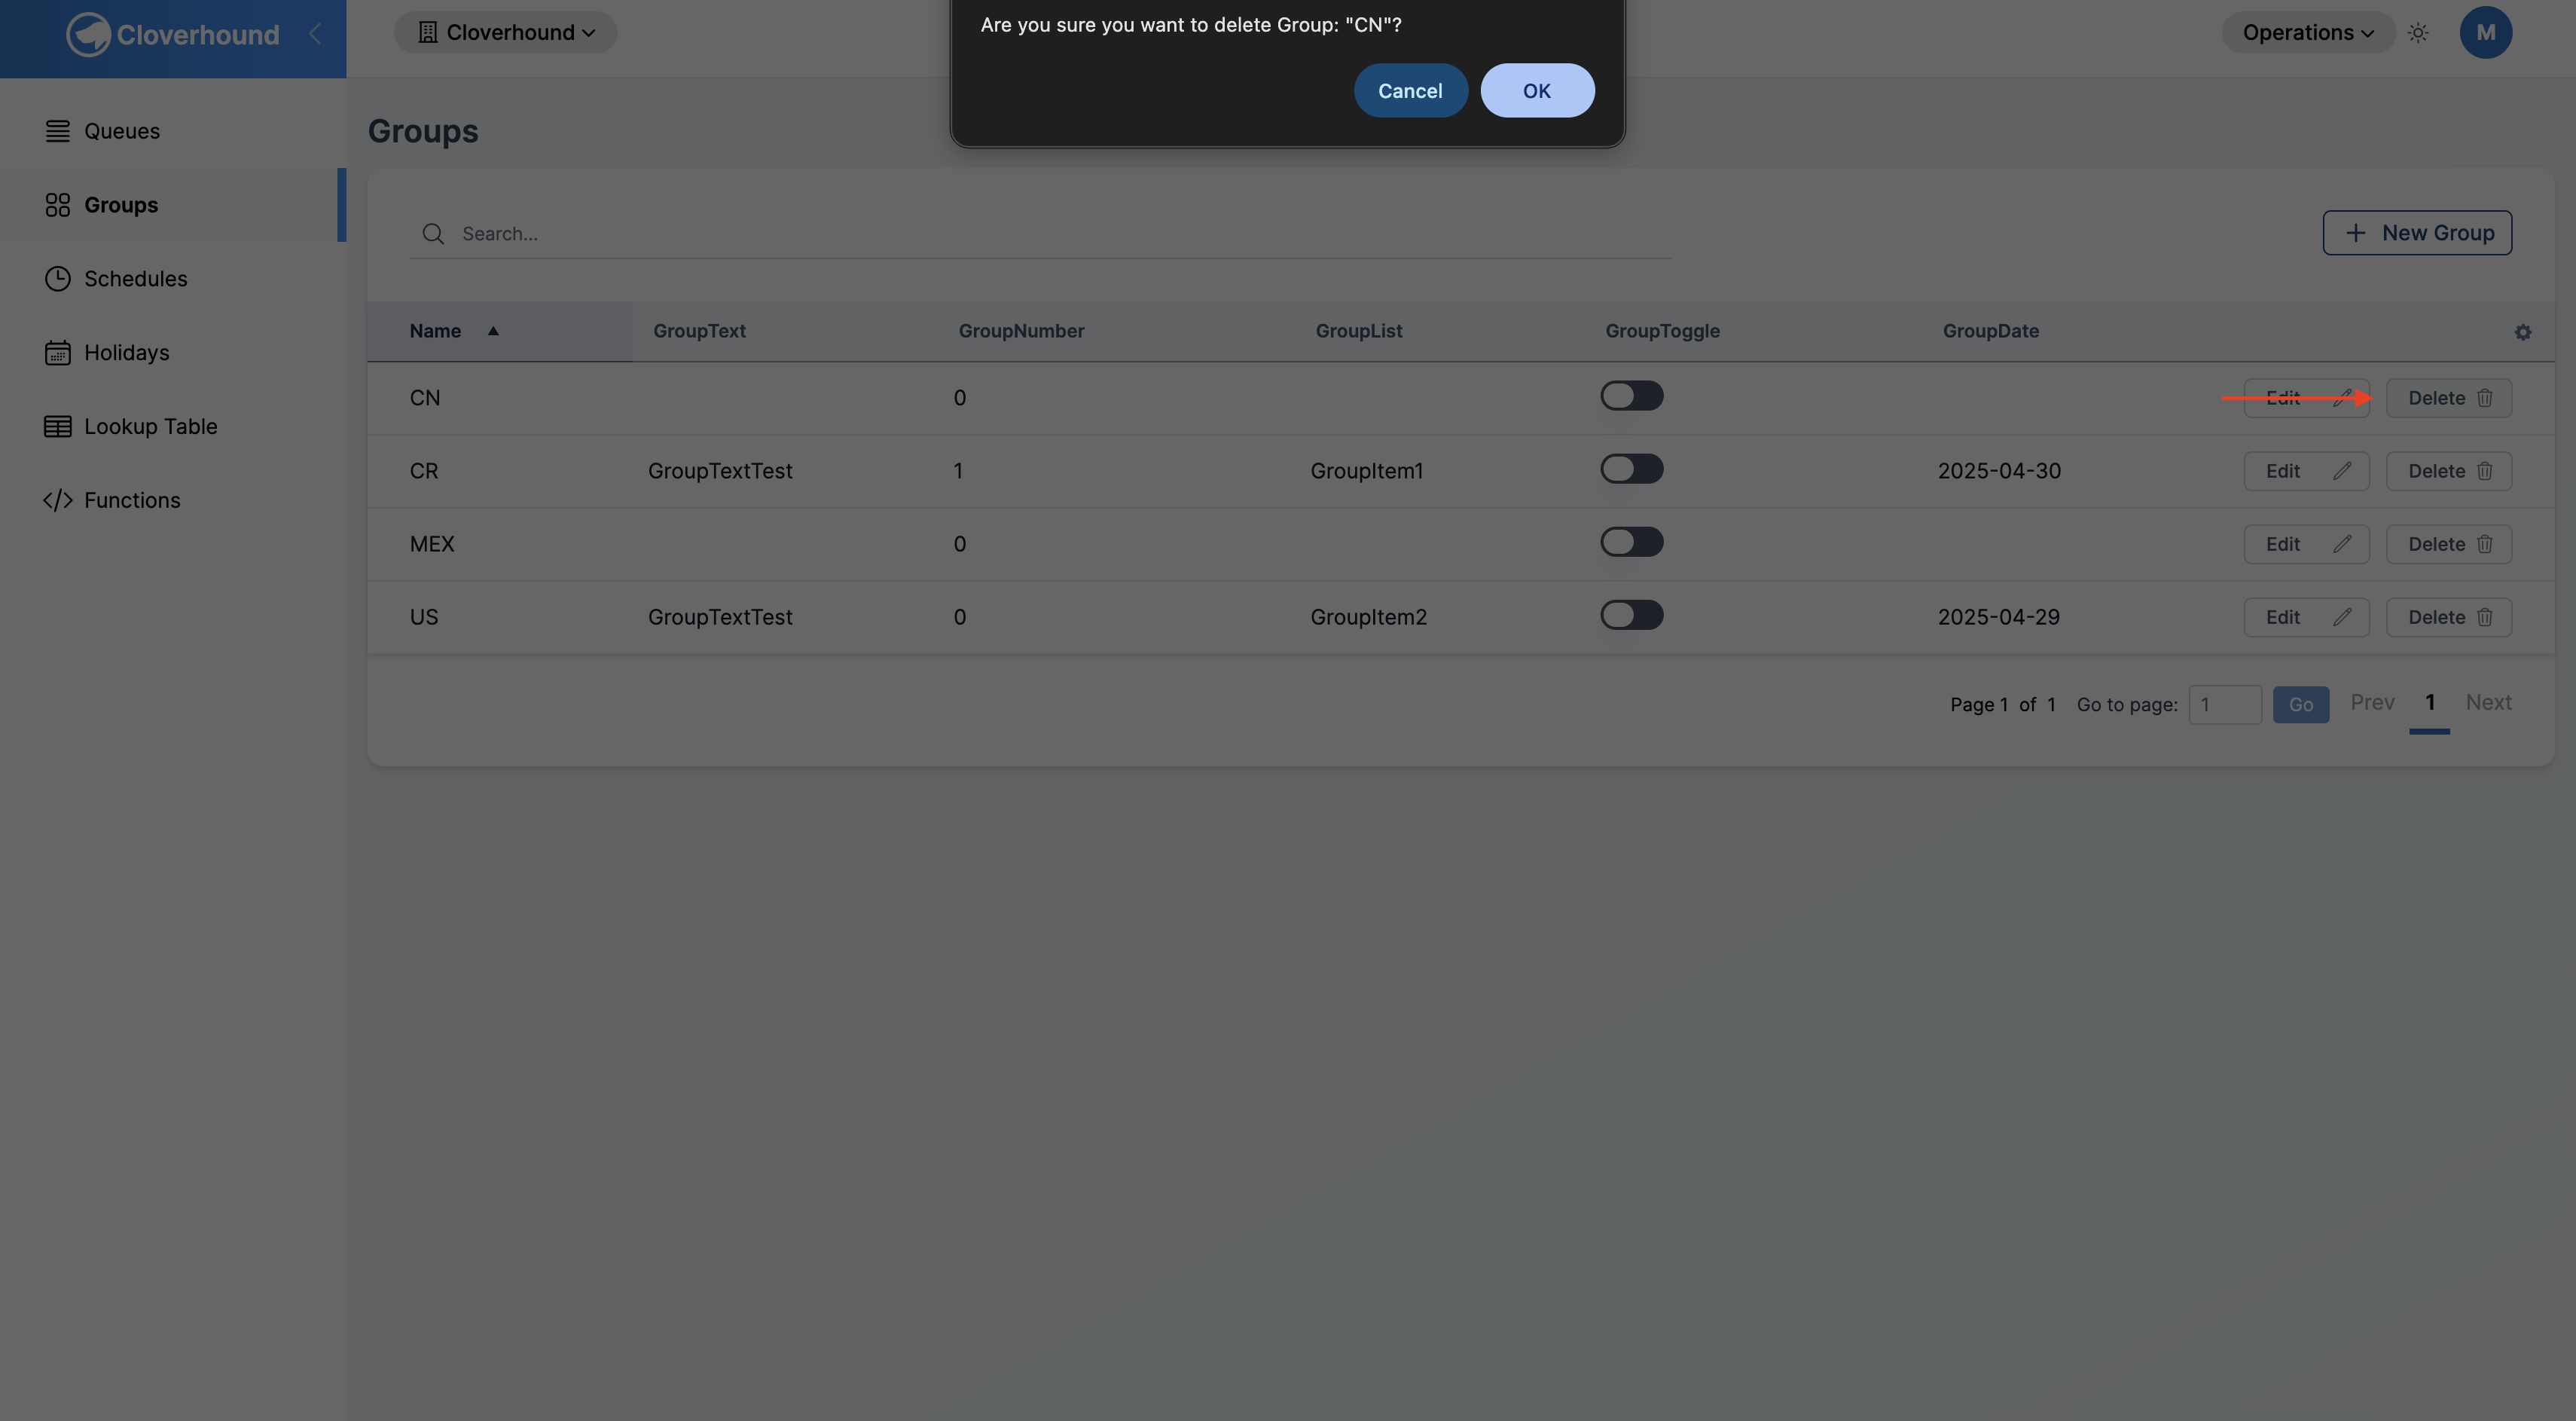
Deleting a Group
-
Locate the group in the Groups table.
-
Click the Delete button on the group's row.
-
Confirm the deletion in the prompt. The group is removed immediately.
Deleting a group is permanent. Any entities that were assigned to the group lose their group association but are not themselves deleted. Reassign them to a different group from the Entities page if needed.
With groups, you can label your entities with a shared attribute and extend that label with any custom fields your organization needs, keeping the structure of your Operations data consistent as it grows.