Managing Test Cases
A test case is one scripted conversation that an Application Test plays against your voice application. Each test case has a name, an optional description, and an ordered list of steps that alternate between what the application should say (match) and what the caller should do in response. Test cases live on the Test cases tab of an Application Test.
Accessing Test Cases
-
Navigate to the Monitoring module.
-
Open the Application Tests page and click the test you want to work with.
-
Select the Test cases tab.
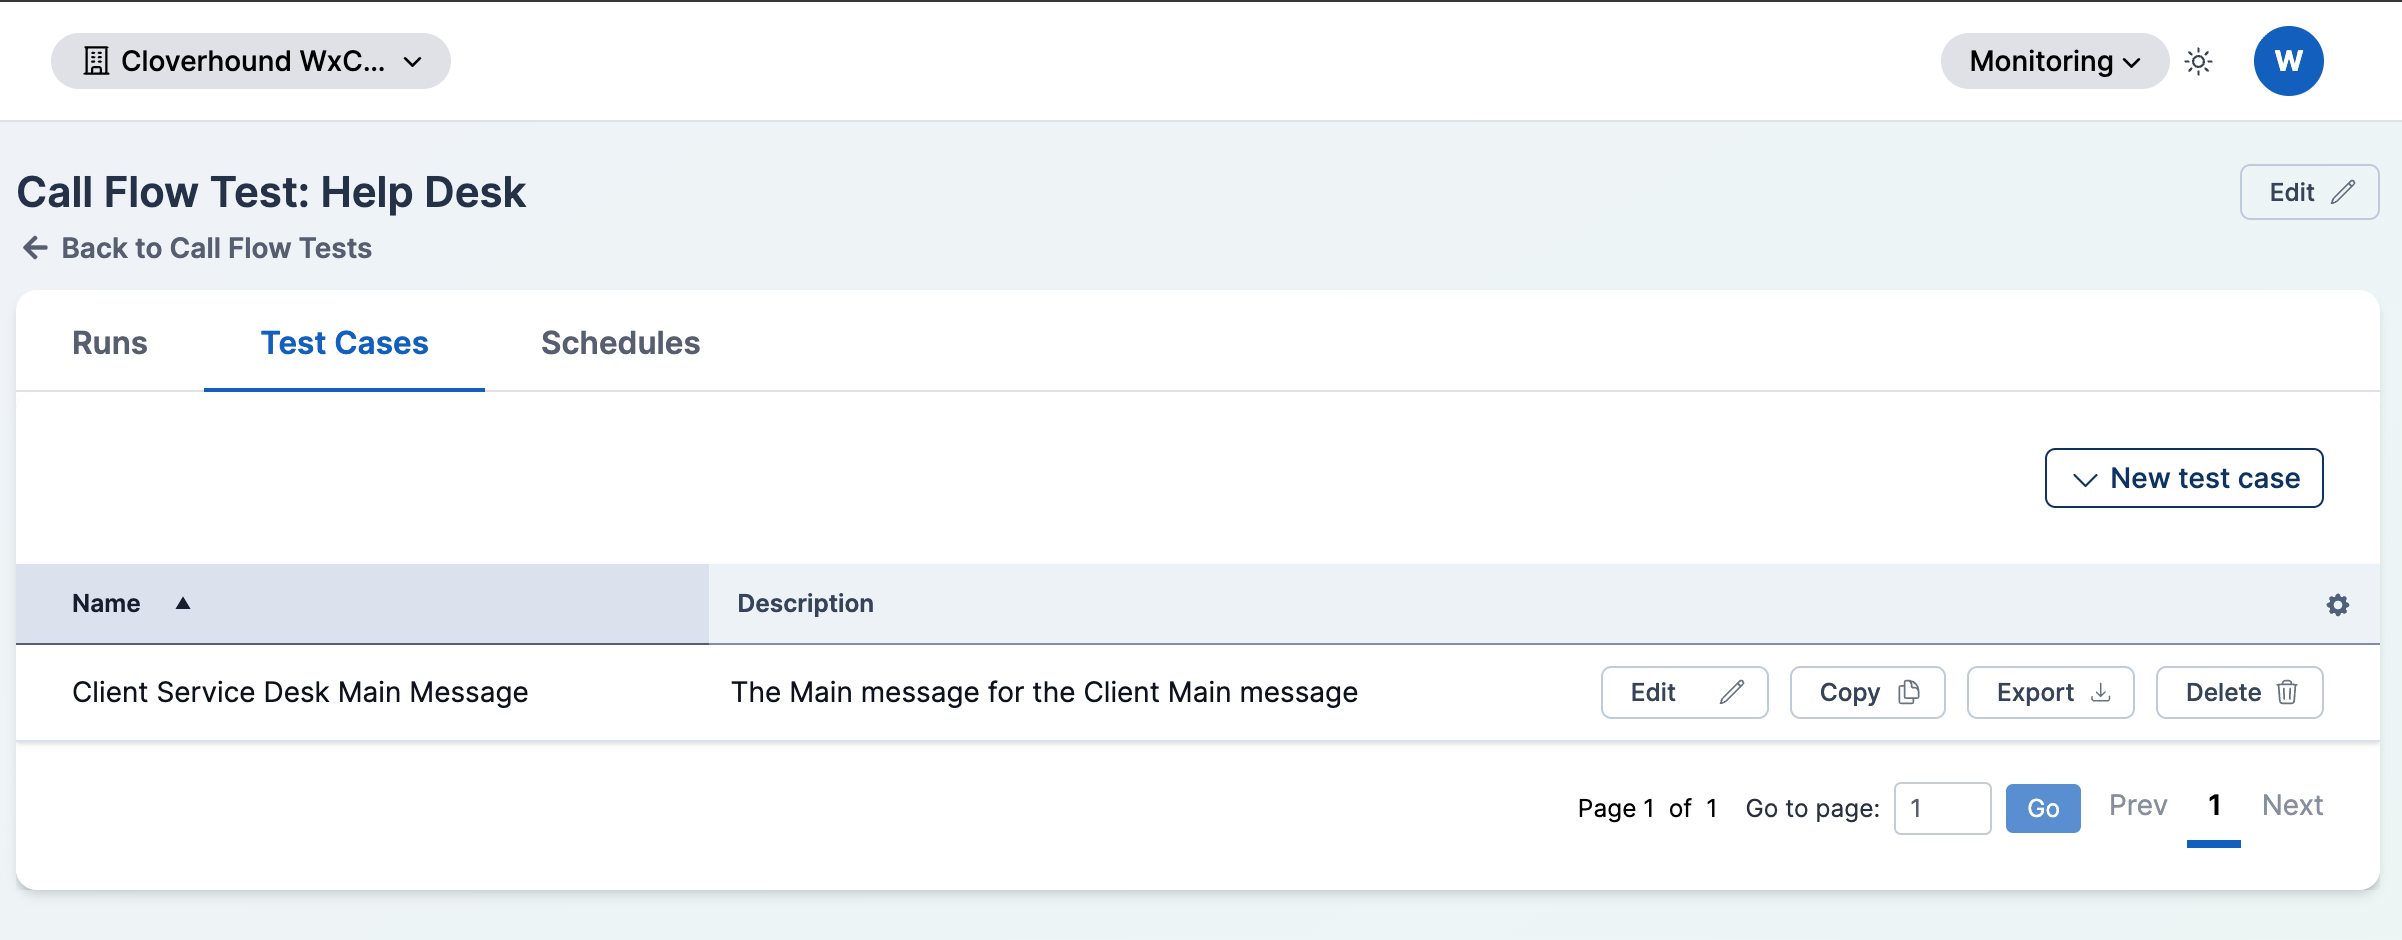
The table lists every test case on the test, with its Name and Description. Use the row actions to edit, copy, export, or delete a test case.
Creating a Test Case
Click the New test case dropdown in the top-right of the tab to choose how to create the case.
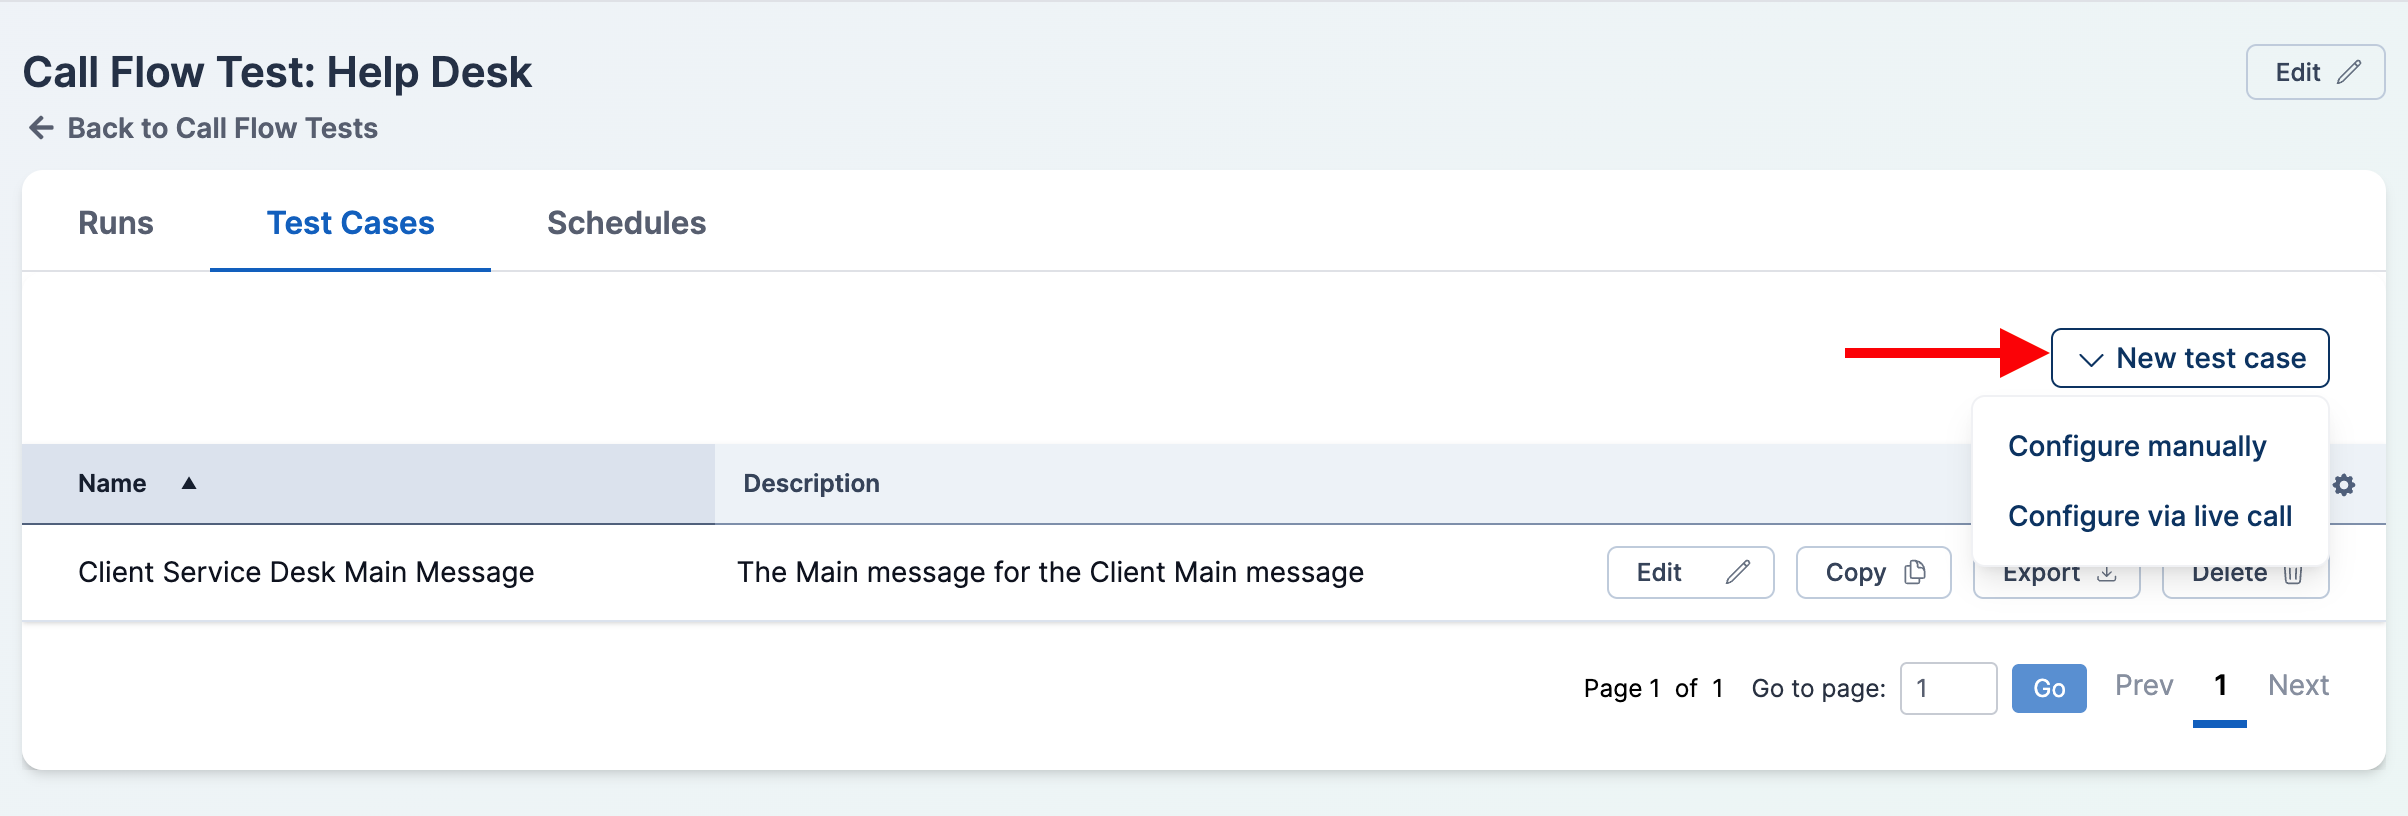
Configure manually
Use this option to build a test case step by step in the editor without placing a call.
- Fill out the test case details:
- Name — required. Shown in the test cases table and in run results.
- Description — optional free-text note about what this case covers.
- Define the steps (see Editing Steps below).
- Click Create to save.
Configure via live call
Use this option to record a real interaction with your voice application. Cloverhound Cloud transcribes what the application says and captures your responses, then pre-fills the editor so you can review and save the test case.
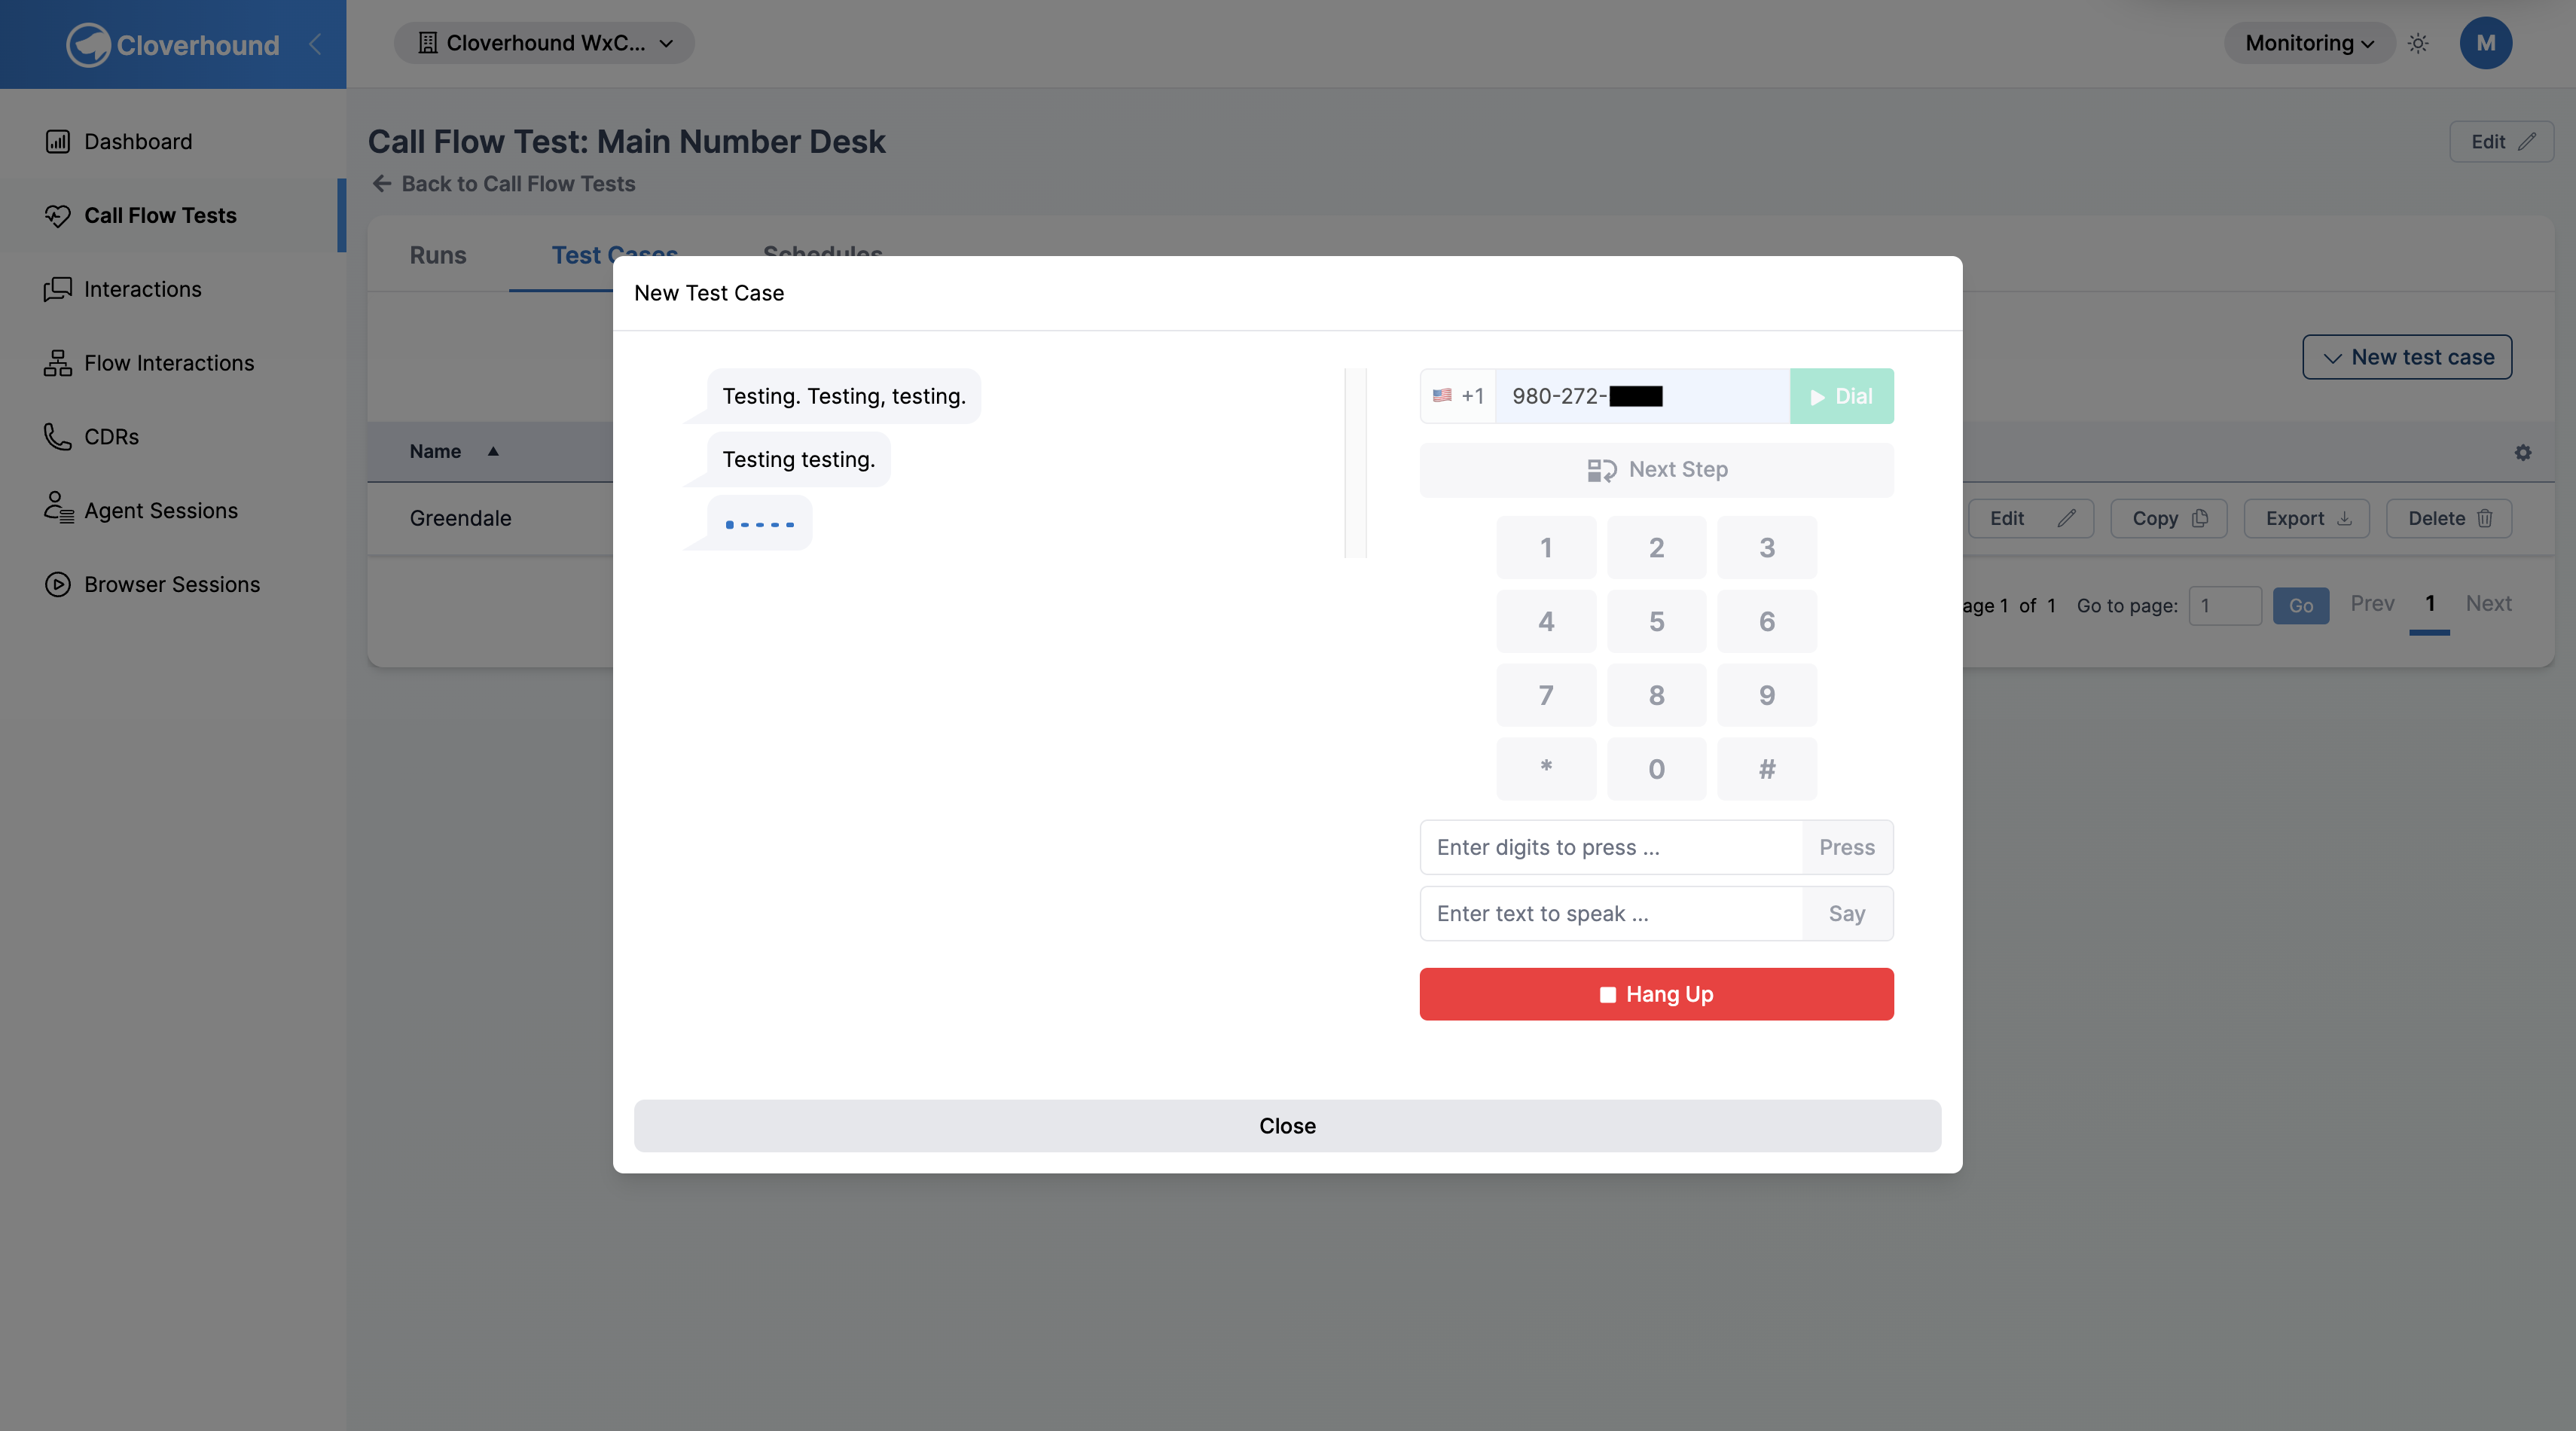
- Enter the phone number of your voice application in the To field (format: XXX-XXX-XXXX).
- Click Dial. The system places the call on your behalf. The status changes to Dialing, then Ringing, then Connected once answered.
- Wait for the application to speak. Each time the application says something, it appears as a new step in the panel. The transcription arrives after a brief delay.
- Respond to each prompt using one of:
- The phone keypad — click the digits you want to press.
- The digits field — type a digit sequence and click Press.
- The speech field — type text and click Say to respond with synthesized voice.
- Next Step — skip responding and advance to the next step (for prompts that need no input).
- Repeat steps 3-4 for each prompt in the call flow you want to capture.
- Click Hang Up (red button) when done. The call ends and the editor opens pre-filled with the recorded steps.
- Review and adjust the steps if needed (see Editing Steps).
- Fill out the Name and Description.
- Click Create to save.
If the call connects but you see Hung up, no steps executed, the application hung up before any audio was transcribed. Check that the phone number is correct and that the application plays audio immediately on answer.
Copying, Exporting, and Deleting
The row actions on the test cases table let you reuse and clean up cases.
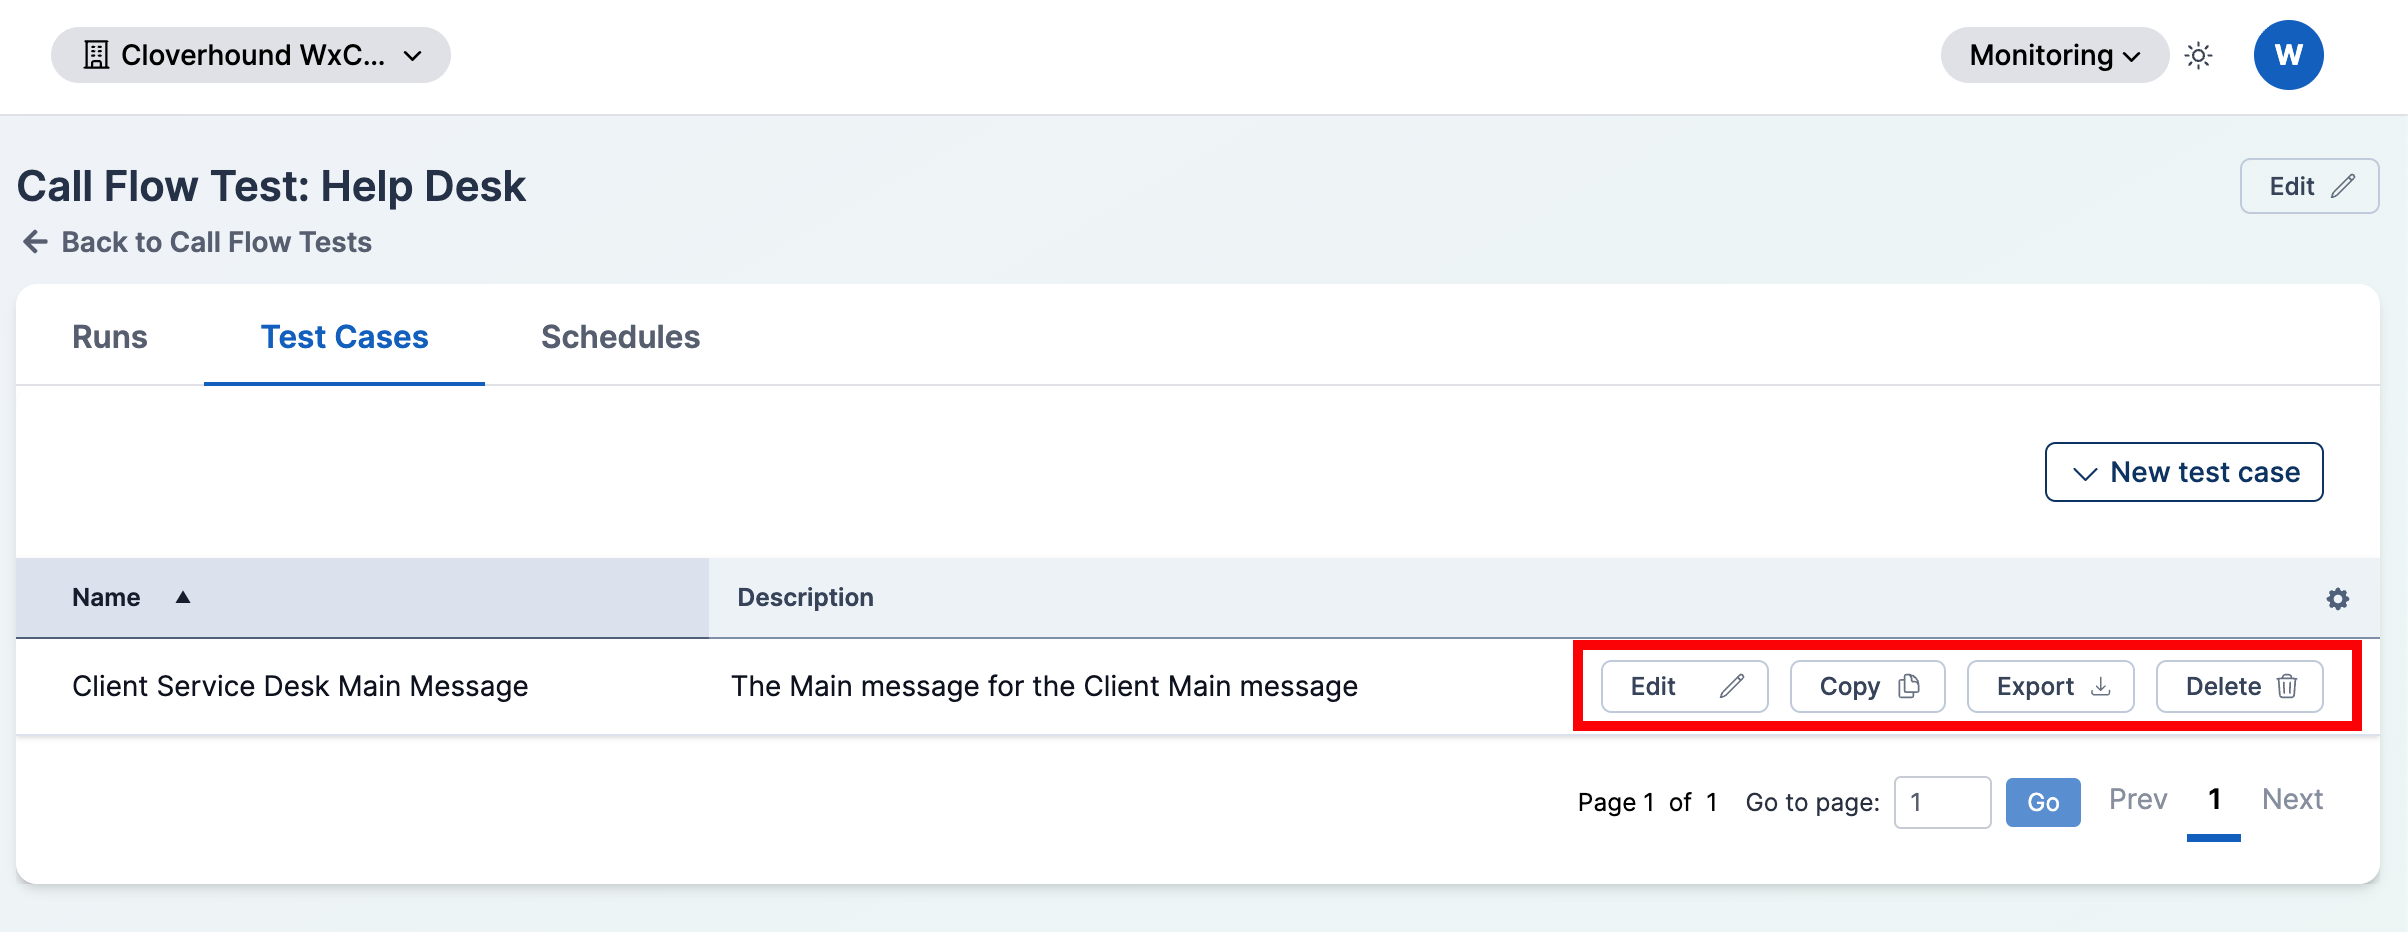
- Click Edit to open the test case in the editor and change its name, description, or steps.
- Click Copy to duplicate the test case. The new case opens in the editor pre-filled with the original's steps and a name like
<original> (Copy). Save to add it to the test. - Click Export to download the test case as a JSON file named
Test_case_<name>.json. Use this to back up a case or move it to another Application Test. - Click Delete to remove the test case.
Deleting a test case is immediate and cannot be undone. Past run results for the case remain in the test's history, but the case no longer runs on future executions.
Editing Steps
Each step represents one turn in the conversation. Steps run in the order shown.
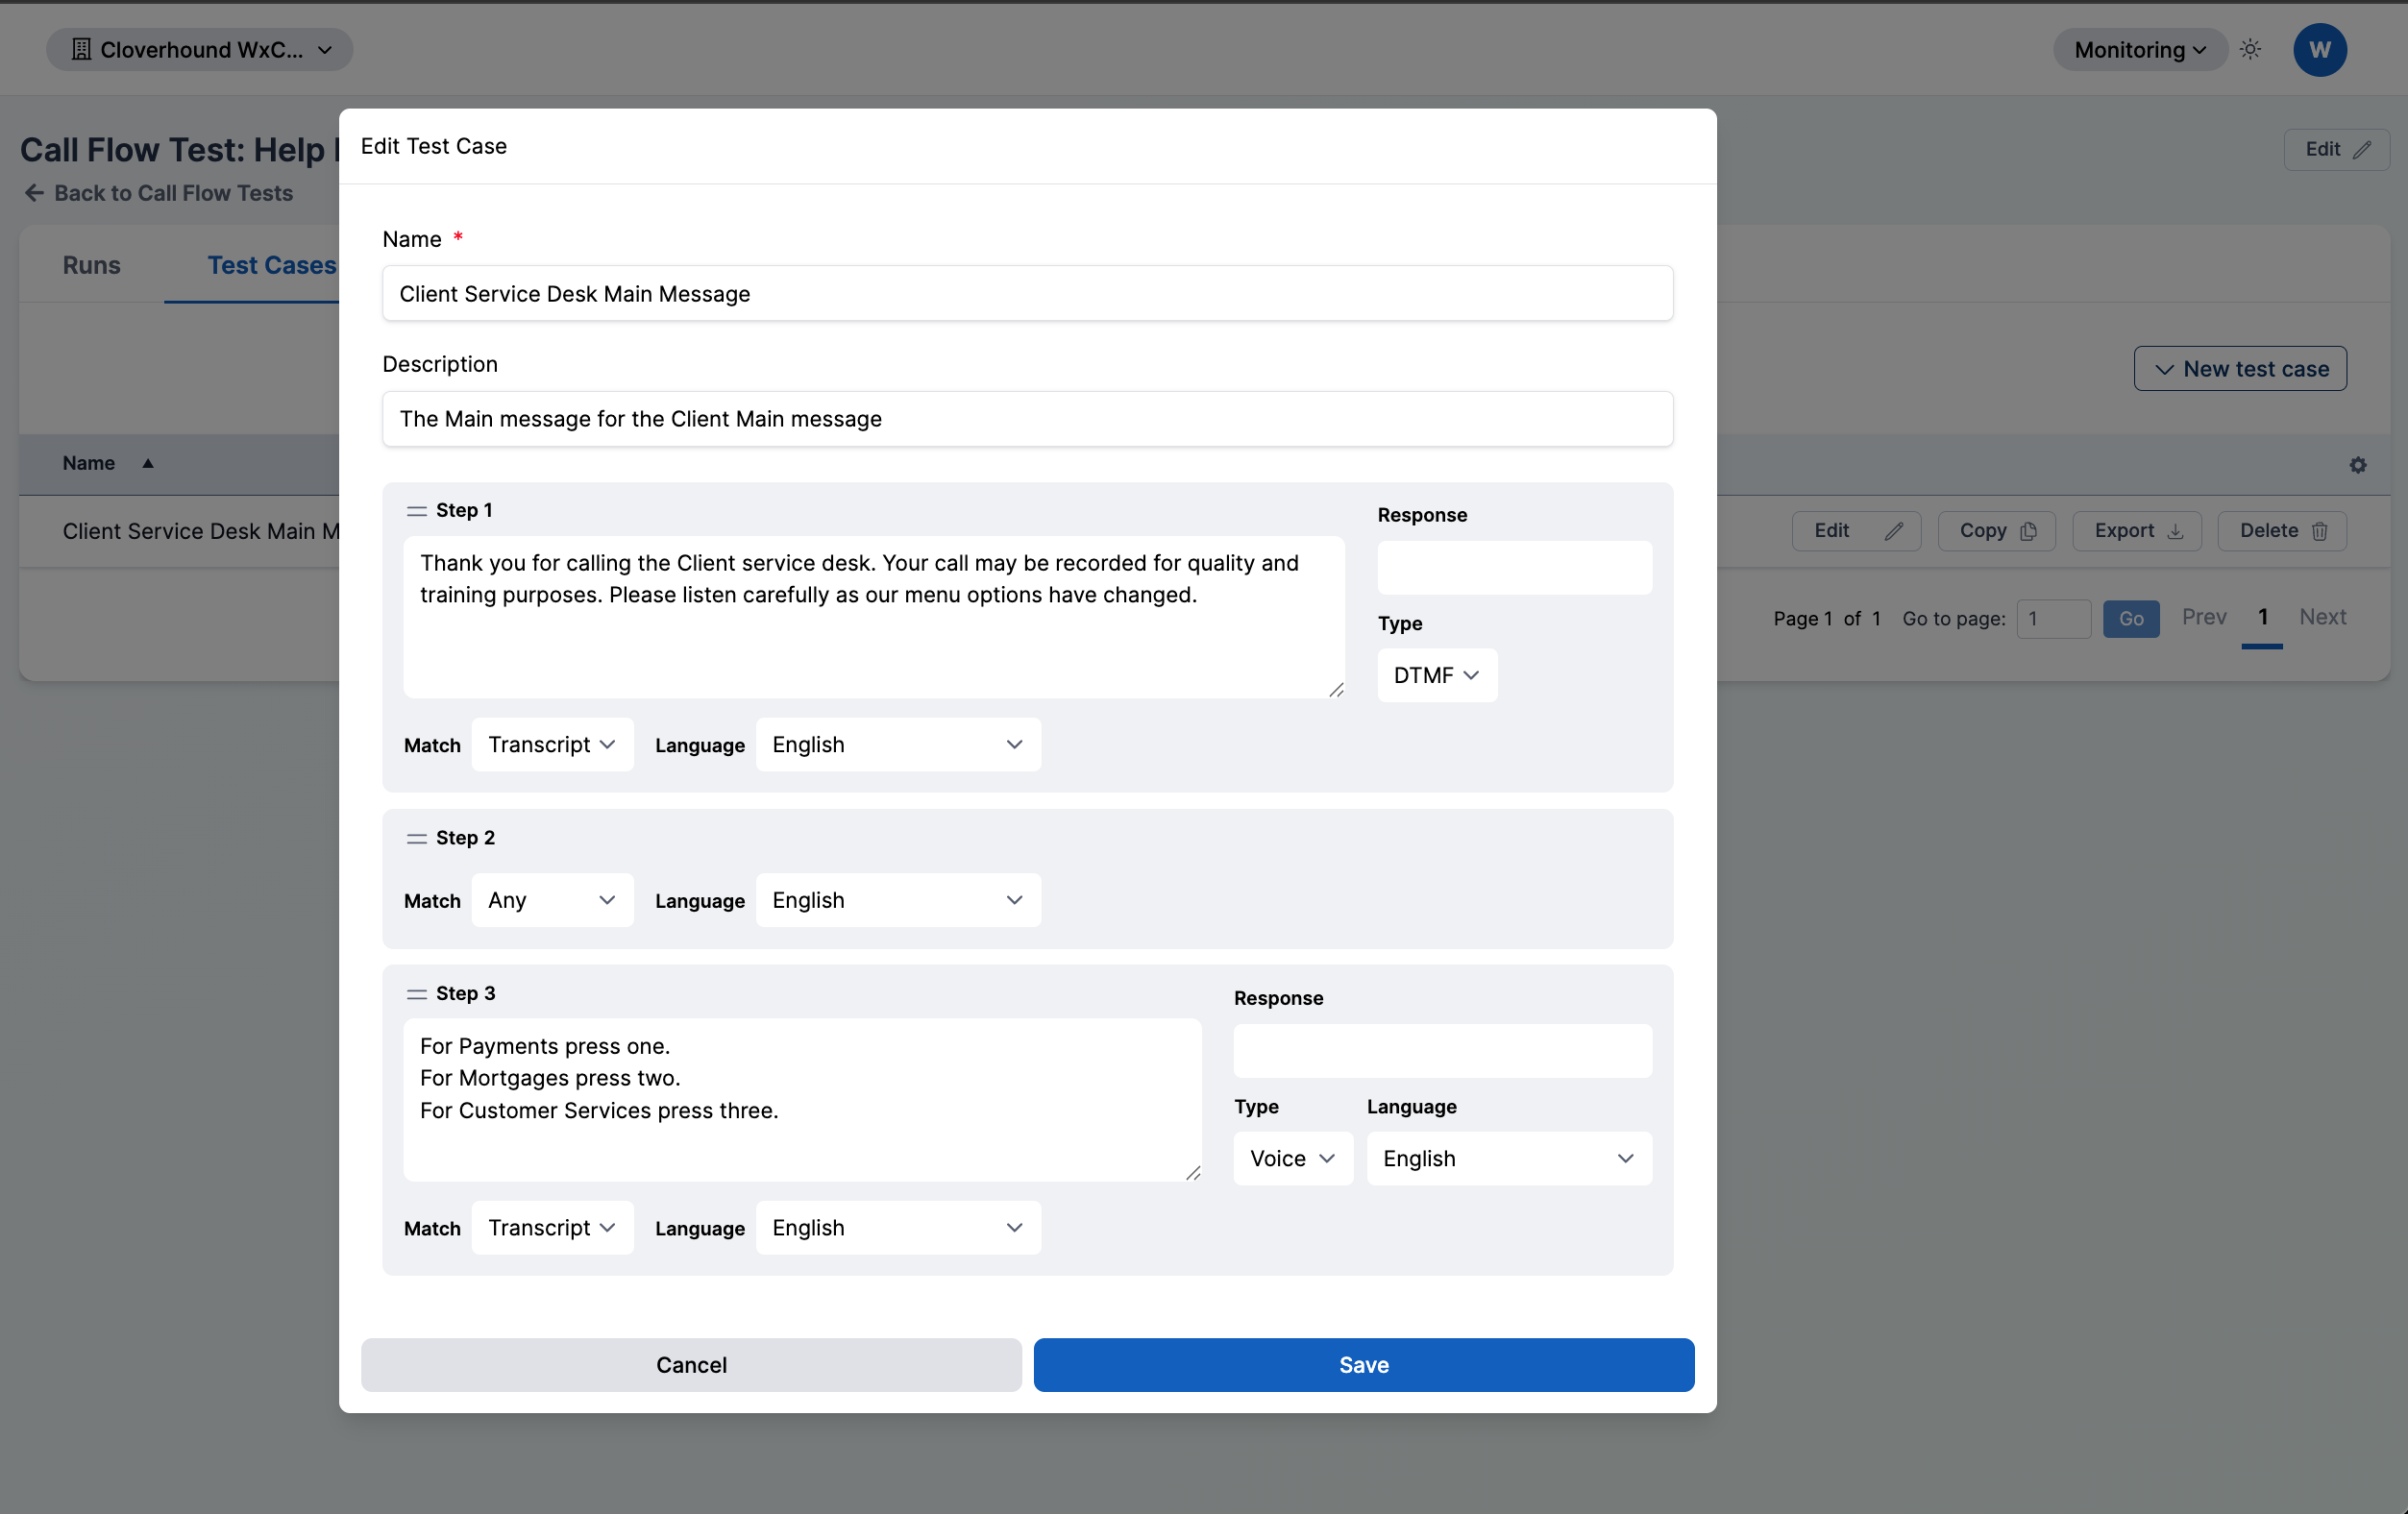
For each step, set:
-
Match — what the application is expected to say or play.
- Match type:
- Transcript — the step matches when the application's audio transcribes to the text you enter. The text area is required.
- Any — the step matches anything the application says. Useful for ignoring a prompt you don't care about. The last step cannot be Any, and two consecutive steps cannot both be Any.
- Language — the language used to transcribe the application's audio for this step.
- Match type:
-
Response — what the test should send back after the match succeeds. Hidden when Match type is Any.
- Type:
- DTMF — the response is a sequence of keypad digits (for example,
1or1234#). - Voice — the response is spoken text synthesized to audio.
- DTMF — the response is a sequence of keypad digits (for example,
- Language — shown only when Type is Voice. Sets the voice used to speak the response.
- Type:
Adding Steps
- Click + Add step at the end of the list to append a step.
- Hover between two steps and click the round + button to insert a step at that position.
Reordering Steps
Drag a step by the handle on the left of its header to move it up or down. Steps are renumbered automatically.

Deleting a step
Hover over the step and click Delete next to the step number.
Step validation runs as you type. If a step shows an error (for example, a blank Match on a Transcript step, or Any in an invalid position), fix the error before saving. The form refuses to save a test case with step errors.
With test cases in place, the Application Test runs each one on schedule and reports a pass or fail for every case. To change when the test runs, see the Test schedules tab on the parent Application Test.