Viewing Agent Sessions
The Agent Sessions page lists every agent login and logout session captured from your contact center provider. Use it to review when agents were active, which teams and sites they worked from, and how long each session lasted.
The Agent Sessions page is located in the Monitoring module under Agent Sessions. From there, you can filter the table, open a session for more detail, and export results for offline review.
Accessing the Agent Sessions Table
-
Navigate to the Monitoring module in Cloverhound Cloud.
-
Open the Agent Sessions page.

-
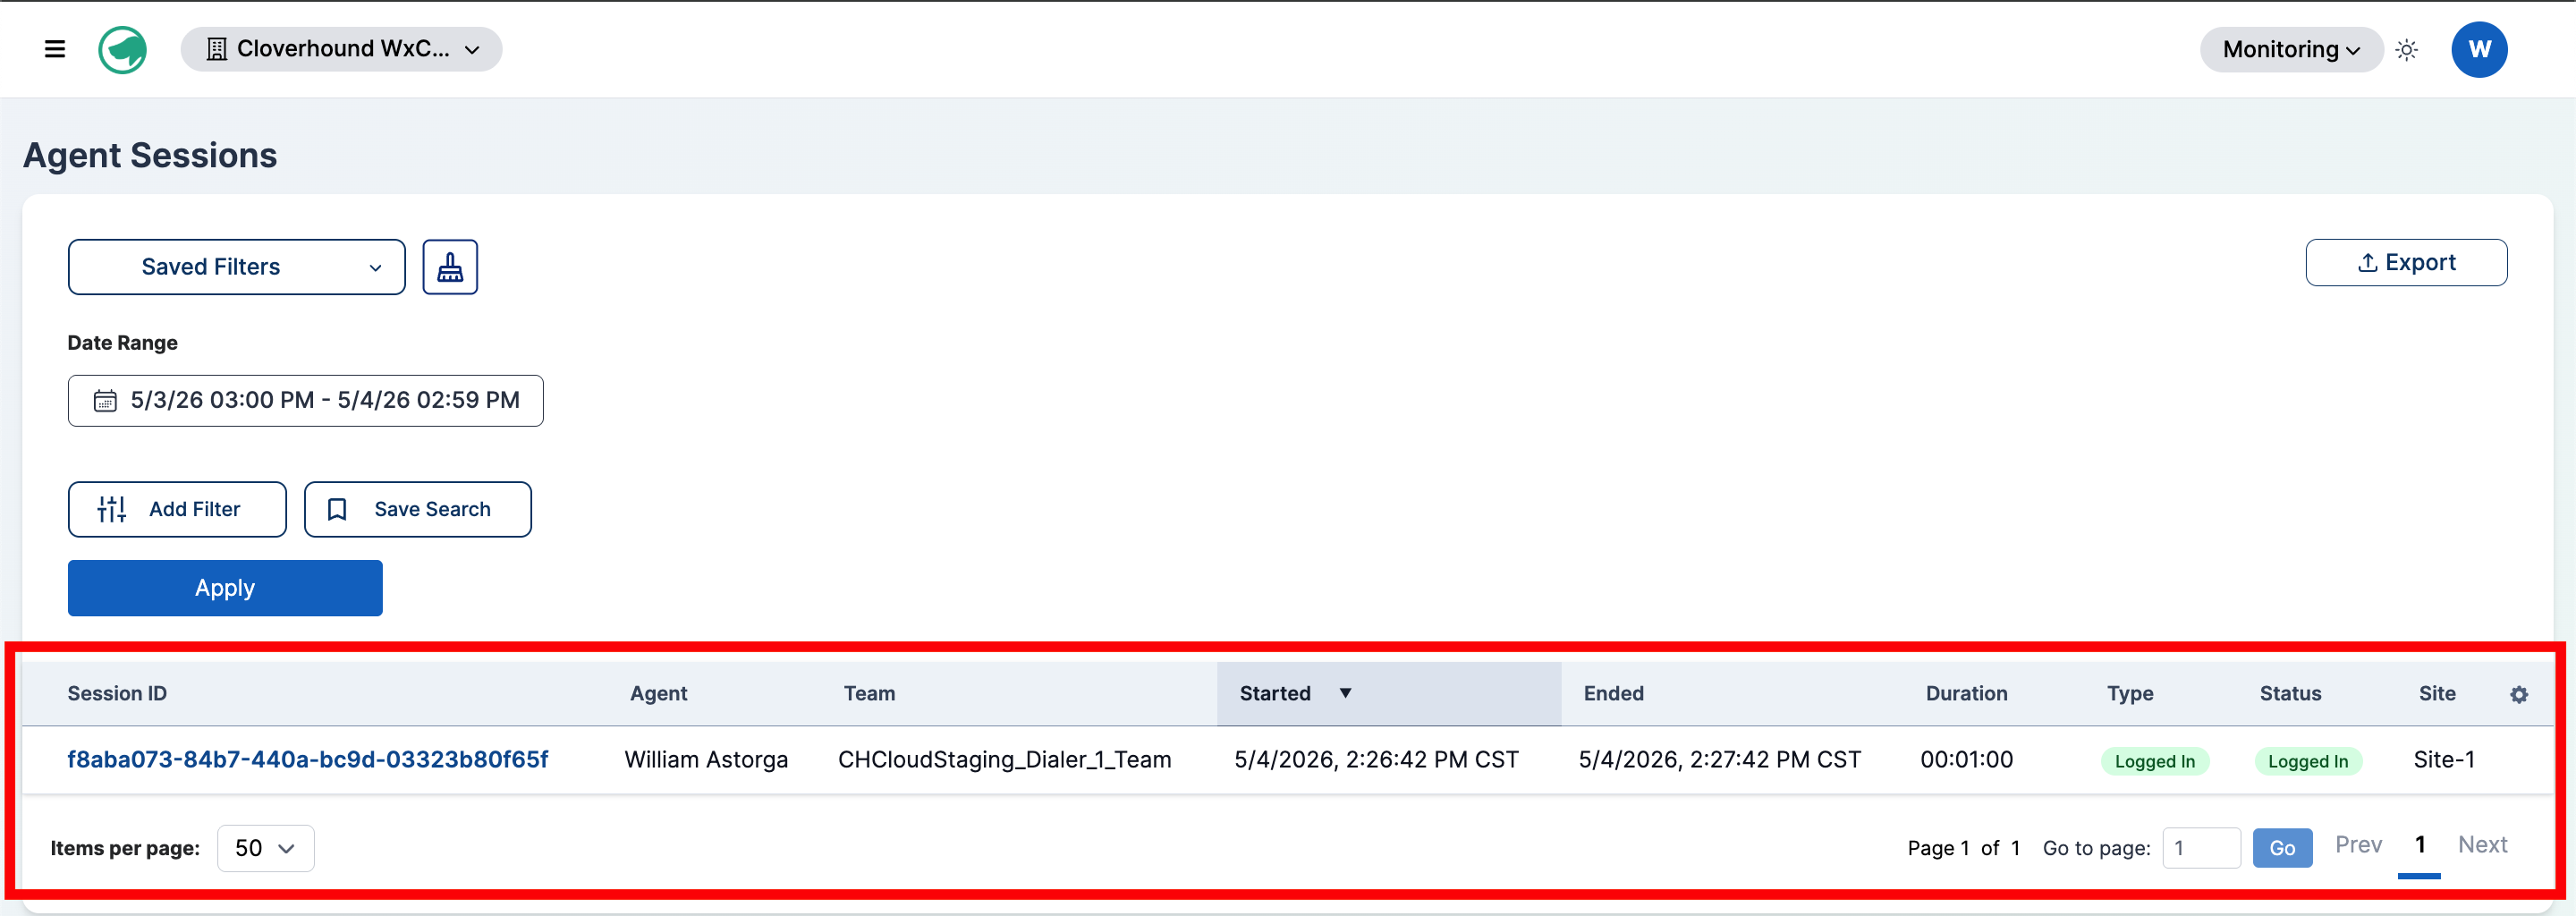
Review the table columns. The Agent Sessions table displays the following information for each session:
- Session ID — The provider's unique identifier for the session. Click the ID to open the session detail page.
- Agent — The agent's full name, or email if no name is set.
- Team — The team the agent belonged to during the session.
- Started — When the session began, in your organization's time zone.
- Ended — When the session ended, or
-if the session is still active. - Duration — How long the session lasted. Shows
-while the session is active. - Type — The session type reported by the provider.
- Status — The current session status (Logged In or Logged Out).
- Site — The site the agent was assigned to.
-
Sort the Table:
- Click any column header to sort by that column.
- Click again to reverse the sort order.
-
Navigate Multiple Pages:
- Use the pagination controls at the bottom of the table to move between pages.
- Select how many sessions to display per page using the dropdown.
Viewing Session Details
-
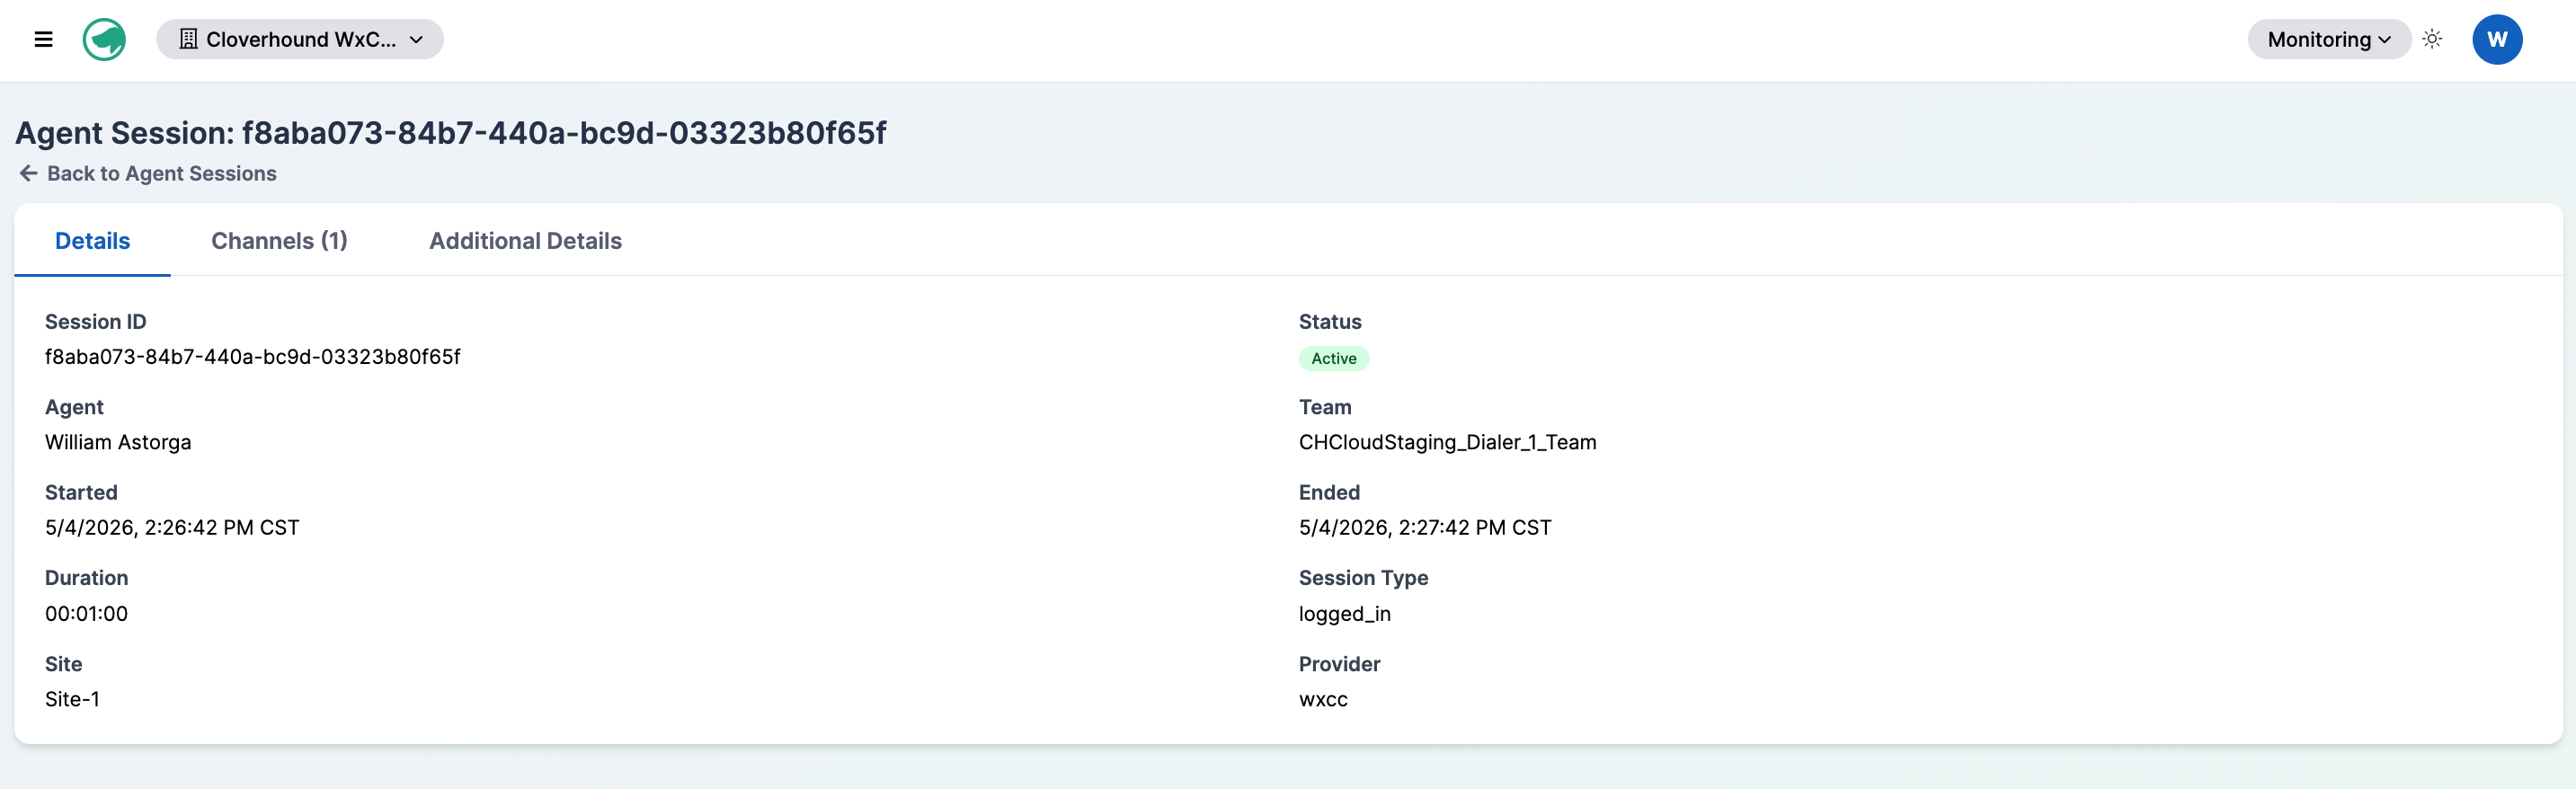
Click a Session ID in the table to open the session detail page.
-
Review the Details tab. It shows the Session ID, Status, Agent, Team, Started, Ended, Duration, Session Type, Site, and Provider.
-
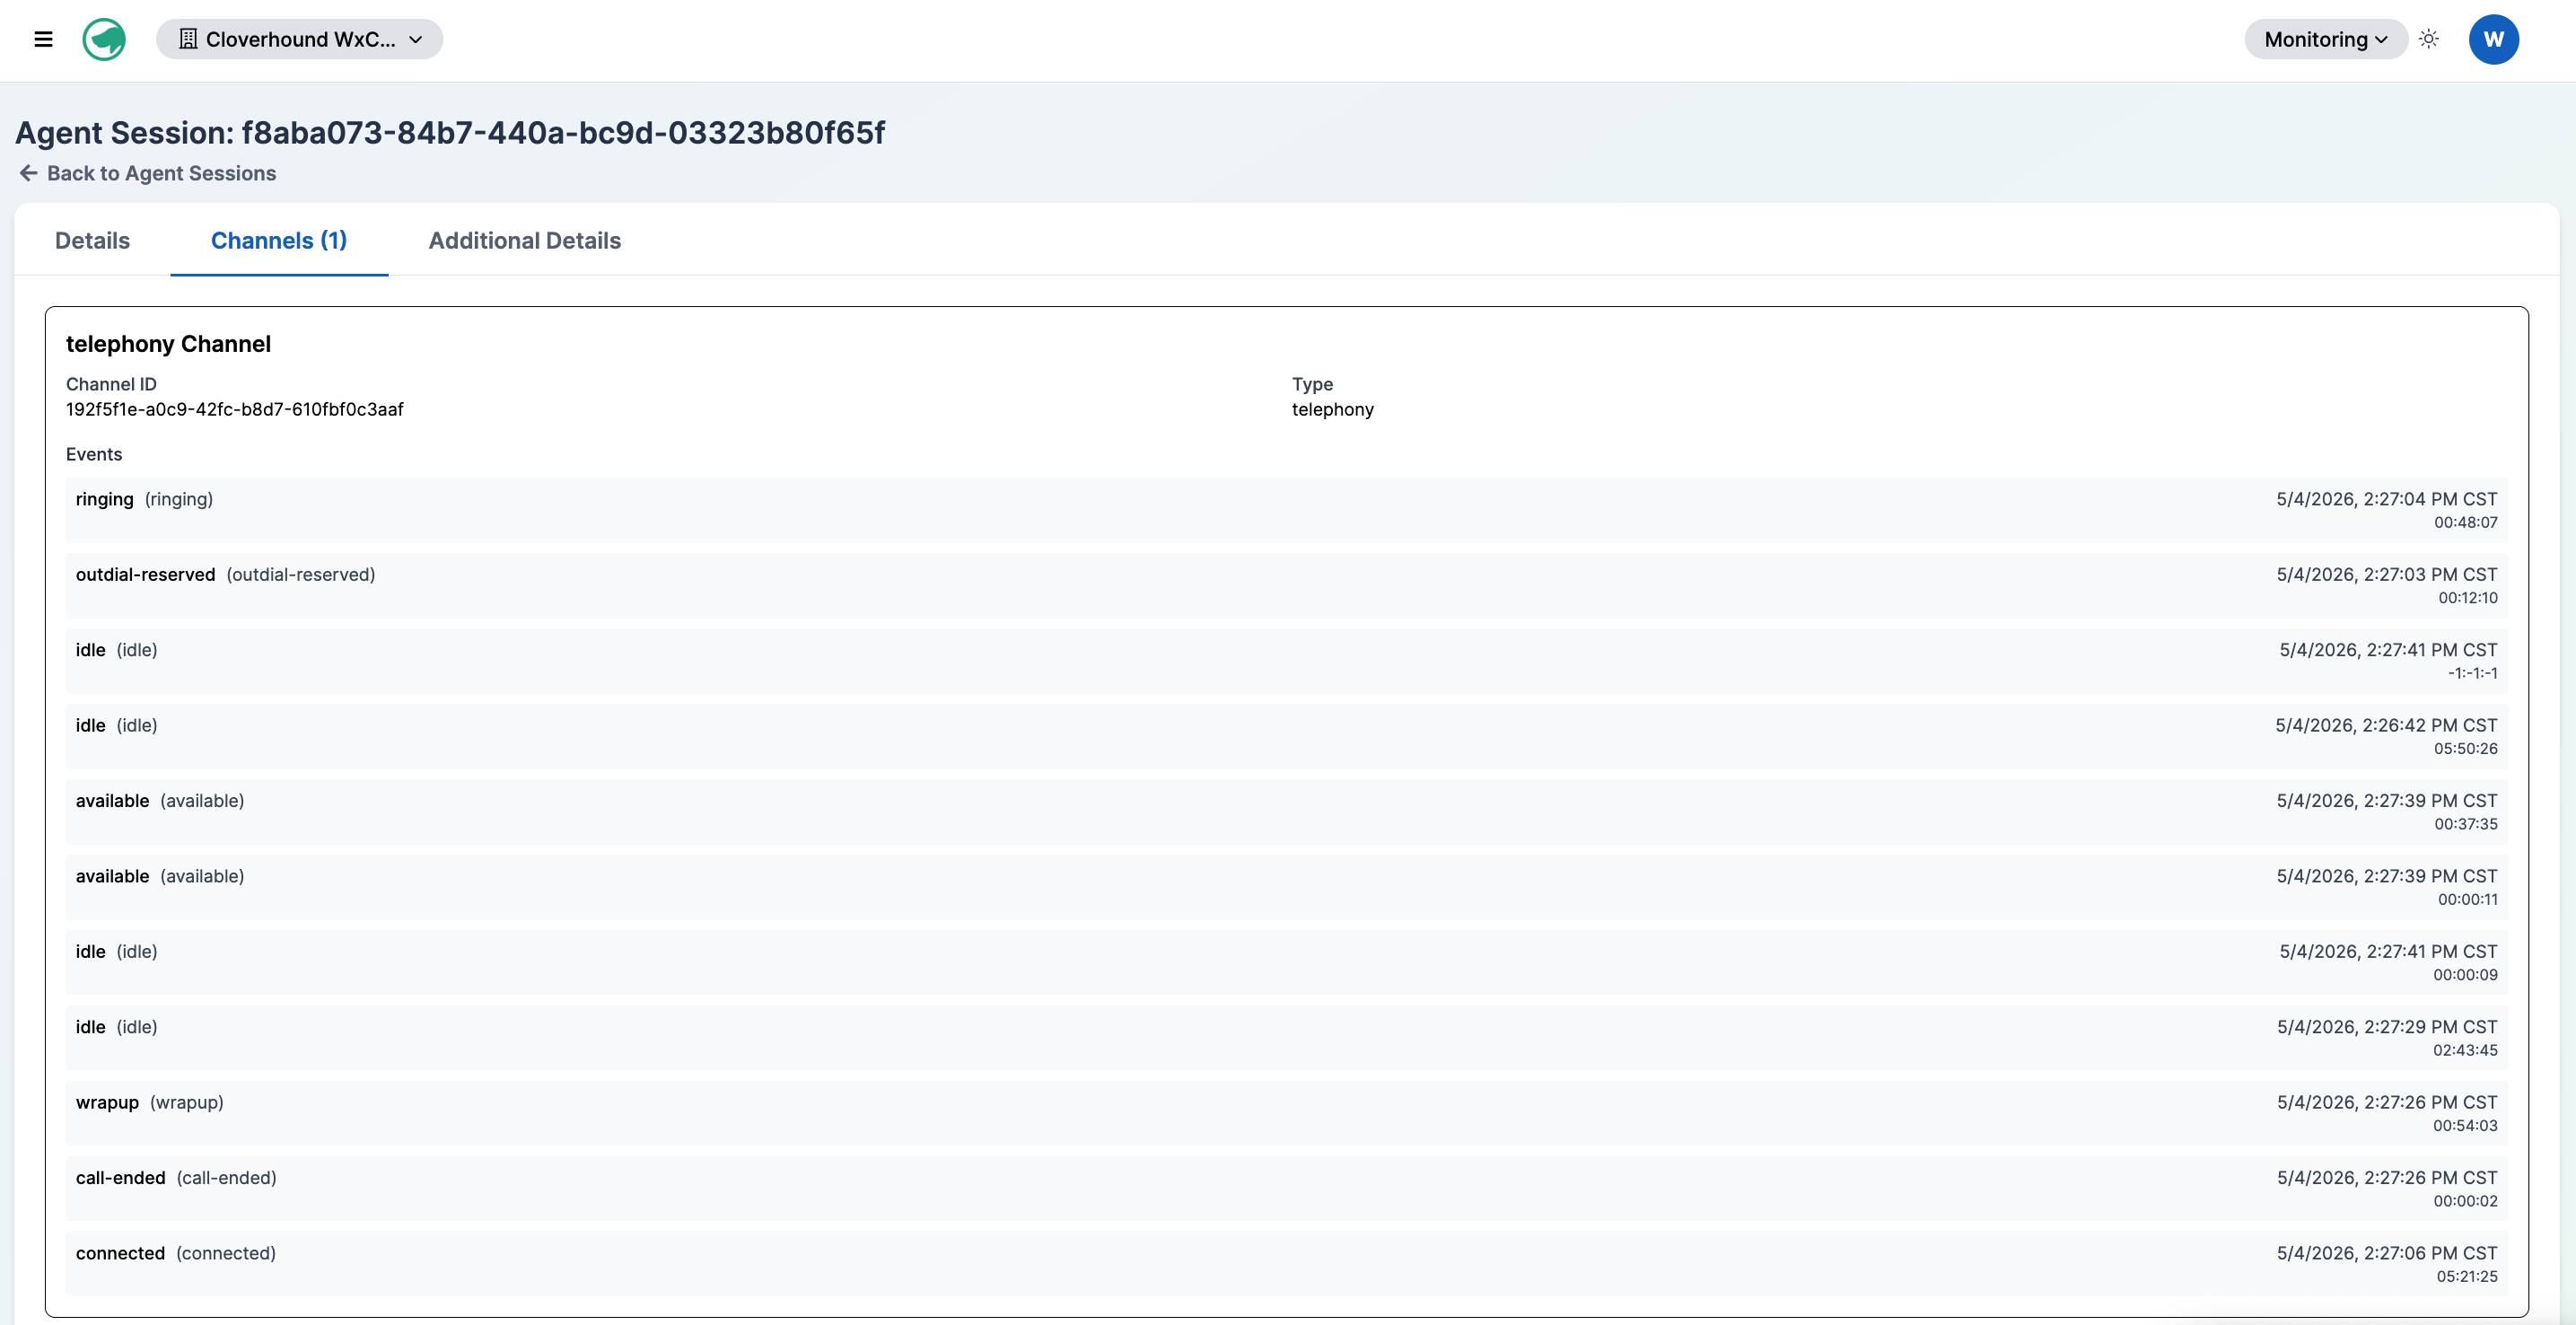
Open the Channels tab if it is present. This tab appears when the session has one or more channels and lists each channel with its type, ID, and any recorded events. Each event shows the activity name, timestamps, state transitions, and queue name when available.
-
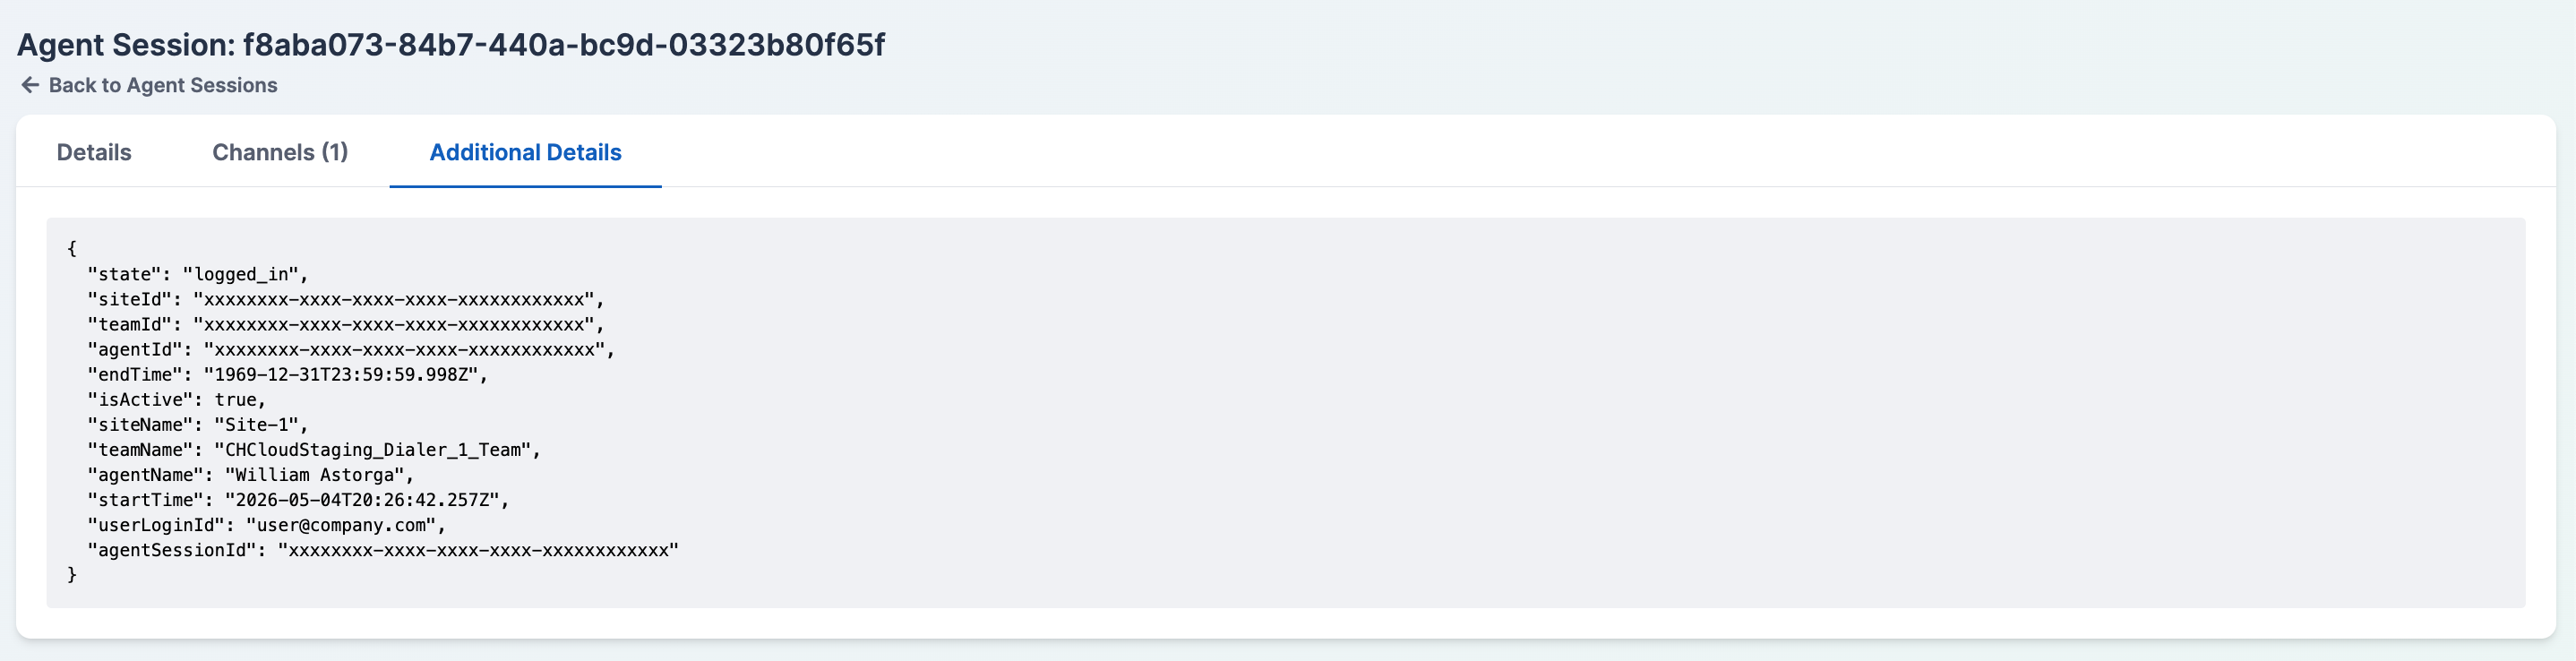
Open the Additional Details tab if it is present. This tab shows the raw provider payload for the session.
Filtering Agent Sessions
-
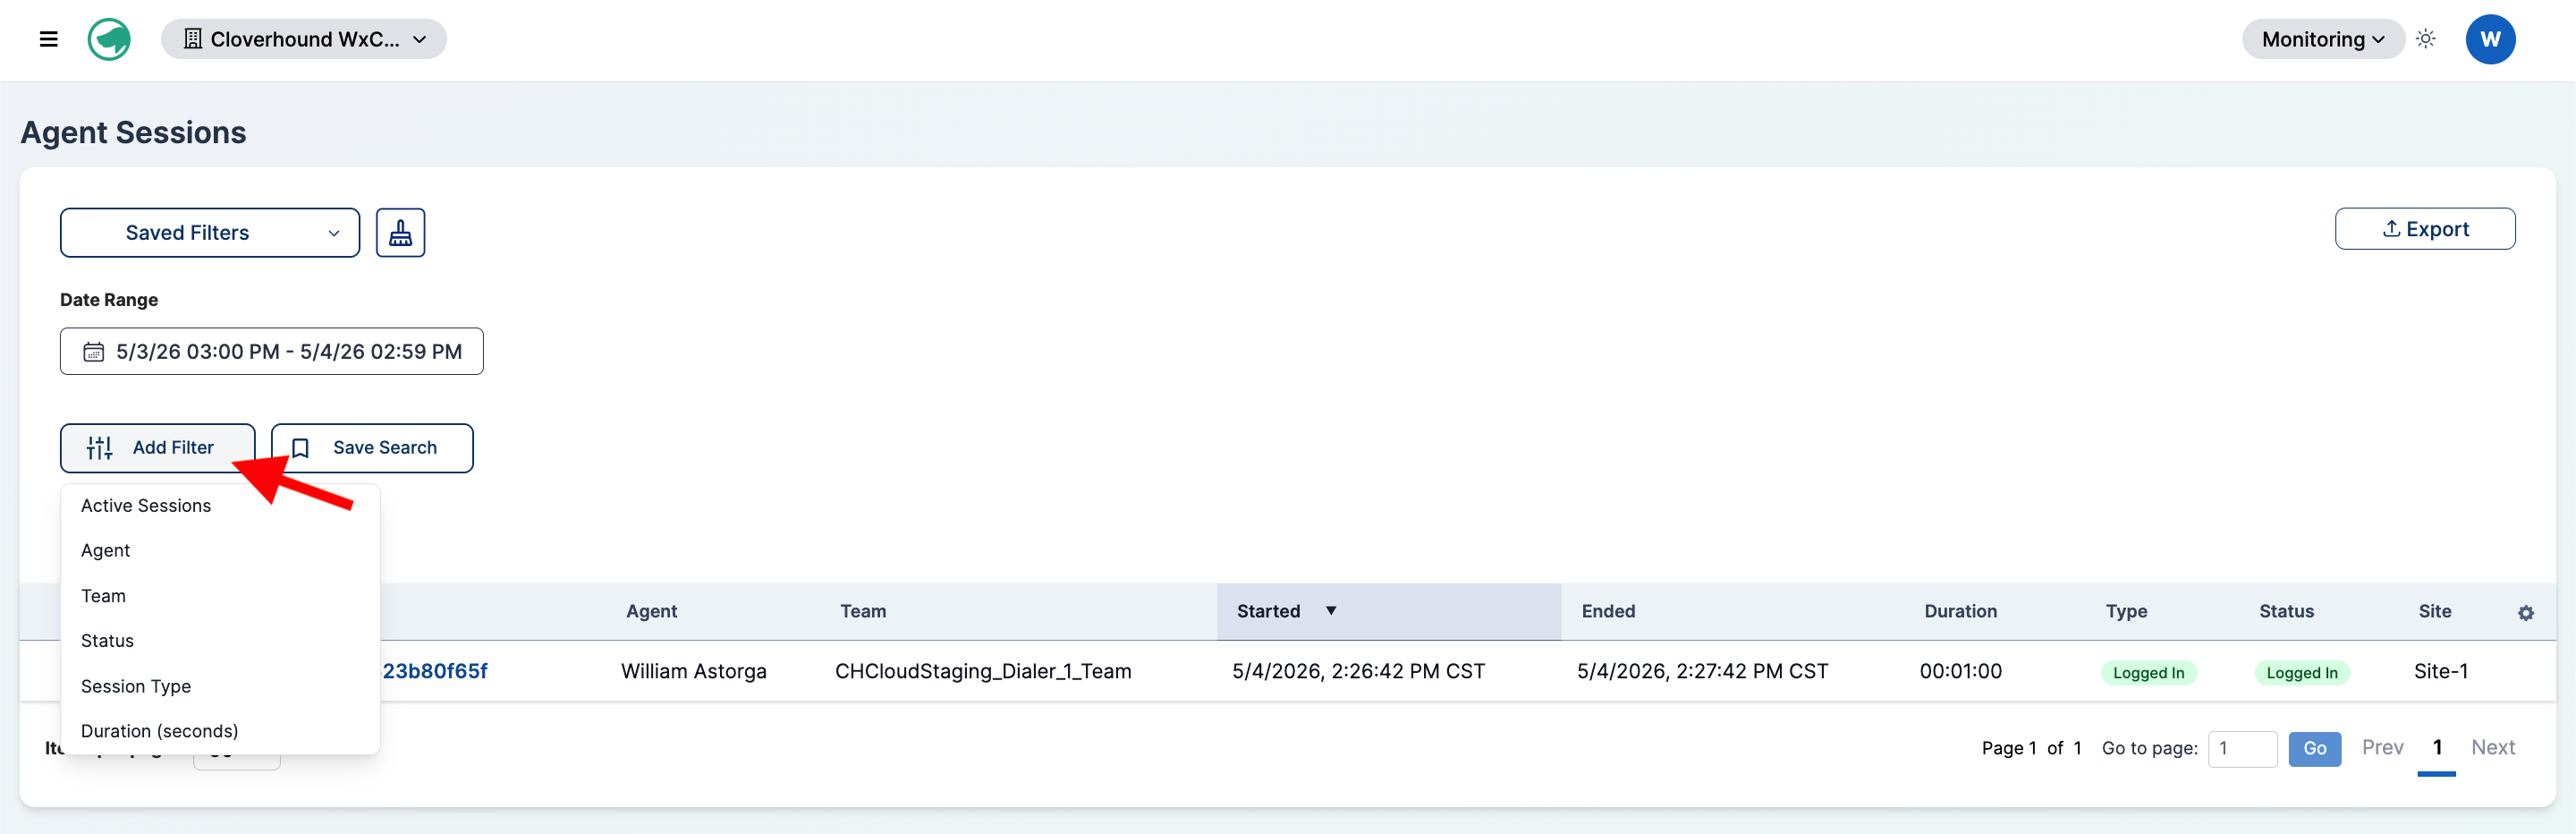
Select a Filter Option from the filter list on the left side of the page. The available filters are:
- Date Range — Always visible. Select a start and end date and time to bound the results.
- Active Sessions — Toggle to show only sessions that are currently active.
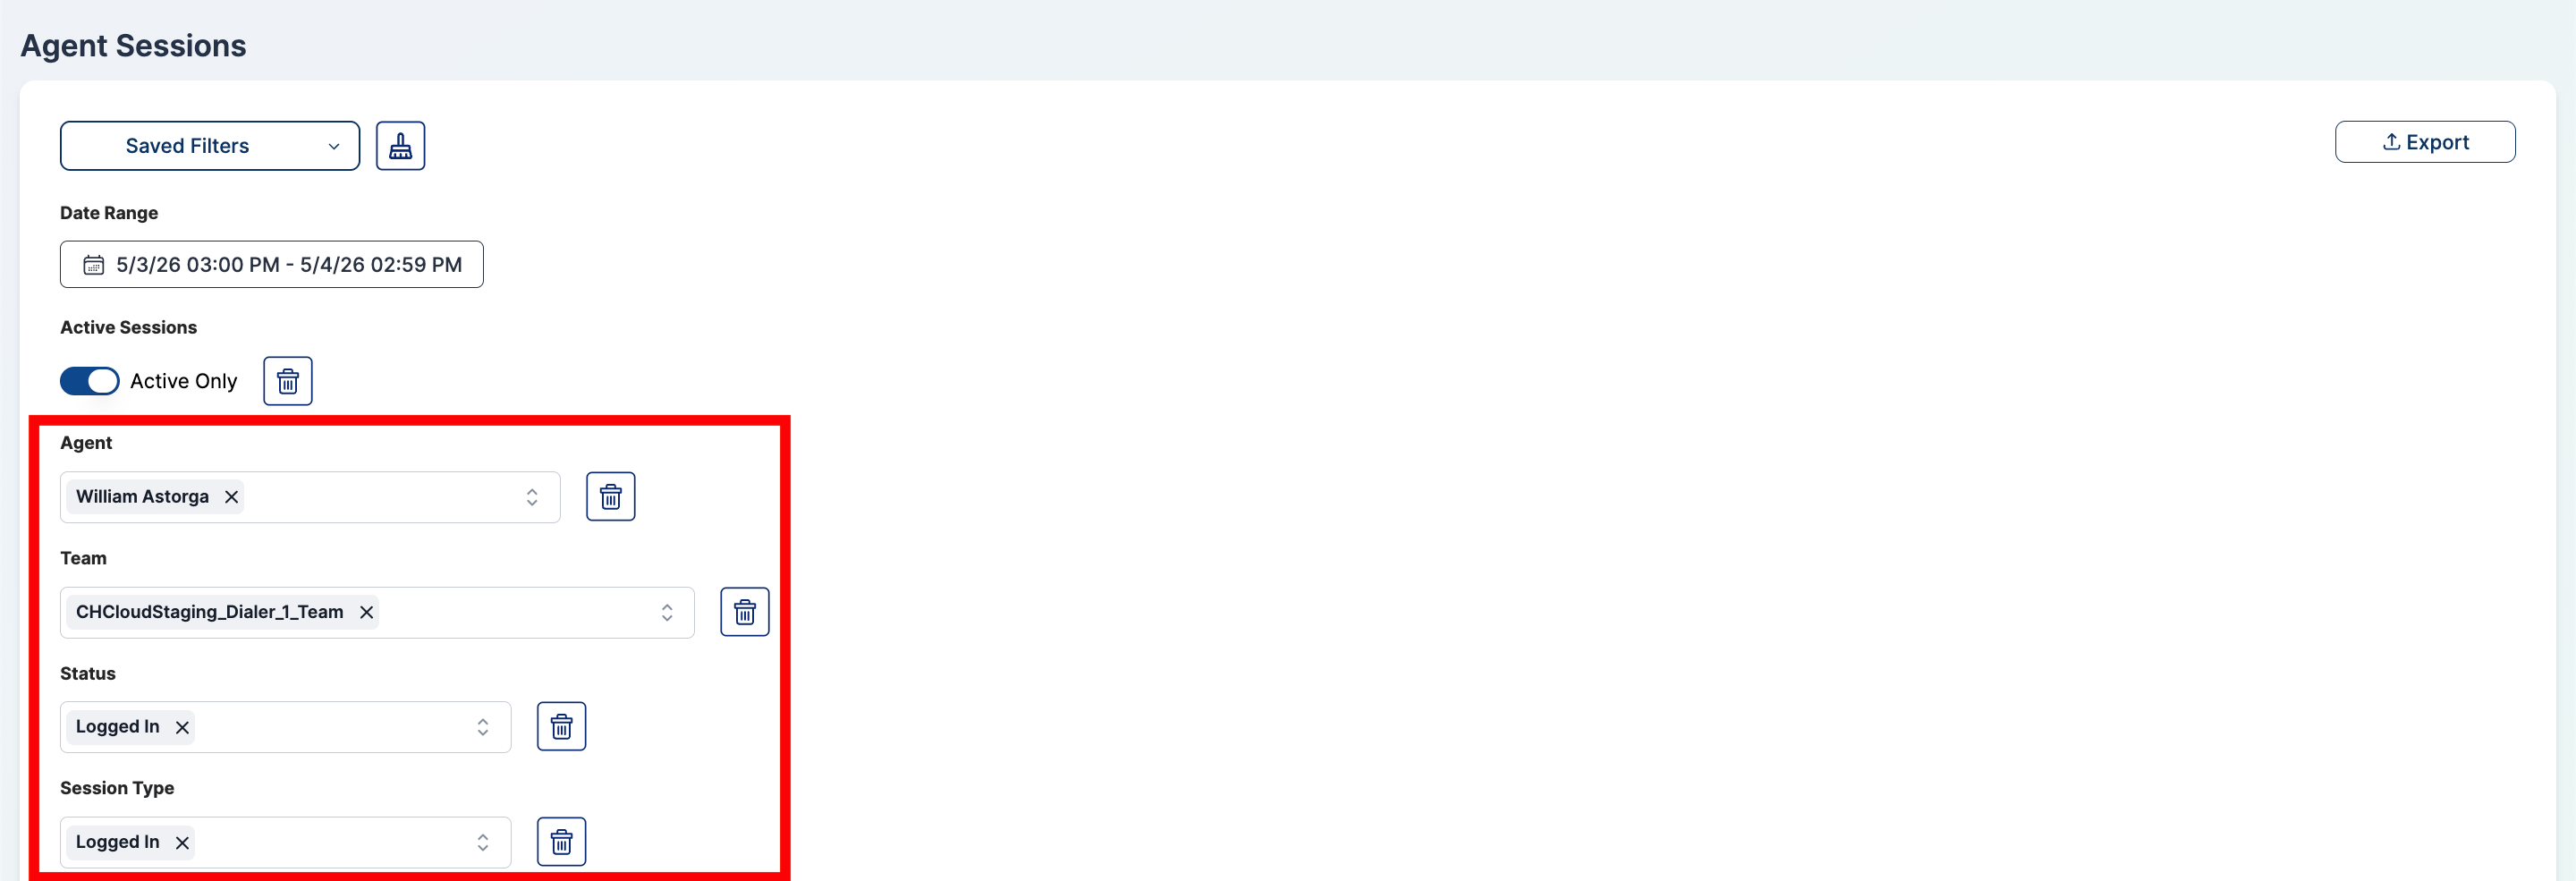
- Agent — Multi-select of agents in your organization.
- Team — Multi-select of teams in your organization.
- Status — Multi-select with Logged In and Logged Out.
- Session Type — Multi-select with Logged In and Logged Out.
- Duration (seconds) — Numeric comparison on session duration.
-
Set the Filter Condition. The inputs depend on the filter you pick:
-
For Date Range, pick the start and end date and time.
-
For Active Sessions, click the toggle to enable Active Only.
-
For Agent, Team, Status, and Session Type, select one or more values from the combobox.
-
For Duration (seconds), choose a comparison operator (
>,<,>=, or<=) and enter a number of seconds.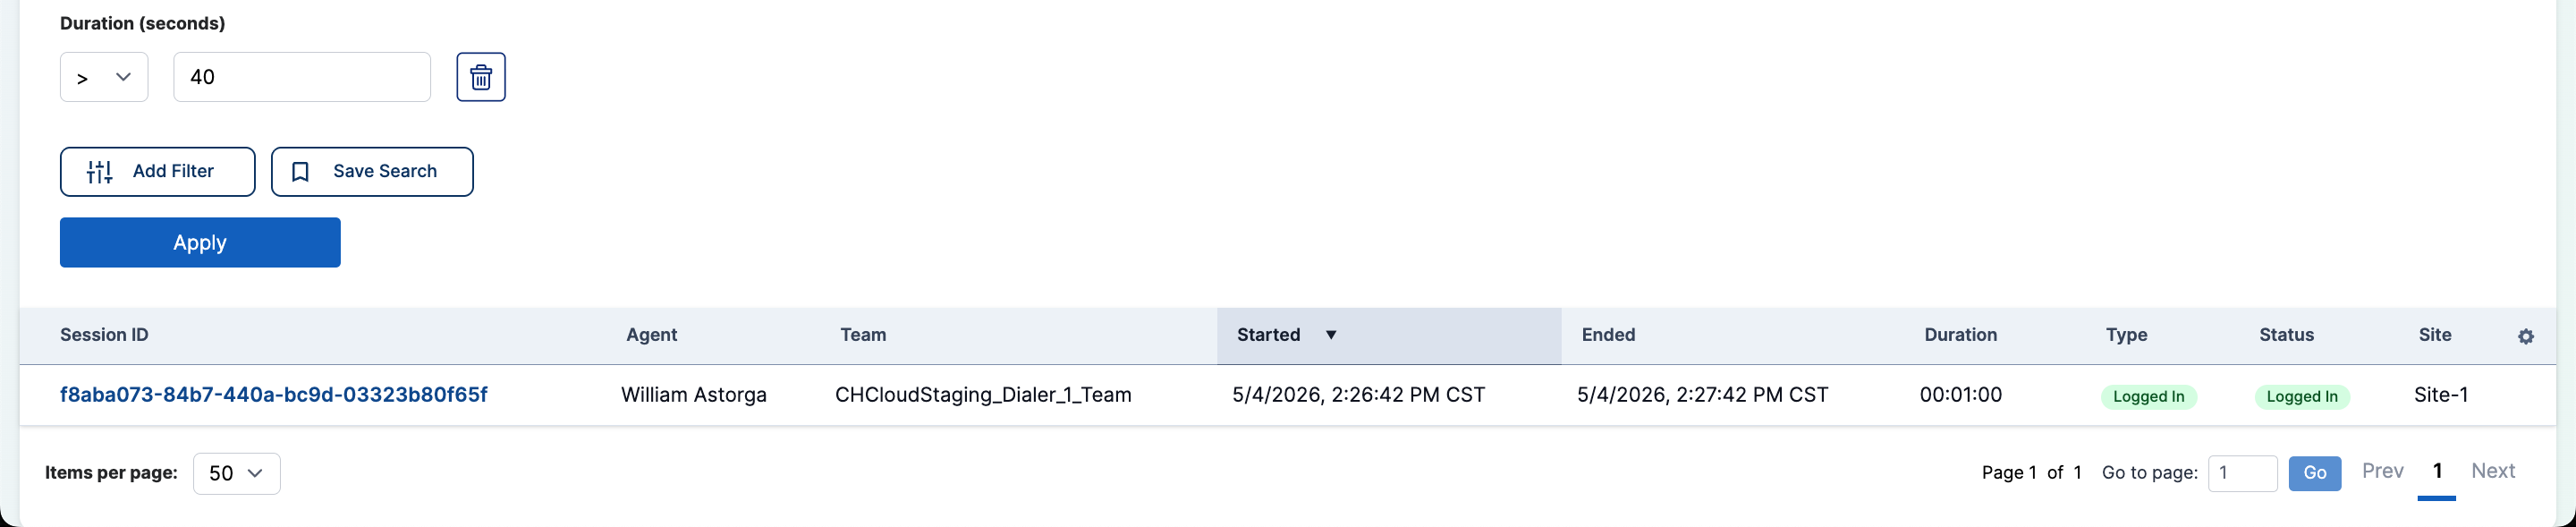
-
-
Remove a Filter (Optional):
- Click the Trash Icon next to a filter to remove it.
Applying the Filters
-
Click the Apply button to update the table with your filter selections.
-
Review the Results. The table refreshes to show only sessions that match every active filter.
Saving Filters
You can save a filter configuration for the Agent Sessions page and load it later. Saved filters are scoped to the Agent Sessions page and to your user account.
-
Configure the filters you want to save.
-
Click the Save Search button and enter a name for the configuration. Saving with an existing name overwrites the previous filter.
-
Click the Saved Filters button to load or delete a saved configuration.
Exporting Agent Sessions
-
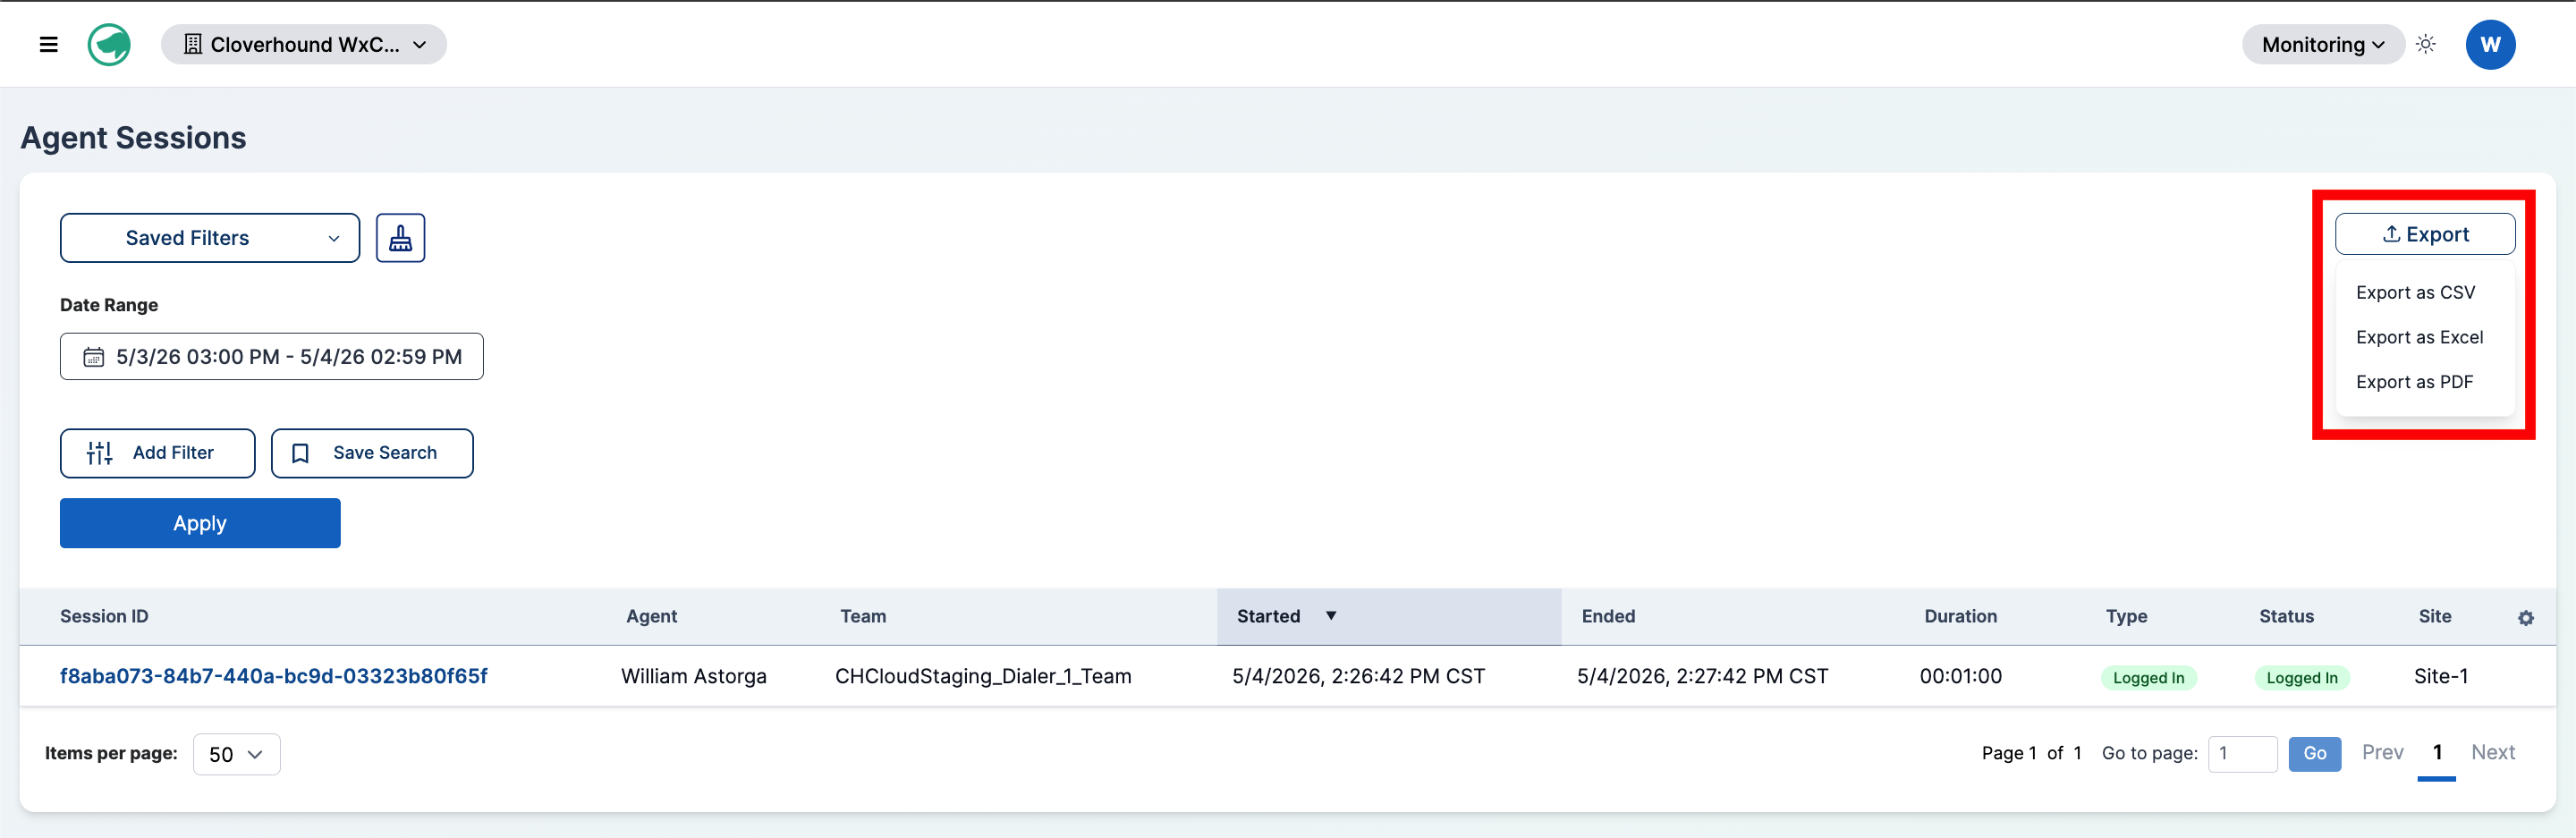
Click the Export button above the table.
-
Choose an output format:
- Export as CSV
- Export as Excel
- Export as PDF
-
Wait for the download. The exported file honors the current date range, filters, and sort order. The filename follows the pattern
agent-sessions-<start date>-to-<end date>.<format>.
PDF exports are capped at 1,000 rows. CSV and Excel exports are capped at 10,000 rows. Narrow your filters if you need a smaller slice, or export in multiple passes.
With the Agent Sessions table, you can review agent login activity, drill into individual sessions and their channel events, and export the filtered results for reporting.