Managing Contacts
The Contacts module in Cloverhound Cloud is designed to make managing contact information simple and efficient. This guide walks you through the steps to create, edit, and delete a contact.
Creating a New Contact
-
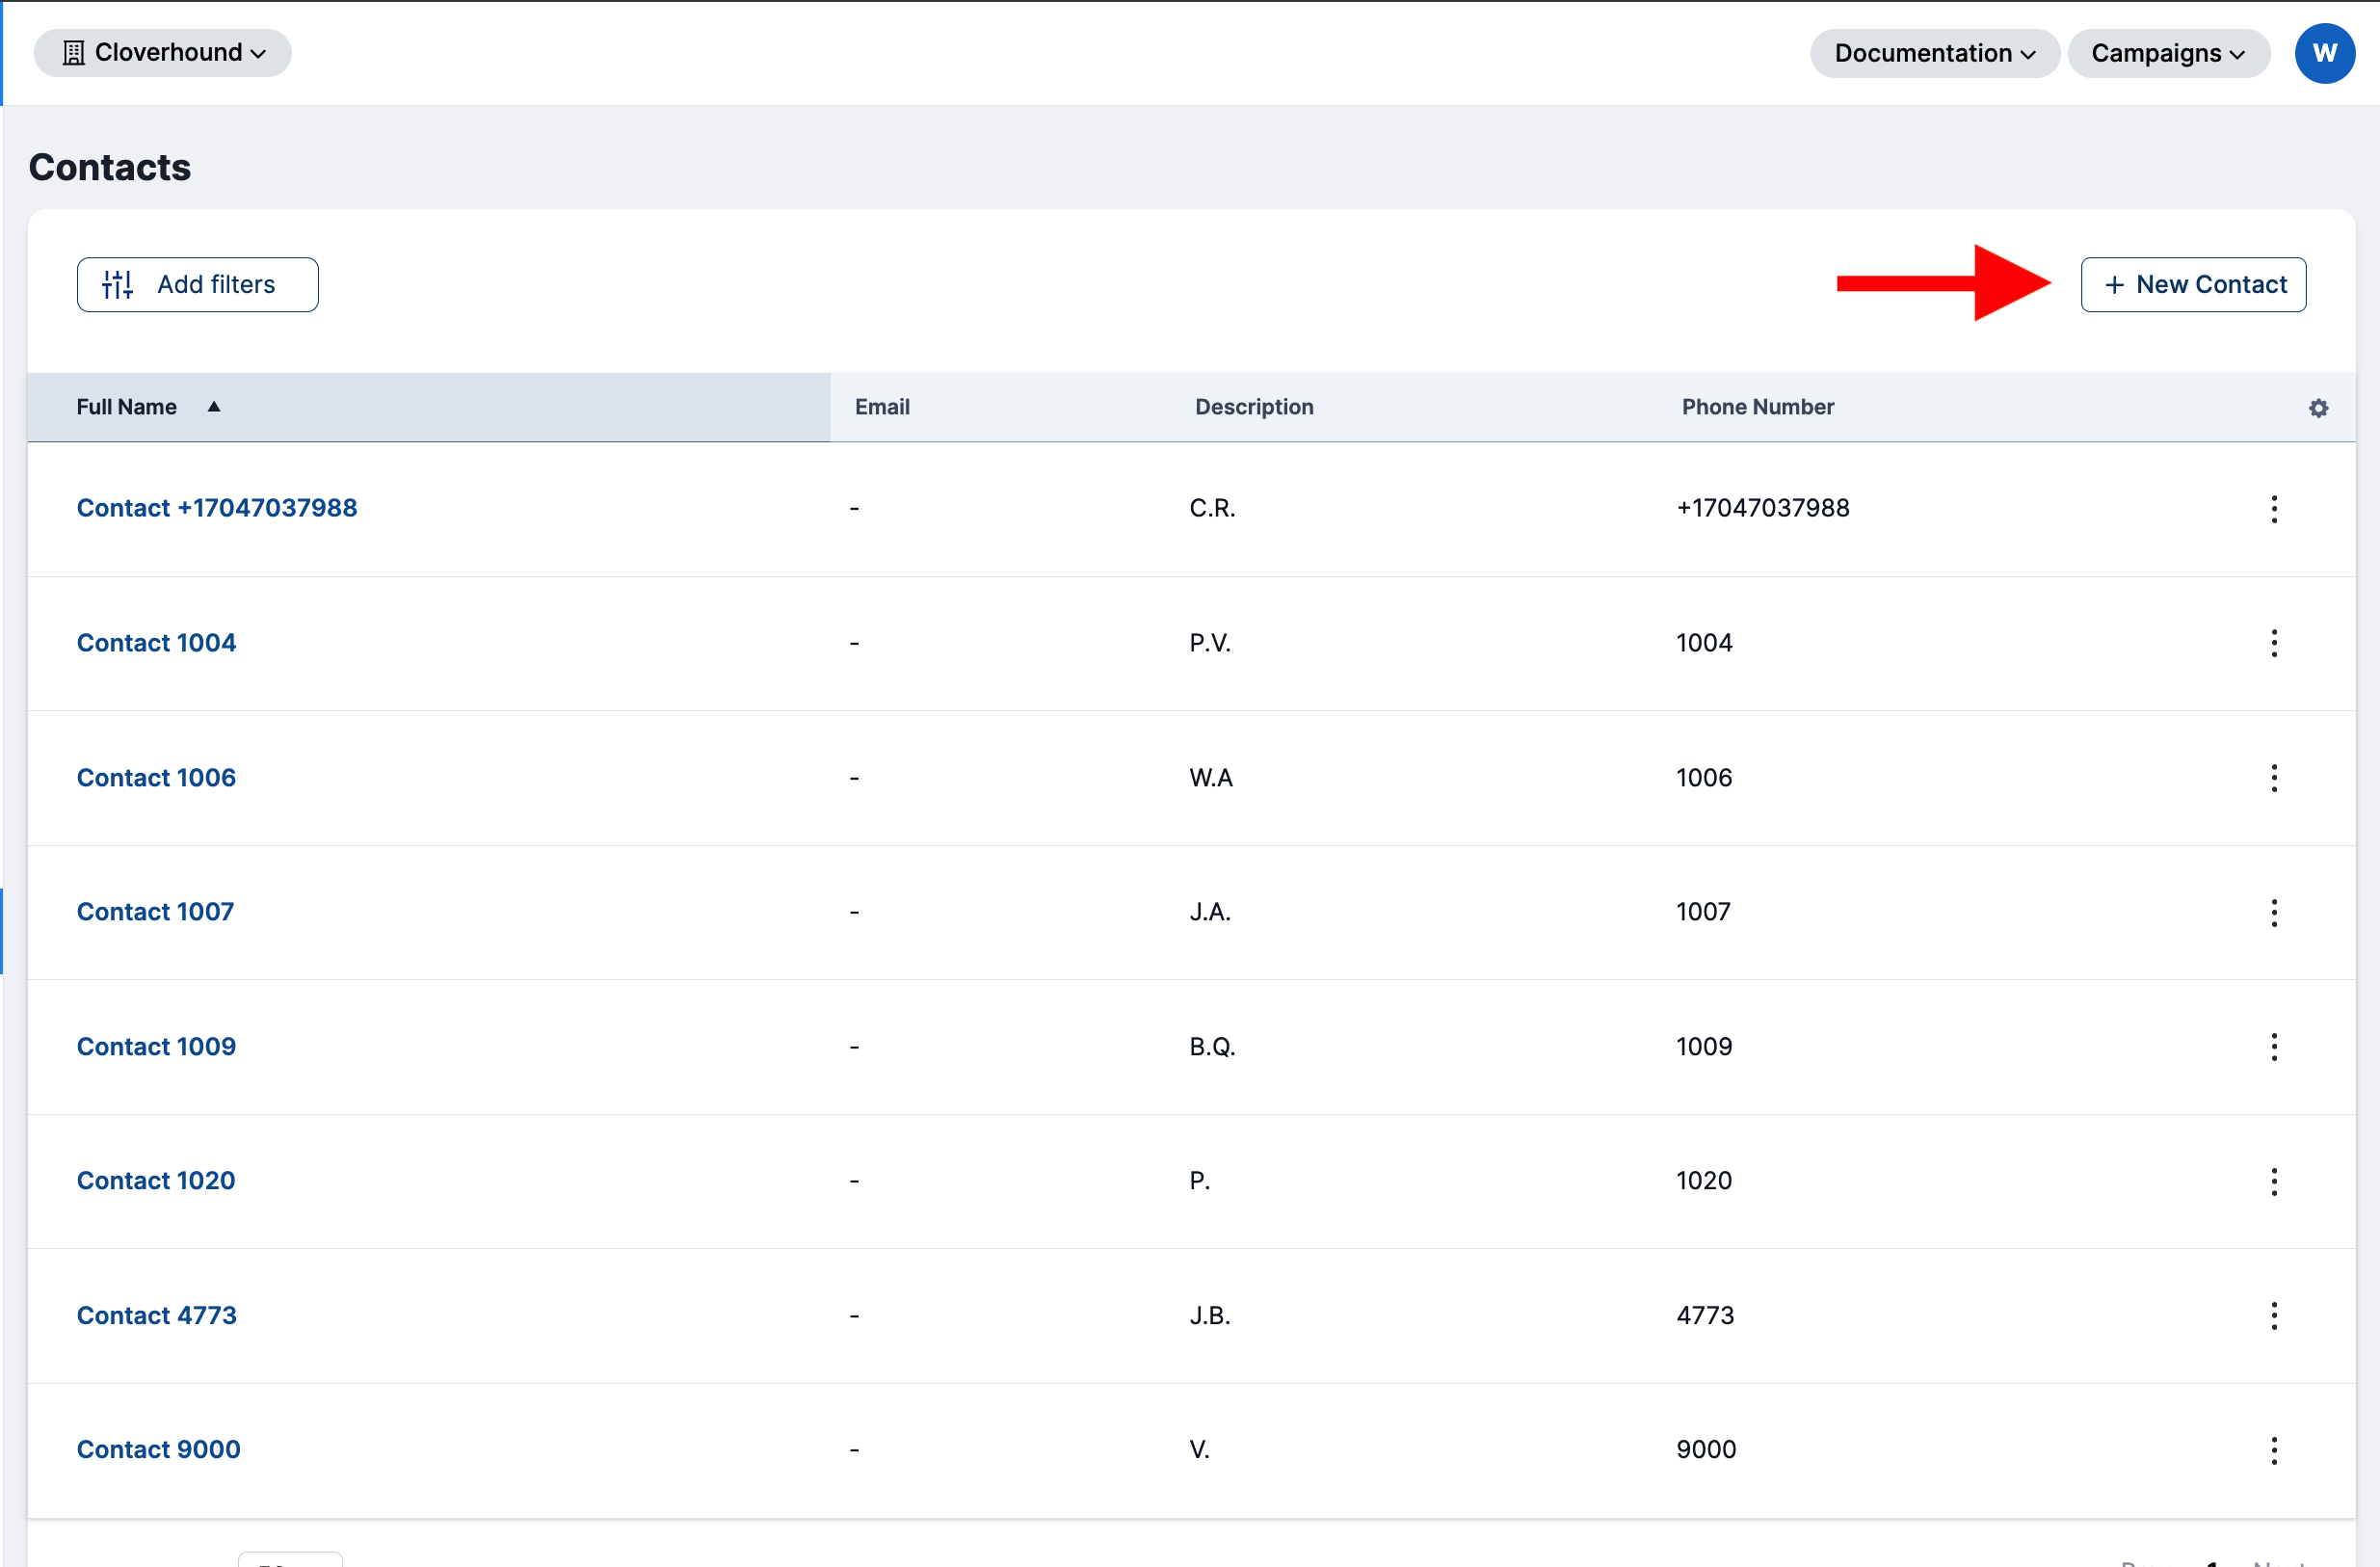
Navigate to the Contacts Menu: Access the Contacts module by selecting "Contacts" from the main menu.
-
Click the New Contact Button: On the Contacts page, locate and click the New Contact button to open the contact creation form.
-
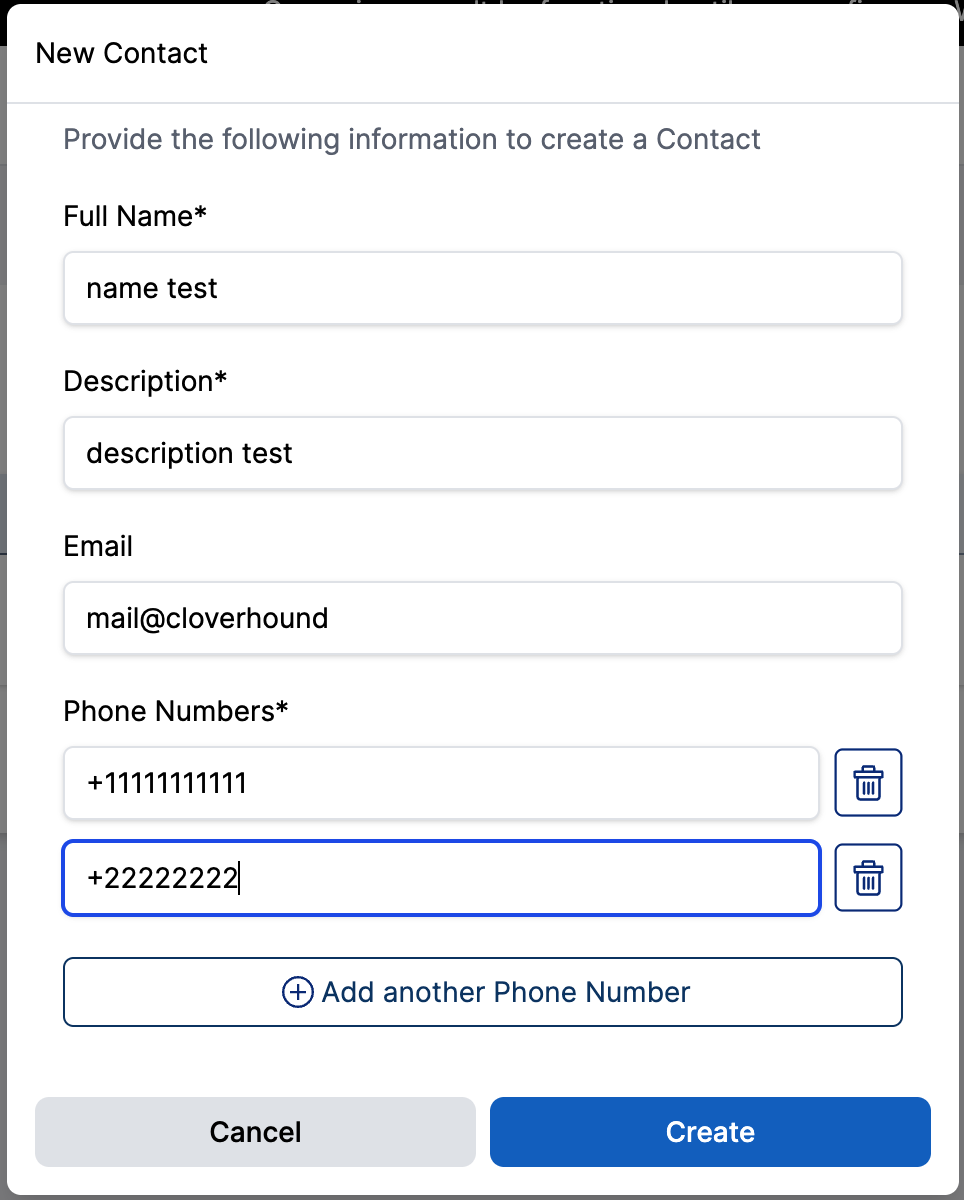
Fill Out the Contact Details:
- Full Name (Required): Enter the full name of the contact.
- Email: Add the email address of the contact (optional but recommended).
- Phone Number (Required): Enter at least one phone number.
- To add more phone numbers, click the Add New Number button.
- To remove a phone number, click the Trash Icon next to the input field.
-
Save the Contact: After entering the required information, click Create to create the contact.

Editing or Deleting a Contact
-
Locate the Contact:
- Use the search bar or filter options to find the contact you want to edit or delete.
-
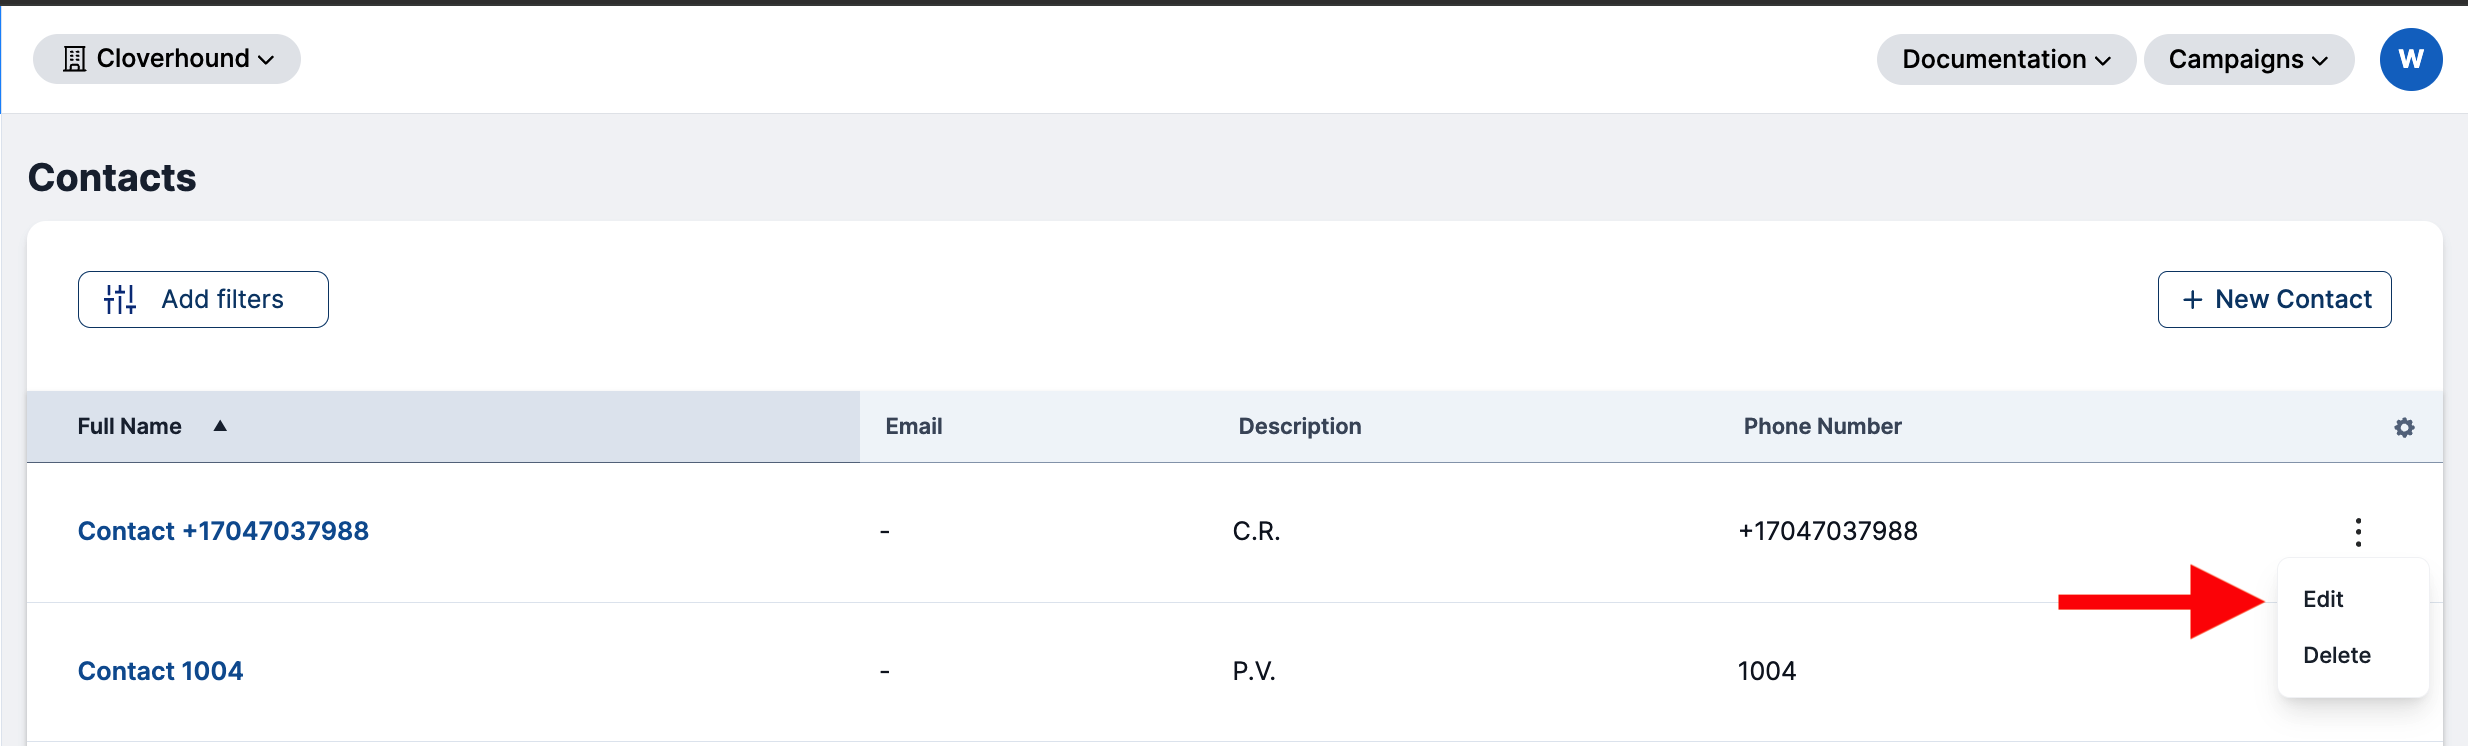
Access the Actions Menu:
- Click the Three Dots Button (⋮) next to the contact's information to open the actions menu.

-
Edit a Contact:
- Select Edit from the actions menu.
- Update the contact details as needed and click Save to apply the changes.
-
Delete a Contact:
- Select Delete from the actions menu.
- Confirm the deletion to remove the contact permanently.
Tips for Managing Contacts
- Use the filter search to quickly locate specific contacts by name, email, or phone number.
- Keep the contact list organized by regularly updating outdated information or removing inactive contacts.
- Leverage the ability to add multiple phone numbers to ensure all relevant contact information is stored.
By following these steps, you can easily manage your organization's contacts, ensuring that your database remains accurate and up-to-date.