Cloverhound Cloud Widget
Opening and Closing the Widget
Click the campaign icon to toggle the widget open or closed.
The widget will also close when you click outside its area, provided that the widget placement and locationType setting are appropriately configured.
Preview Tab
The preview tab allows you to:
- Review preview campaign record details
- Call preview campaign records
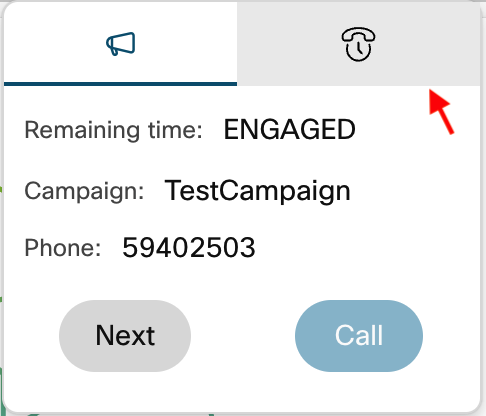
The widget behaves differently depending on the call status and user actions.
Collecting Preview Records
The widget will fetch a new customer record in these scenarios:
- When an agent first opens the widget after logging in
- When the preview time expires and the widget is reopened
- When an agent clicks "Refresh" with no data available
- After a failed call attempt and the agent clicks "Next"
- When an agent clicks "Skip", if the allowSkipRecord setting is enabled.
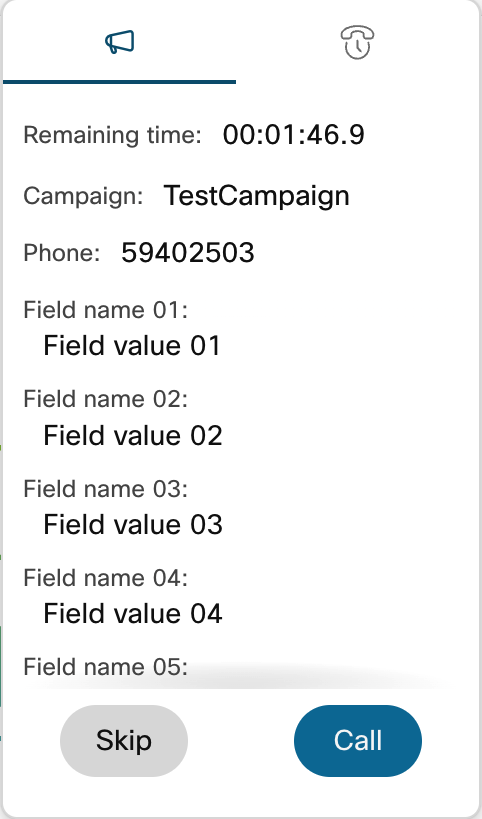
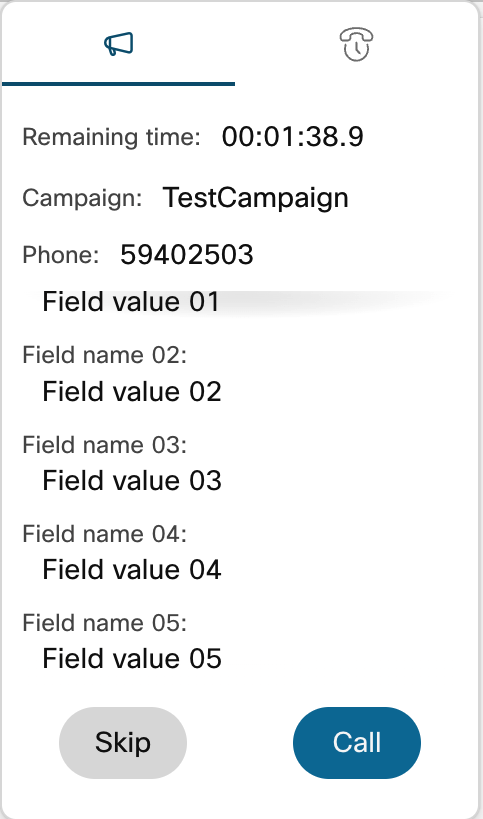
Viewing Records
When a customer record is found, it will be displayed along with any additional information. You may need to scroll to see all details if there is extensive additional information.
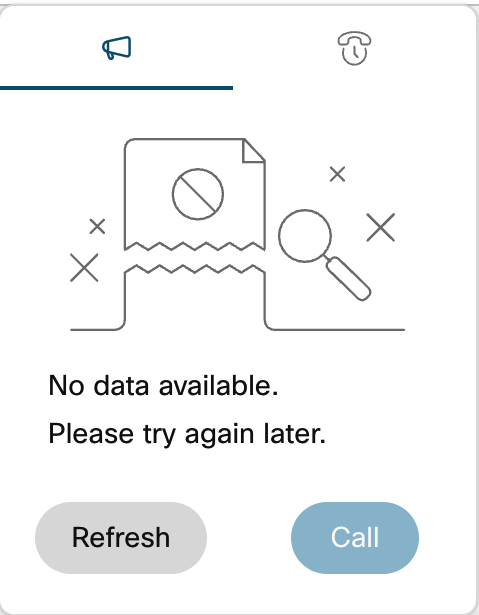
If no record is available, you'll see this message:
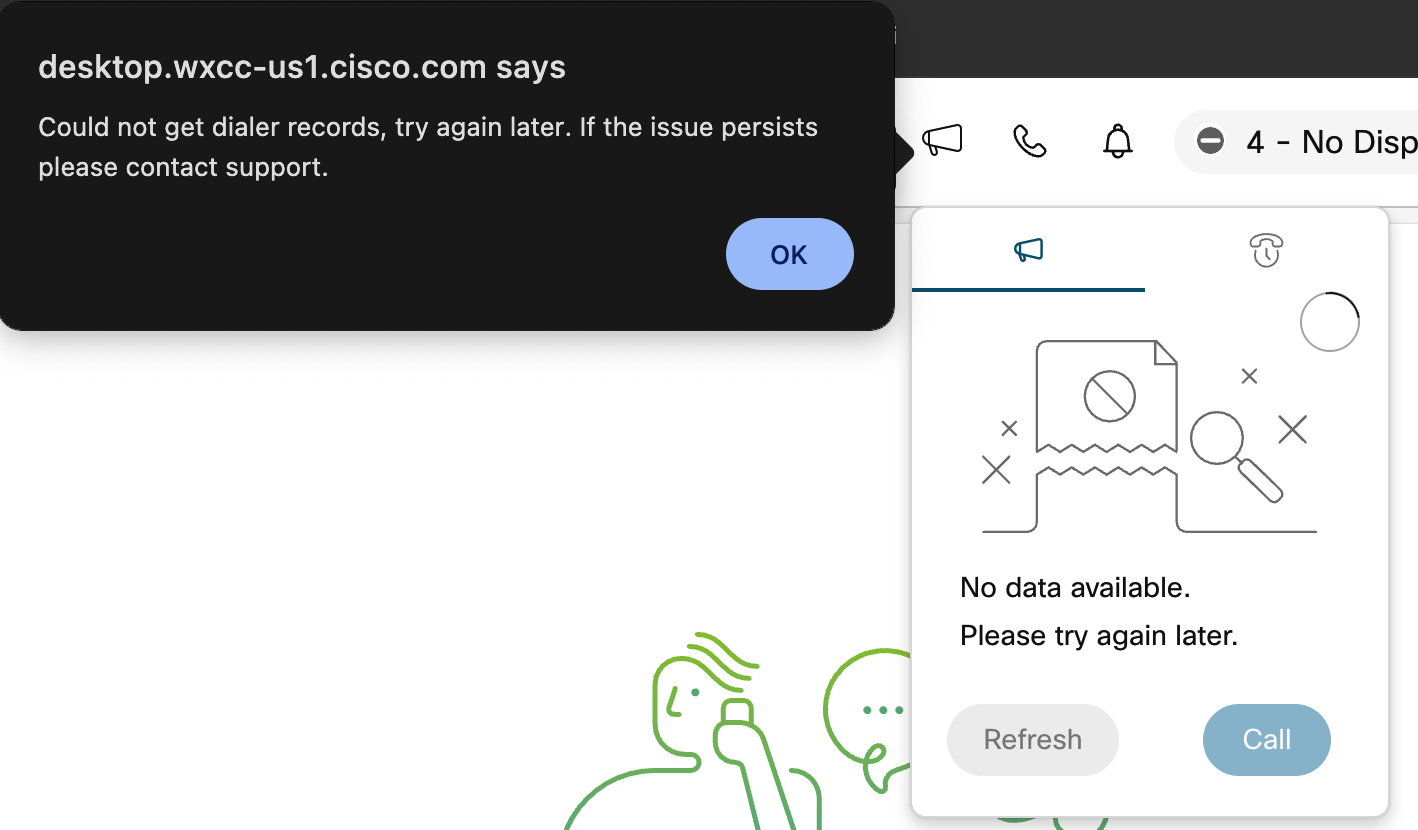
If an error occurs while requesting data, you'll see a browser alert:
Interacting with Preview Records
Making Calls
When you click "Call", the widget initiates a Webex Contact Center outdial using the preview record's phone number and one of these ANI options (in priority order):
- Customer ANI from the preview record
- Default ANI from the preview record
- First ANI from the outdial ANI list
Other Actions
- Skip: Available before any other action is taken with the record, if the allowSkipRecord setting is enabled
- Refresh: Appears when no data is available after checking for a preview record
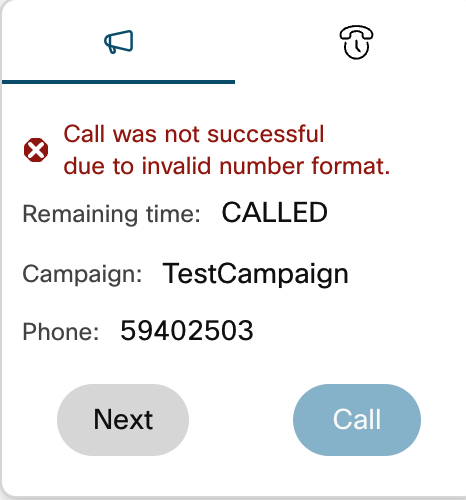
- Next: Shows up after an unsuccessful call attempt

If a call fails, the widget will display an error message and the "Next" button:
Callback Tab
The callback tab allows you to:
- Review campaign record callback details
- Schedule callback for a campaign record
- Remove the callback from a campaign record
The callback tab is enabled after the record is called. Check out the Making calls section above for more details.
Viewing Record Callback
- Click the callback icon to switch to the Callback tab.
- The widget will fetch and display the campaign record callback details.

Remember that if you are working on a record from a preview campaign, you can navigate back to the Preview tab by clicking the campaign icon within the widget, if required.
If the record is associated with a different type of campaign, namely predictive, progressive, or IVR, you can set up a general callback for that contact using the widget.
For predictive, progressive, or IVR campaign records, you will not see the callback options for that record at the time the contact is offered to you; these options will only be accessible after the record has been assigned to you.
Additionally, the callback options will continue to be accessible until the call wrap-up time concludes, or until the call ends in the absence of a wrap-up period.
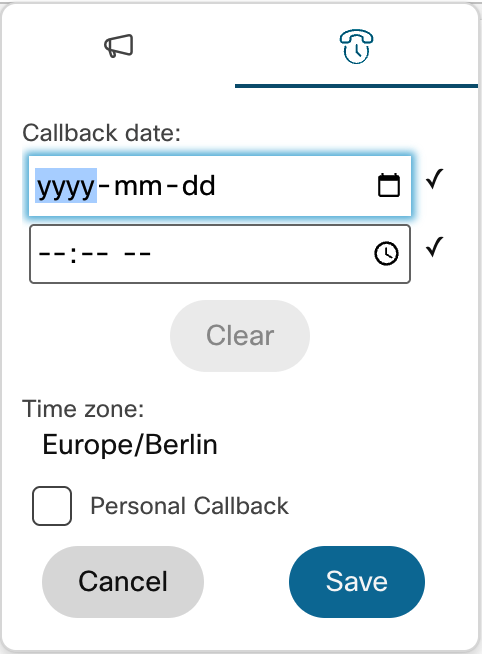
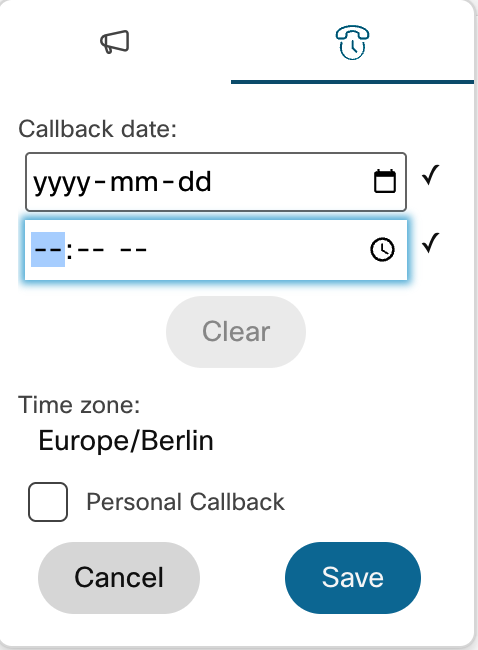
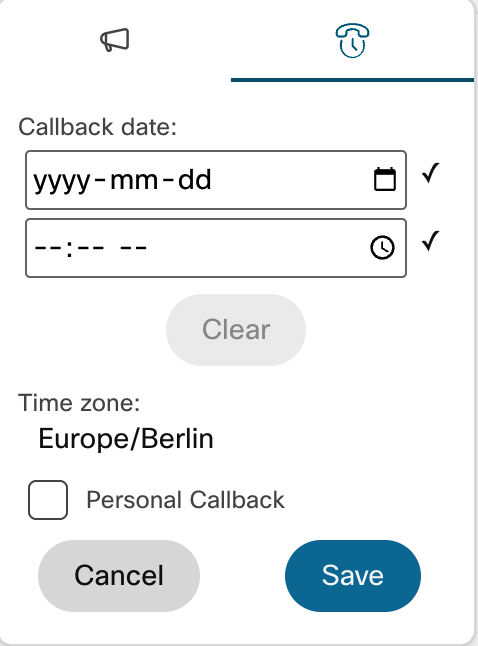
Scheduling a Record Callback
-
Click the callback icon to switch to the Callback tab if needed.
-
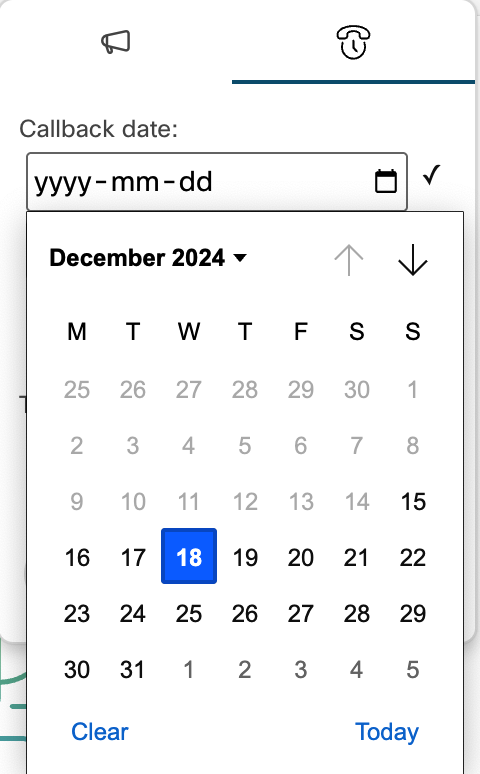
Enter the date on the date input field.
- By clicking each of the date part (
yyyy,mmanddd) and typing its value.
- By clicking the calendar icon and selecting the date on the calendar picker.
- By clicking each of the date part (
-
Enter the time on the time input field.
- By clicking each of the time part (
--:-- --if 12h format, or--:--if 24h format) and typing its value.
- By clicking the time input field and selecting the time with its picker.
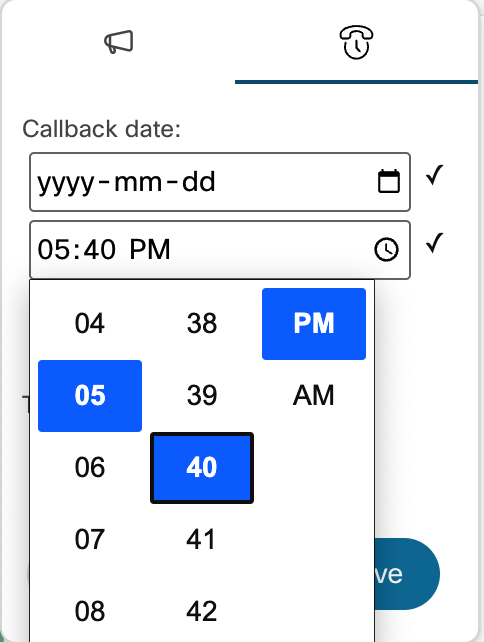
- By clicking each of the time part (
-
Click the checkbox Personal Callback to switch to personal callback if needed. This checkbox will be displayed only when the record is from a preview campaign and the saveCallbacksAsPersonal option is configured to false within the Cloverhound Cloud Widget Configuration settings.
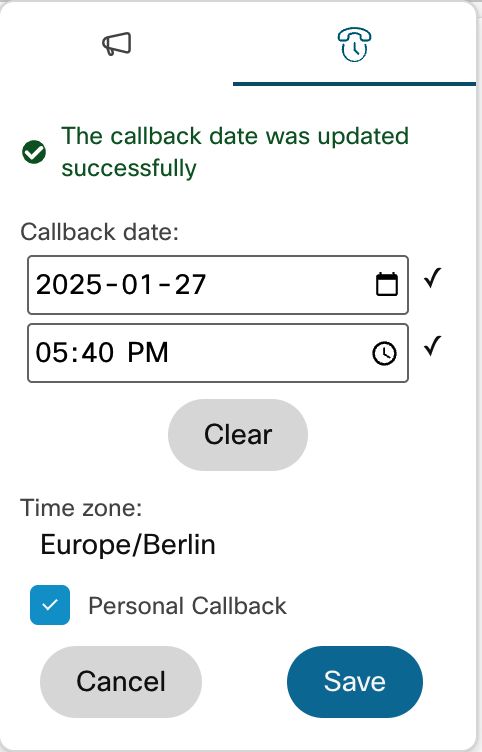
- Click Save to apply the changes.
Removing Callback from Record
-
Click the callback icon to switch to the Callback tab if needed.
-
Click Clear to clear the callback date.
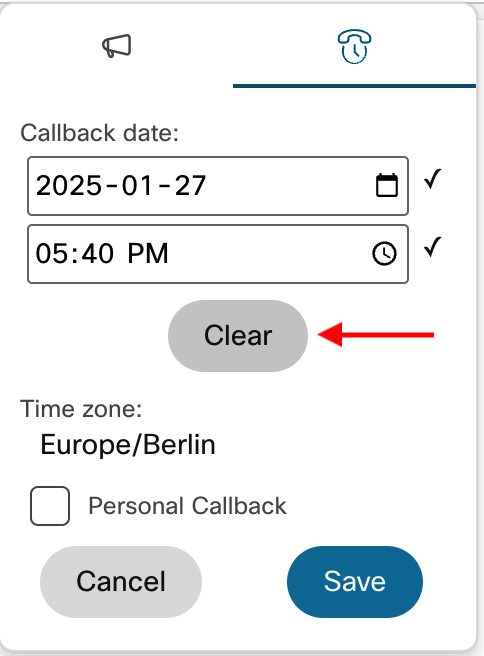
- Click Save to apply the changes.