Creating a Trunk Group
Follow these steps to create a new Trunk Group in the Cloverhound Cloud Campaigns Module:
-
Access the Trunk Groups Section
- Navigate to the Campaigns Module
- In the left-hand navigation, click on Trunk Groups
-
Initiate Trunk Group Creation
- Click the + New Trunk Group button
- A modal window will appear for configuring the group
-
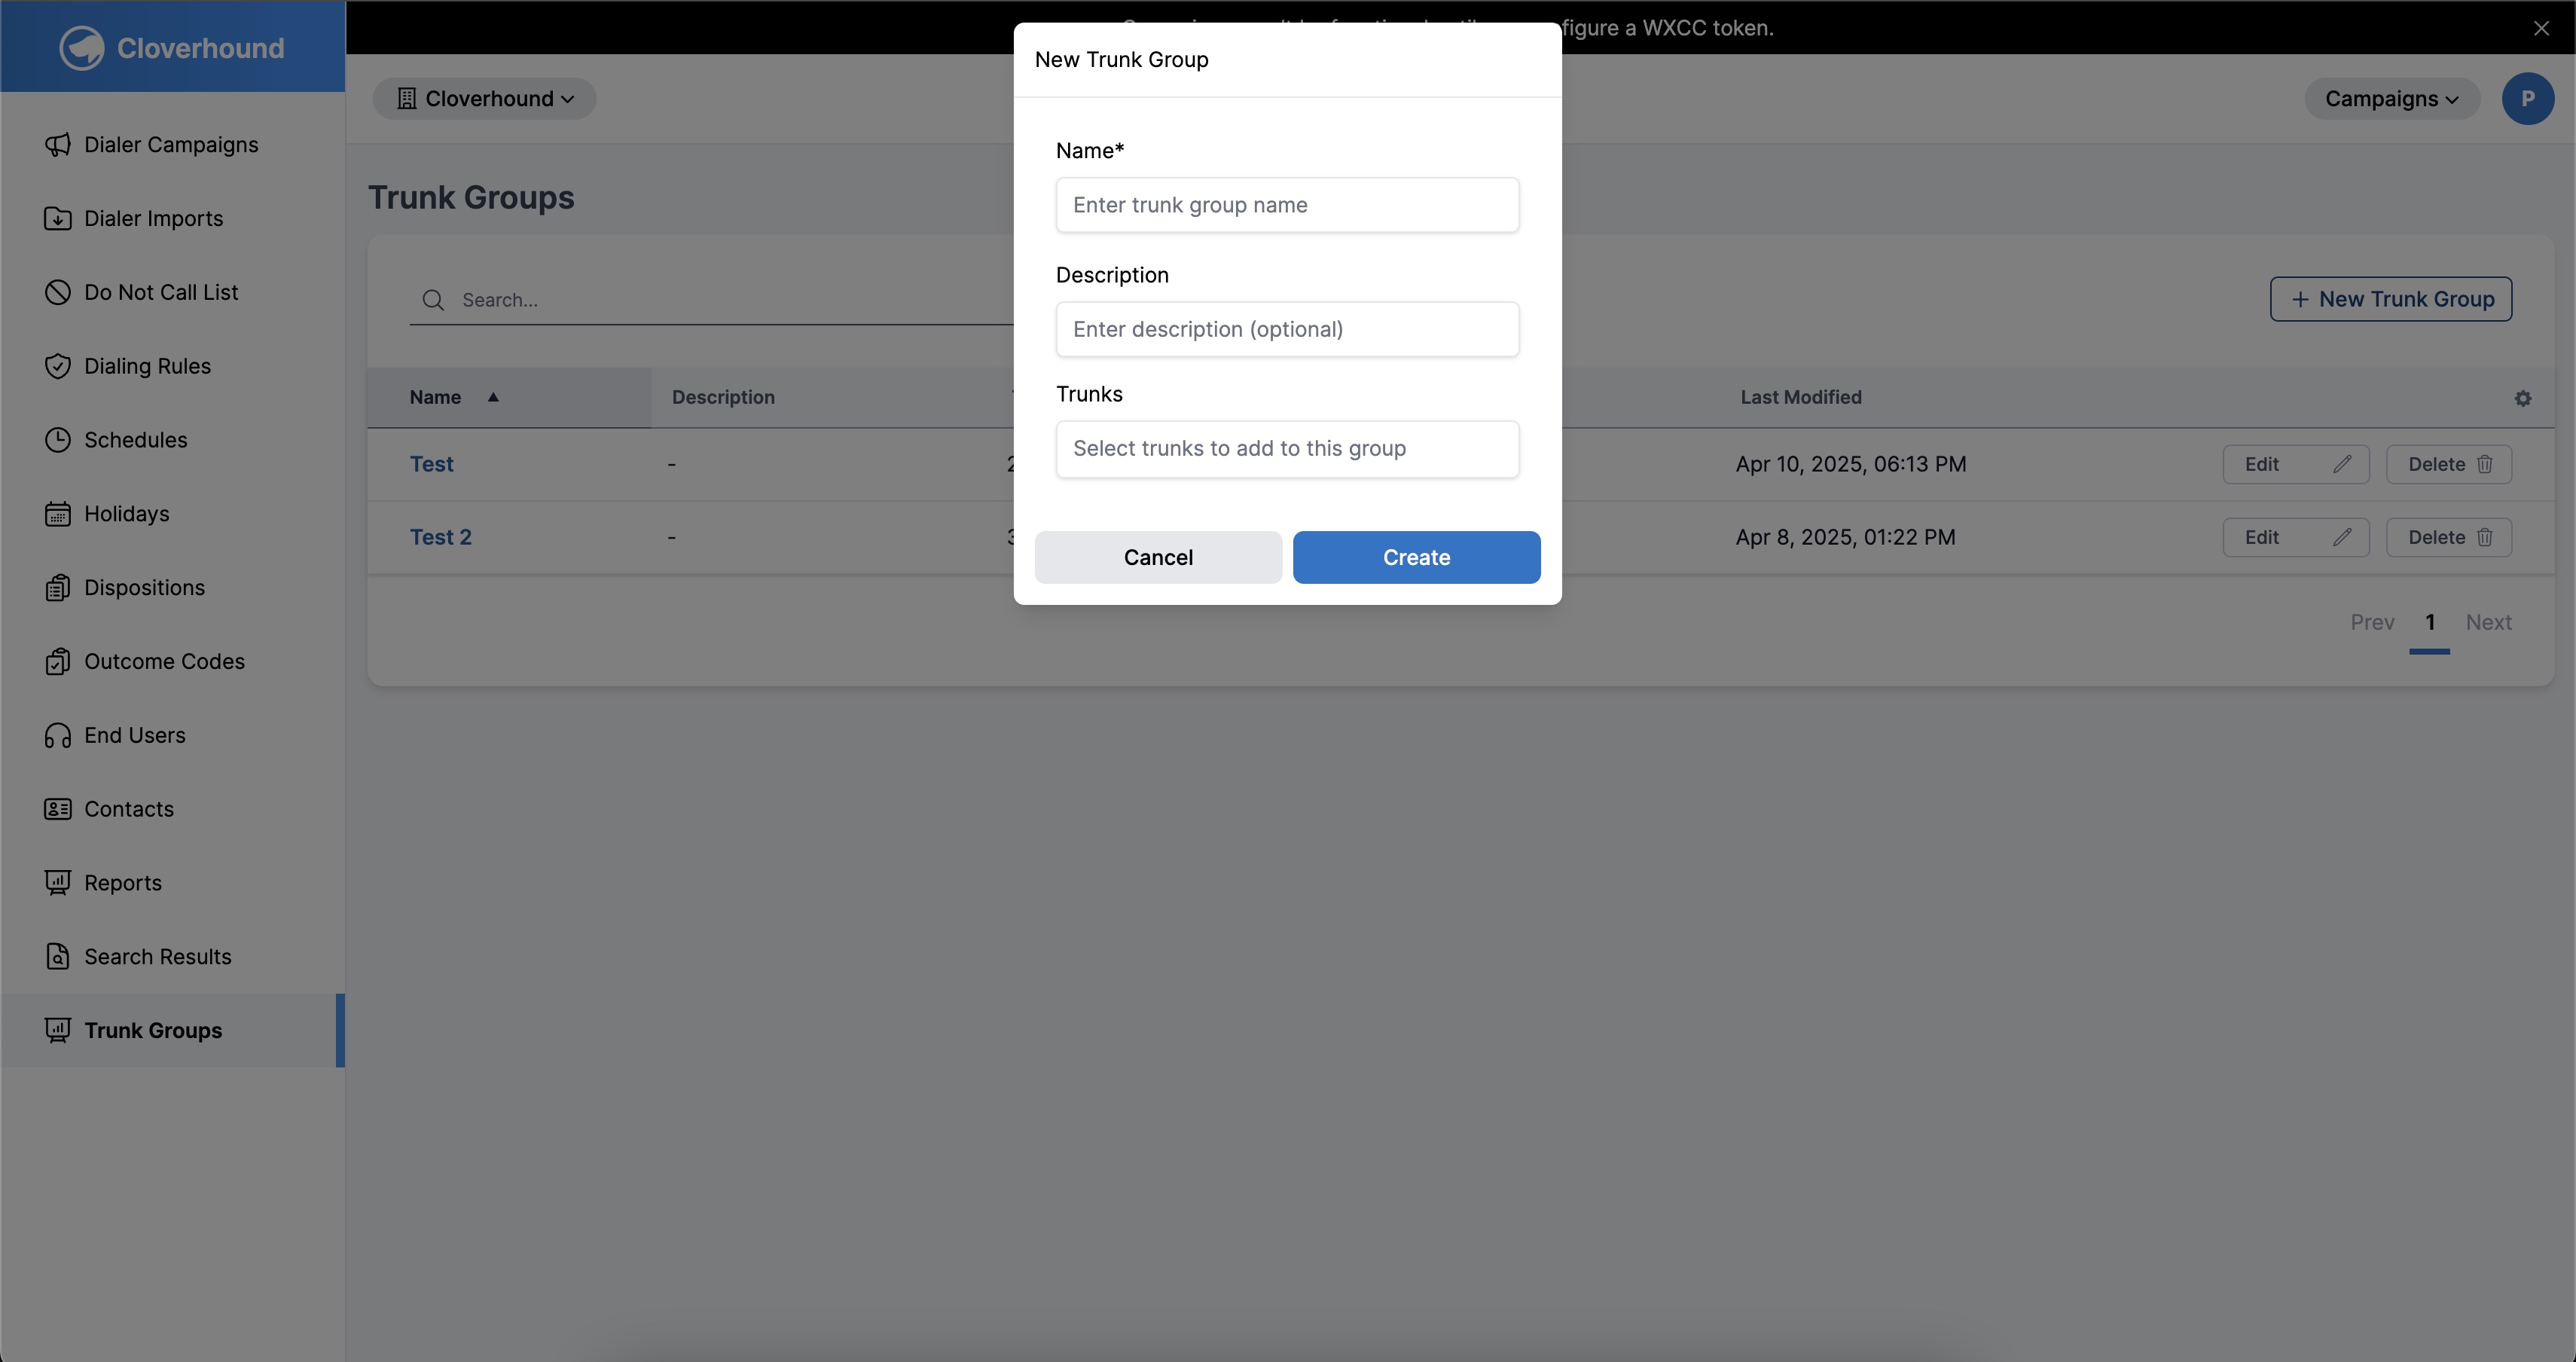
Fill Out Trunk Group Information
- In the modal form, complete the following fields:
- Name: Enter a unique and descriptive name for the group (required)
- Description: Optionally, add a description to clarify the purpose or contents of the group
- Trunks: Select one or more existing trunks to associate with this group
- In the modal form, complete the following fields:
-
Save the Trunk Group
- After filling out the form, click the Create button
- Your new Trunk Group will now appear in the list view with its creation timestamp
-
Review the Trunk Group
- You can now:
- Edit the group’s details by clicking Edit
- Remove the group by clicking Delete
- View the number of associated trunks directly in the table
- You can now:
Note: You must have at least one trunk available to associate with a group. If no trunks appear, ensure they have been created and are active.
Tips for Success:
- Use consistent naming conventions for easier management
- Include clear descriptions to help identify each group's function
- Periodically review and update trunk associations based on infrastructure changes