Setting Up SFTP Automated Export
SFTP Automated Export lets a Dialer Campaign push result files to an SFTP server once per day, so your downstream systems — data warehouses, CRMs, reporting tools — receive fresh campaign data without manual downloads. You configure the feature from the SFTP Settings tab on a Dialer Campaign.
Before you begin, confirm the following:
- At least one SFTP connection is configured in the Admin section and marked Active.
- You know the destination directory on the SFTP server where export files should land.
How the Export Runs
At the configured time each day, Cloverhound Cloud:
- Collects all campaign records with a status of completed or failed that were updated since the last successful export.
- Generates a file in the configured format (CSV or JSON).
- Uploads the file to the configured SFTP directory using the resolved filename.
If no records have been updated since the last run, the job exits without uploading a file. The Last Export timestamp is only updated after a successful upload.
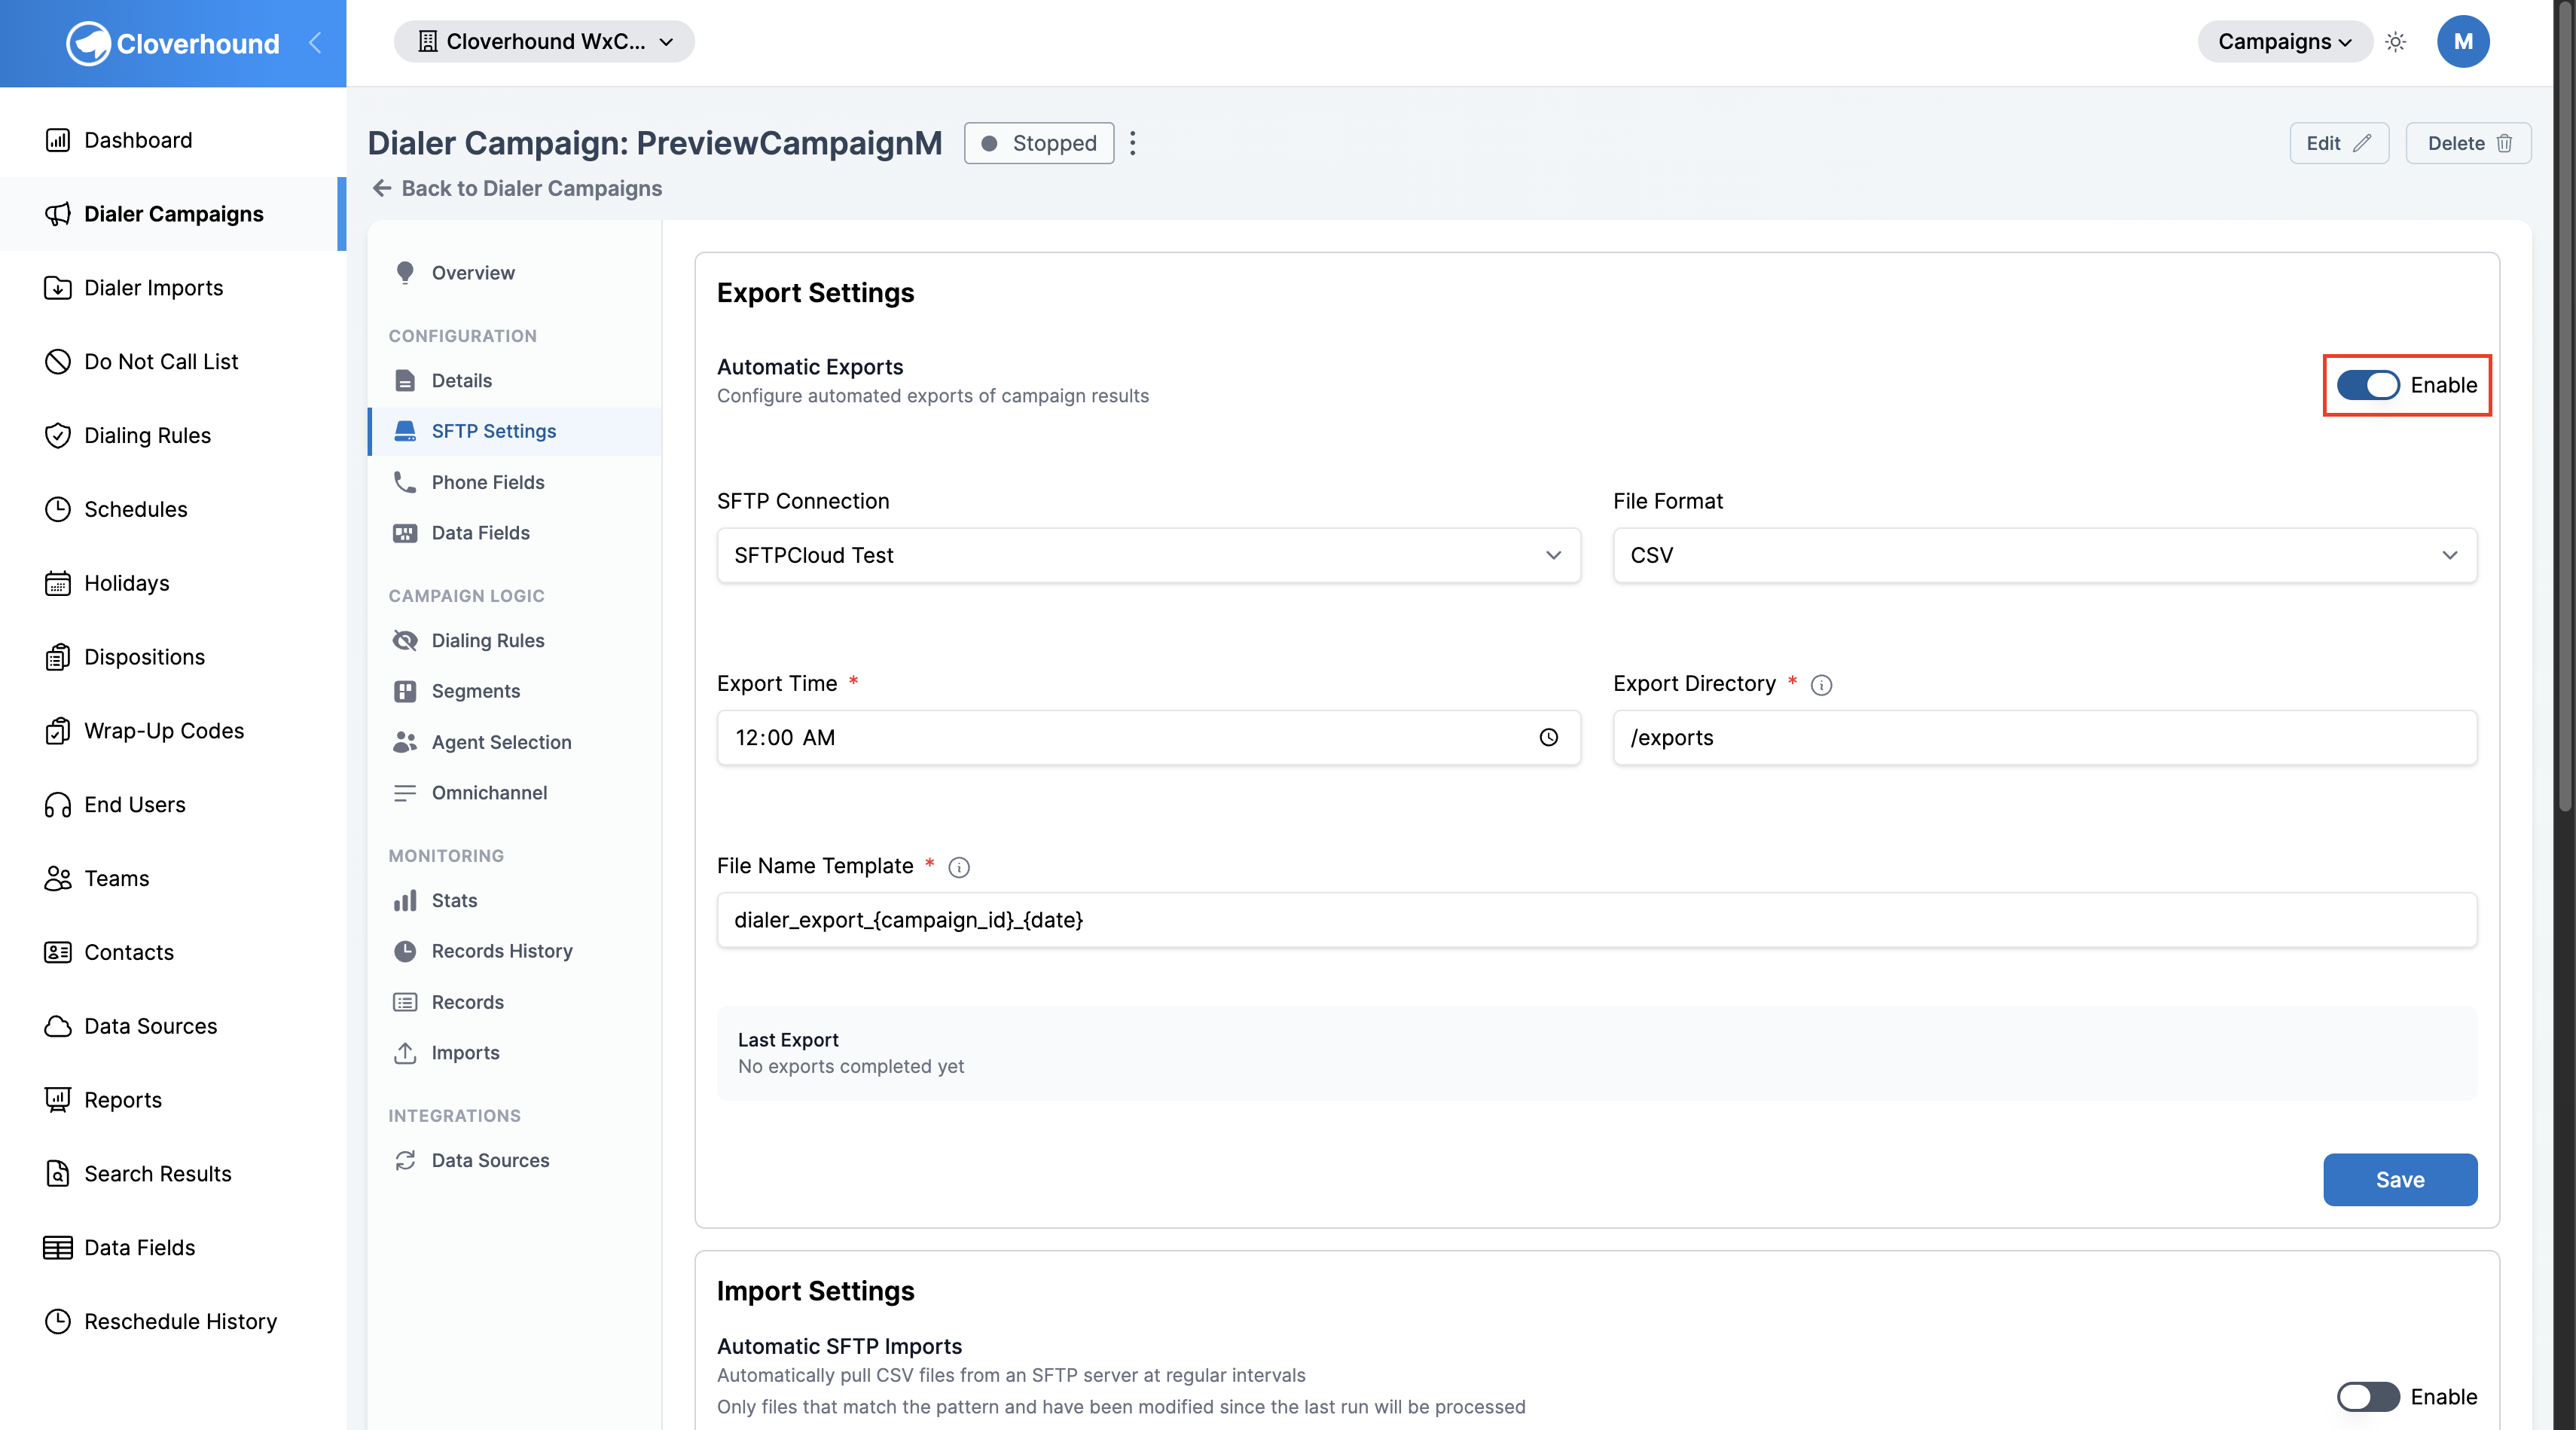
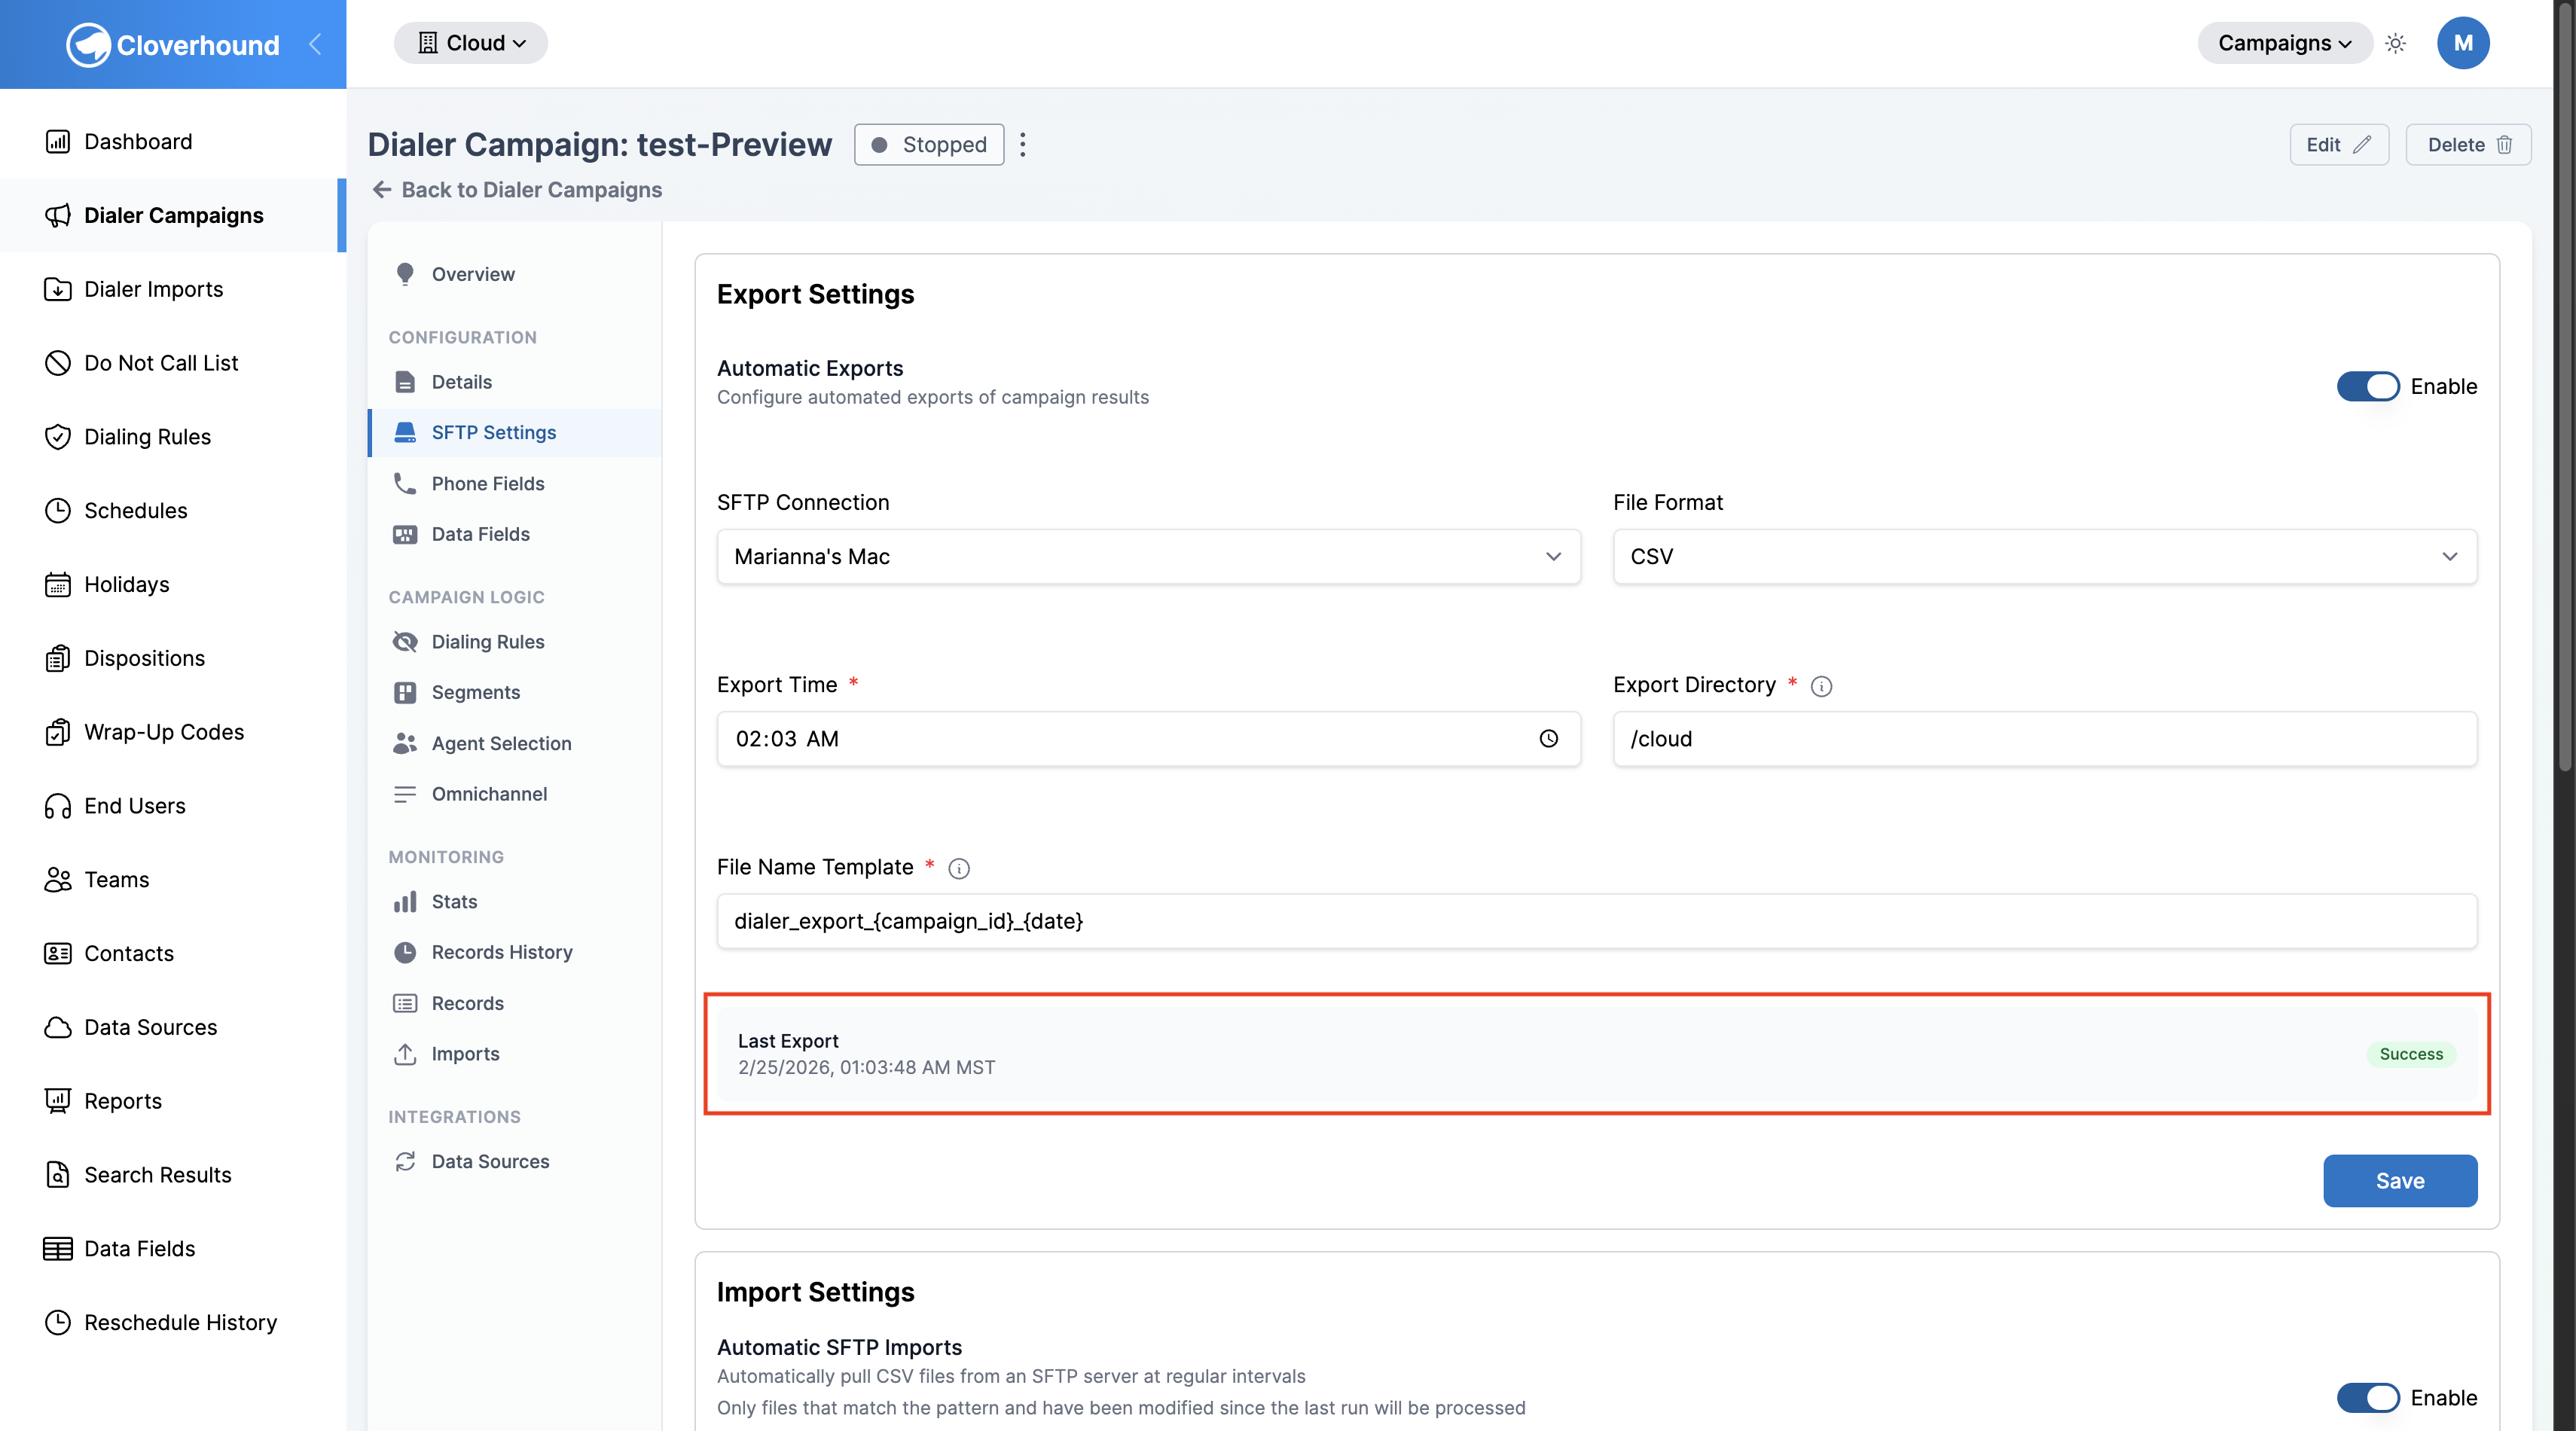
Accessing the Export Settings Section
- Navigate to the Campaigns module and open the Dialer Campaign you want to configure.
- Click the SFTP Settings tab in the campaign's left-hand navigation.
- Scroll to the Export Settings section at the top of the tab. Import and export are configured on the same tab but are independent — you can enable either or both.
Configuring the Export
-
Toggle Enable on in the Export Settings header to turn on automatic exports for this campaign. Your configuration is saved even when the toggle is off, so you can prepare settings before going live.
-
Fill out the configuration fields:
- SFTP Connection — select one of the SFTP connections configured for your organization. If the dropdown is empty, create a connection first under Admin > SFTP Connections.
- File Format — the format for the exported file. Choose CSV or JSON.
- Export Time — the time of day when the export runs. Uses the organization's configured time zone.
- Export Directory — the destination folder on the SFTP server. This path is appended to the connection's base path. For example,
exports/resultsresolves to<base_path>/exports/results. Parent-directory references (..) are rejected. - File Name Template — the name pattern for the exported file. Must include both
{campaign_id}and{date}. The file extension (.csvor.json) is added automatically — do not include it in the template.{campaign_id}— replaced with the campaign's numeric ID.{date}— replaced with the export date inYYYYMMDDformat.- Example:
campaign_{campaign_id}_{date}→campaign_42_20260505.csv
-
Click Save at the bottom of the Export Settings section.
What Gets Exported
Each run exports records that were completed or failed since the previous export. The file content depends on the chosen format.
CSV
| Column | Description |
|---|---|
| Record ID | Internal ID of the dialer record |
| Phone Number | First configured phone number for the record |
| Status | completed or failed |
| Result | Dialer result (e.g. Live Voice, No Answer, Answering Machine) |
| Campaign Disposition | Campaign disposition name applied to the record |
| Wrap Up Code | Wrap-up code name applied to the record |
| Agent | Full name of the agent who handled the call |
| Started At | Timestamp when the call started |
| Ended At | Timestamp when the call ended |
| Attempts | Total number of contact attempts for the record |
| Customer Reference ID | Your system's identifier for the record |
JSON
The JSON file wraps the same fields in a structure that includes campaign metadata:
{
  "campaign_id": 42,
  "campaign_name": "Spring Campaign",
  "export_date": "2026-05-05T14:00:00Z",
  "records": [
    {
      "record_id": 1001,
      "phone_number": "+15556667777",
      "status": "completed",
      "result": "Live Voice",
      "campaign_disposition": "Interested",
      "wrap_up_code": "Callback Requested",
      "agent": "Jane Smith",
      "started_at": "2026-05-05T10:15:00Z",
      "ended_at": "2026-05-05T10:18:32Z",
      "attempts": 2,
      "customer_reference_id": "CRM-8842"
    }
  ]
}
Monitoring Exports
The Last Export tile in the Export Settings section shows the date and time of the most recently completed run, along with a Success badge when it completed without errors. If no exports have run yet, it displays "No exports completed yet."
For a history of what was exported and when, check your SFTP server's destination directory directly — Cloverhound Cloud does not maintain a log of past export files.
Troubleshooting
- No file appears on the SFTP server after the scheduled time. The export skips the upload when no records have been updated since the last run. Verify that the campaign had completed or failed records during the period, and check that the Export Time and organization time zone are set correctly.
- "File Name Template must include
{campaign_id}and{date}". Both variables are required. Update the template to include them (for example,campaign_{campaign_id}_{date}). - "Export directory cannot contain parent directory references". Paths that include
..are rejected. Use a path relative to the SFTP connection's base path. - The file extension appears twice (for example,
campaign_42_20260505.csv.csv). The extension is added automatically — remove any manual extension from the File Name Template. - The SFTP connection fails. Verify the connection credentials and reachability under Admin > SFTP Connections. The export does not have a built-in connection test; use the Test Import Connection button on the Import Settings section of the same tab to confirm connectivity to the same server.
Related Pages
- Setting Up SFTP Automated Import — pull CSV records from an SFTP server on a recurring schedule.
- Managing SFTP Connections — create, test, and manage the SFTP servers available to campaigns.