Managing Segments
The Segments tab displays all segments configured for your campaign as a list of cards. Each card shows the segment's name, priority order, conditions, and status. From here you can add new segments, reorder them, edit conditions, and delete segments you no longer need.
Adding a Segment
Click Add Segment in the top-right corner to open the segment form. Fill in the segment details and conditions, then submit to save.
Segment Fields
Name
- Required: Yes
- Purpose: A descriptive label for the segment, displayed on the segment card and used for identification.
Description
- Required: No
- Purpose: An optional free-text note describing what this segment represents or why it exists.
Enabled
- Type: Toggle
- Purpose: When disabled, the segment is skipped during dialing. Its conditions and configuration are preserved. Disabled segments display a Disabled badge on their card.
Default Segment
- Type: Toggle
- Purpose: Marks this segment as the catch-all. A default segment has no conditions — it matches all records that did not satisfy any preceding segment. Only one default segment is allowed per campaign.
Conditions
Conditions determine which records belong to this segment. A record must satisfy all conditions to be included (AND logic). If no conditions are added, the segment matches all records (equivalent to a default segment).
Available Condition Fields
| Field | Description |
|---|---|
| Record Status | Filter by the current dialing status of the record (e.g., pending, completed). |
| Attempt Count | Filter by the number of dialing attempts made on the record. |
| Time Since Import | Filter by how many days have passed since the record was imported into the campaign. |
| Custom Field | Filter by a campaign-specific custom field value. |
Available Comparisons
| Comparison | Meaning |
|---|---|
equals | Exact match |
does not equal | Excludes exact match |
is less than | Numeric/date less than value |
is less than or equal to | Numeric/date ≤ value |
is greater than | Numeric/date greater than value |
is greater than or equal to | Numeric/date ≥ value |
contains | Text contains value |
does not contain | Text does not contain value |
is blank | Field has no value |
is not blank | Field has any value |
is between | Value falls within a range (used with Time Since Import) |
For Time Since Import with is between, specify both a minimum and maximum number of days.
Reordering Segments
Drag and drop segment cards using the drag handle (the six-dot icon on the left side of each card) to change the order in which segments are evaluated. The dialer processes segments from top to bottom, so higher segments take priority.
Reordering is saved automatically — no additional save action is needed.
Segment Cards
Each segment card displays:
- Priority number — a blue badge showing the segment's position in the evaluation order.
- Name — the segment's label.
- Default badge — shown if the segment is the campaign's catch-all.
- Disabled badge — shown in red if the segment is currently inactive.
- Description — if provided, displayed below the name.
- Conditions — a list of all filter conditions in human-readable form. If no conditions are set, the card shows "No conditions - matches all records."
Editing a Segment
Click Edit on a segment card to reopen the segment form with the current configuration. Update any fields or conditions and submit to save changes.
Deleting a Segment
Click Delete on a segment card. A confirmation prompt will appear before the segment is permanently removed.
Note: Deleting a segment does not affect the records themselves — it only removes the grouping rule.
Setting Record Priority
Click Set Record Priority in the top-right corner to open the Set Priority modal. This configures the order in which records are surfaced to agents within each segment.
Priority Criteria
You can enable and configure up to four criteria:
| Criterion | Options |
|---|---|
| Next Dialable Time | Newest first / Oldest first |
| Record Created Date | Newest first / Oldest first |
| Contact Attempts | Lowest first / Highest first |
| Scheduled Callbacks | Newest first / Oldest first |
Configuring Priority
- Select a sort direction (radio button) next to any criteria you want to use. Criteria with no selection are ignored.
- Drag criteria cards using the drag handle to set the tiebreaker order — the topmost selected criterion is applied first.
- Click Save to apply the configuration to the campaign.
Use Clear All to remove all priority selections and reset to default ordering.
Note: Priority applies across all segments — it determines the order records are pulled within whichever segment is currently being dialed.
Segment Prioritization Toggle
The Segment Prioritization switch in the Segments tab header lets you bypass segment-based record ordering for the entire campaign without deleting or individually disabling segment records. Useful during incident triage when you need the dialer to fall back to default ordering quickly.
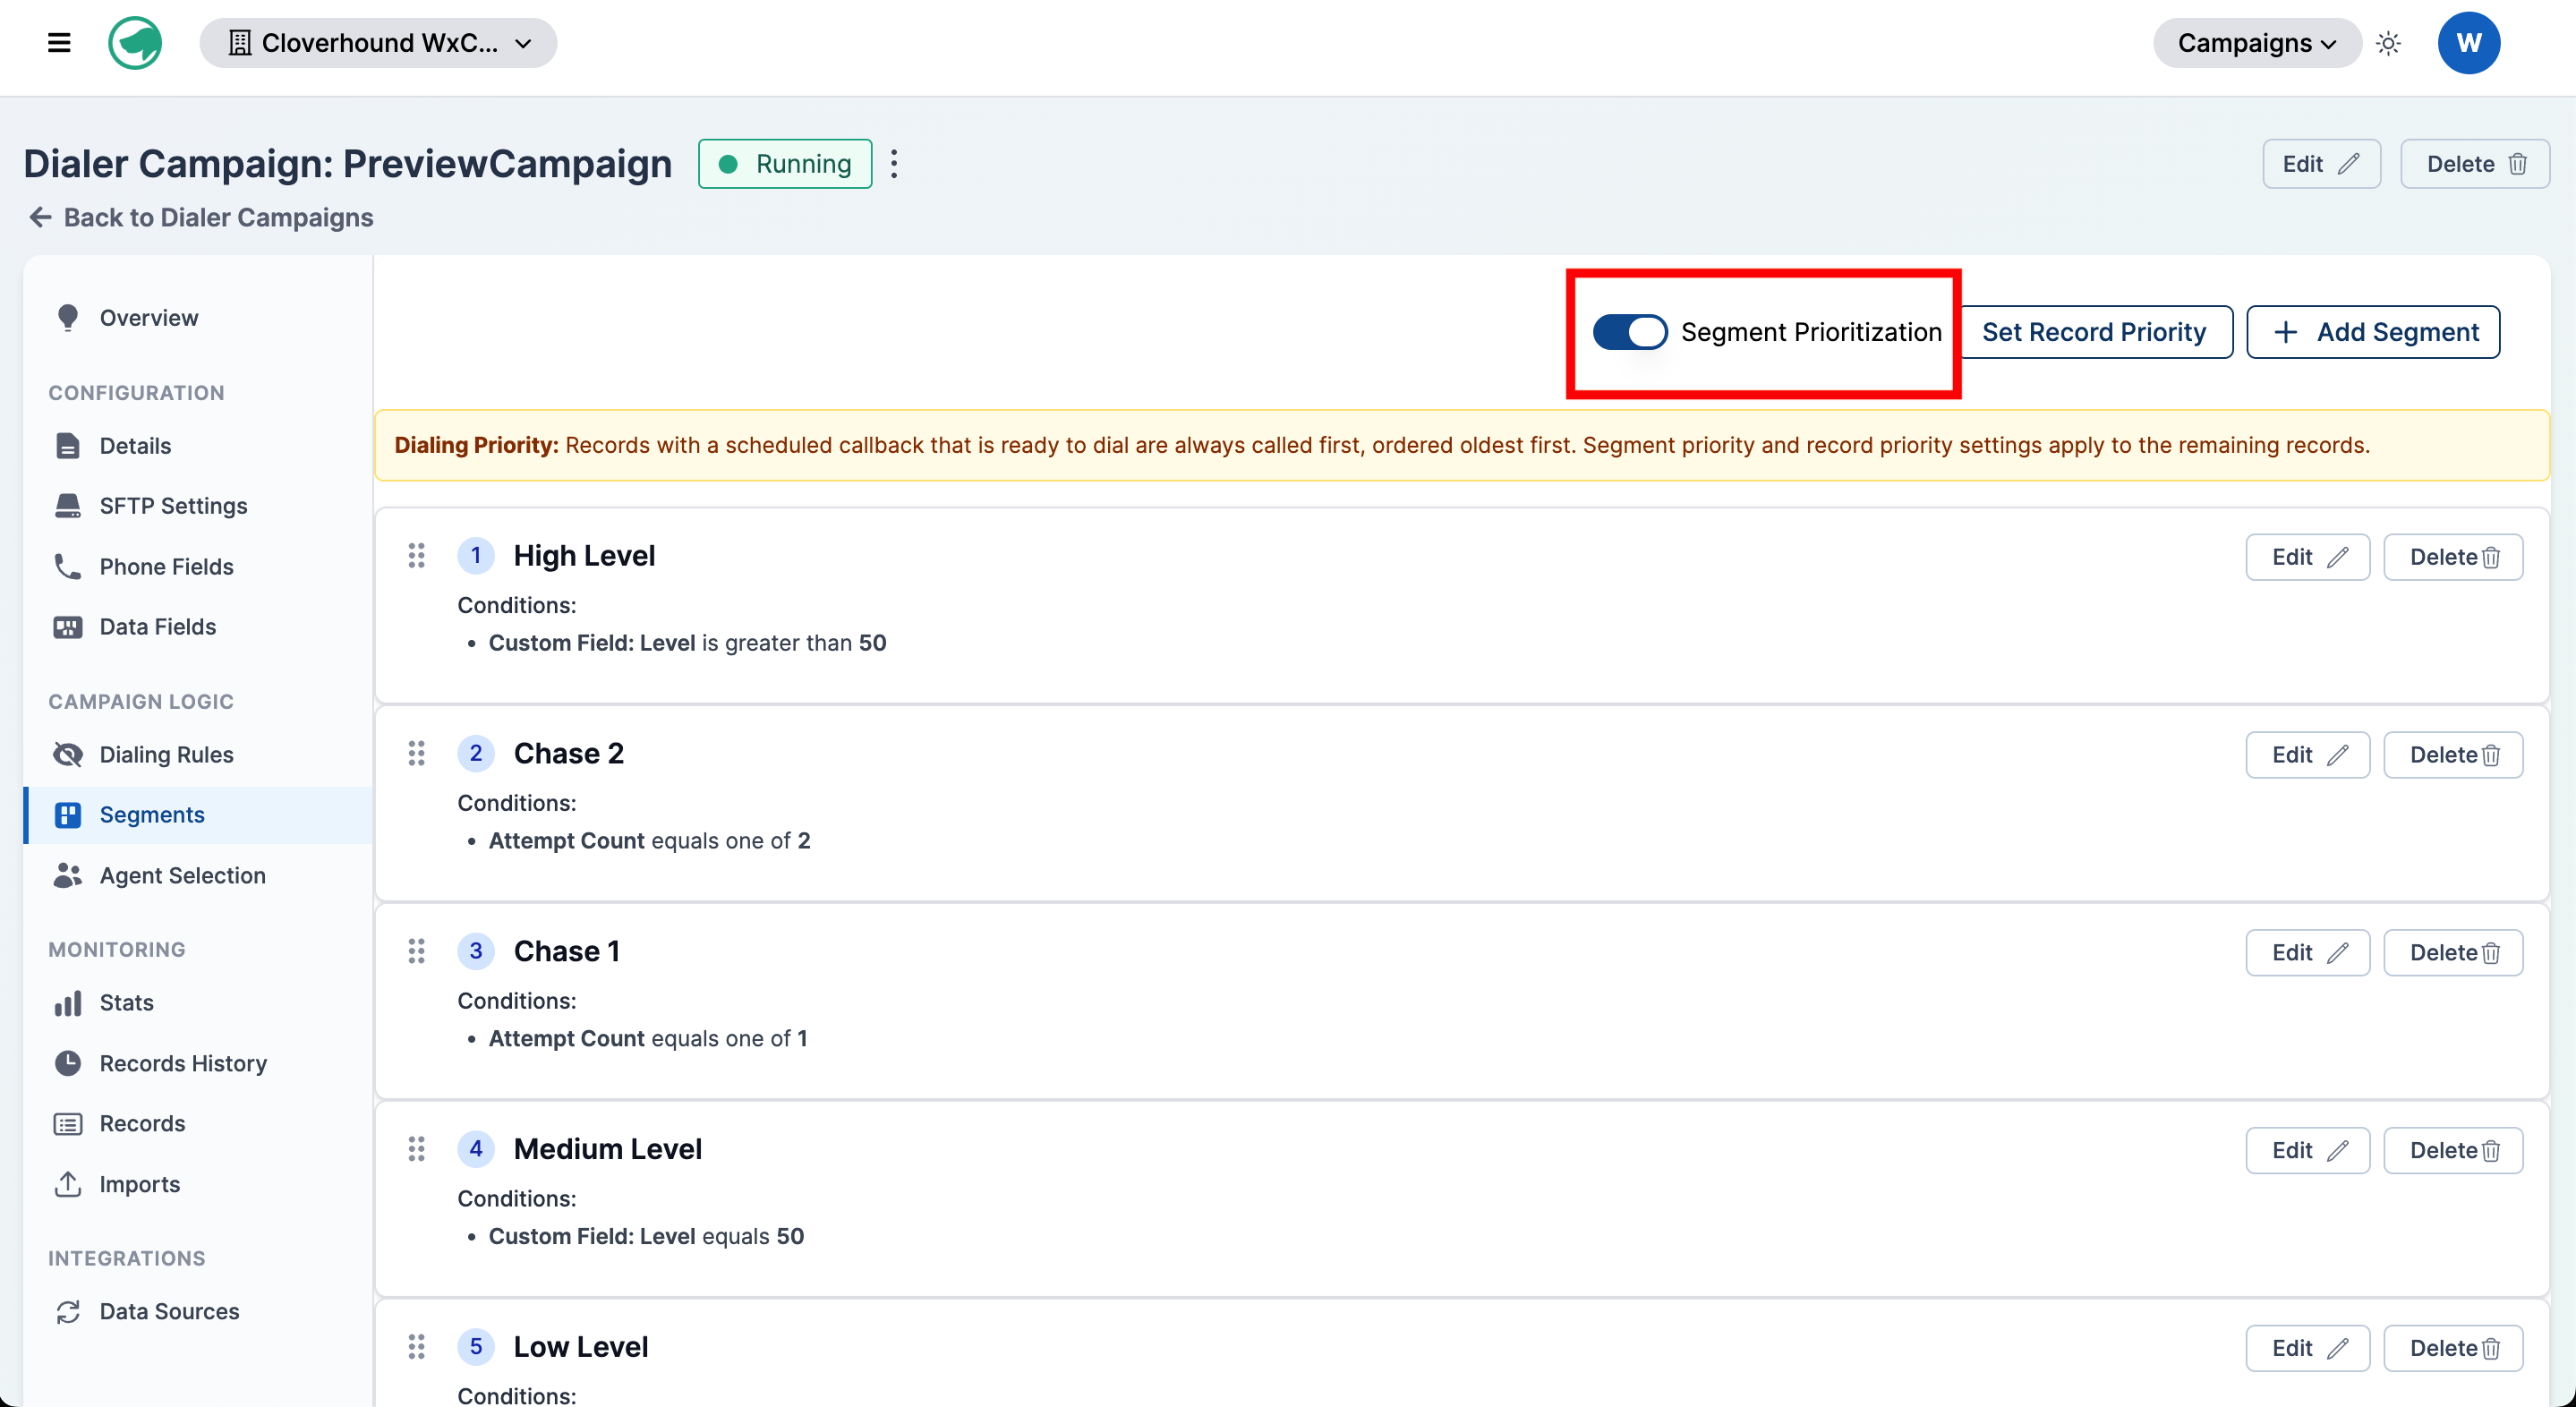
Behavior When Disabled
- The dialer ignores all segment priority orders, even for segments that are individually enabled.
- Records are surfaced as if no segments existed — scheduled callbacks still come first, then the configured Set Record Priority ordering applies.
- Segment records, their conditions, and their assignments are preserved. Only prioritization is bypassed; toggling back on resumes segment-driven ordering with no data loss.
- A red banner is shown above the segment list while the toggle is off:

When to Use
- A misconfigured segment is starving other records and you need an immediate workaround.
- You want to A/B compare segmented vs. unsegmented dialing performance without dismantling the segment configuration.
- On-call triage: flip off, investigate, flip back on once the underlying segment issue is resolved.
Re-enabling the toggle triggers a background resegmentation of active records so they pick up the current segment definitions on the next pull.
Related Sections
- Campaign Details — configure core campaign settings.
- Records — view and manage the individual records in your campaign.