Managing Data Source Links
A Data Source Link connects a campaign to a Data Source so that records flowing from Salesforce (or another supported system) are imported into that campaign. Links live on each campaign's Data Sources tab and control field mappings, duplicate handling, and manual sync actions for that campaign-to-data-source pairing.
Before linking, make sure your organization has:
- A Salesforce connection on the Integrations page.
- At least one Data Source defined (see Managing Data Sources).
- A Salesforce Org Sync that is enabled for the Salesforce object you want to pull from.
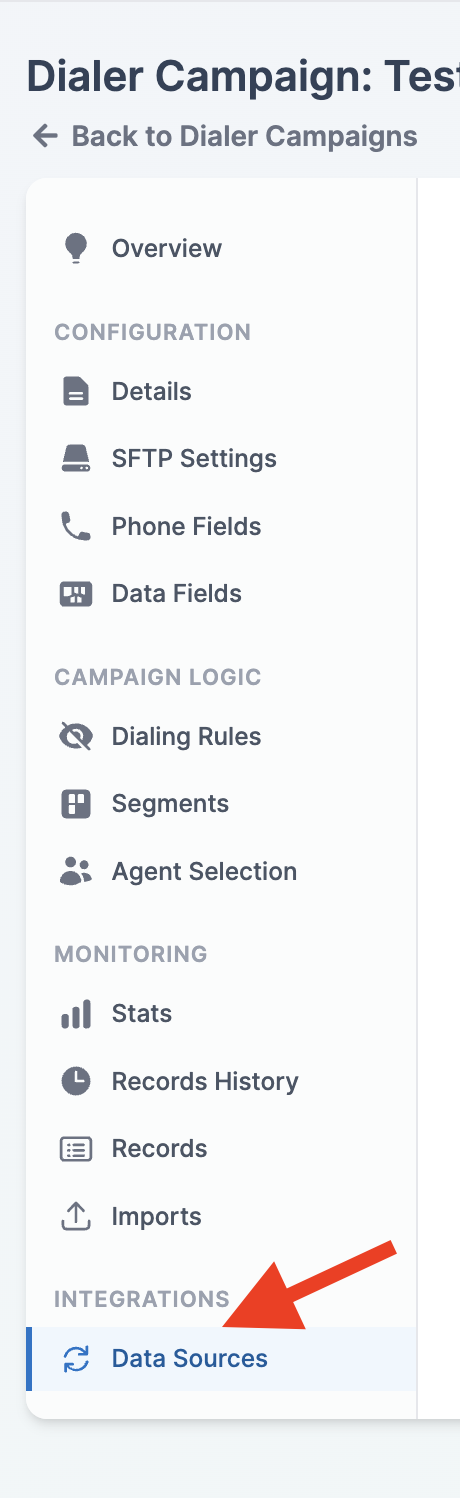
Accessing Data Source Links
-
Navigate to the Campaigns module and open the campaign you want to configure.
-
Open the Data Sources tab.
If your organization has no Salesforce connection yet, the tab shows a prompt with a link to the Integrations page instead of the linking UI. Connect Salesforce there, then return to this tab.
If your organization has a Salesforce connection but no data sources, the tab shows a message pointing to the Data Sources page where you can create one before returning to link it.
Linking a Data Source to a Campaign
-
Select a data source from the Select a data source... dropdown. Only data sources that are not already linked to this campaign appear.
-
Click the Link button.

The new link appears in the list below the dropdown. Each link row shows:
- The data source name and the Salesforce object it queries (for example,
ContactorLead). - A filter summary of the data source's filter criteria.
- The Last full sync timestamp, formatted in the campaign's time zone. Links that have never been backfilled show
Never.
Click any link row to expand it and configure its duplicate handling and field mappings. Click again to collapse. Only one link is expanded at a time.
- The data source name and the Salesforce object it queries (for example,
A campaign can be linked to the same data source only once. If a data source is missing from the dropdown, it is either already linked or has not been created yet.
Configuring a Link
-
Click a linked data source row to expand it.

-
Set Duplicate Handling. This controls what happens when Salesforce emits a create event for a record that already exists in this campaign:
- Skip Duplicates — ignore the incoming record.
- Overwrite Existing Records — replace the existing record with the incoming data.
If the campaign has Allow Duplicate Records enabled, this dropdown is disabled and duplicate handling does not apply.
-
Add Field Mappings. Click Add Mapping for each Salesforce field you want imported. For each row, set:
- Salesforce Field — the API name of the field (for example,
Phone,Email,FirstName). - Type — one of:
- Phone — maps the Salesforce value to a phone field on the campaign. Select the target phone field in the Campaign Field column.
- Custom Field — maps the Salesforce value to a campaign custom field. Select the target custom field in the Campaign Field column.
- Identifier — marks the field as the record's Salesforce Record ID. No target campaign field is needed; Cloverhound Cloud uses the identifier to match subsequent change events back to the same record in this campaign.

- Salesforce Field — the API name of the field (for example,
-
Click Save Changes.
Each link must have at least one Phone mapping. Saving without one fails with "At least one phone field mapping is required."
Forcing a Full Sync
After you save a link's mappings for the first time, Cloverhound Cloud automatically queues a one-time backfill. The backfill pulls every Salesforce record that matches the data source's filter criteria into the campaign, populating the fields you mapped. You can re-run this backfill at any time using the Force Full Sync button — useful when you change field mappings, broaden a data source's filter criteria, or suspect records are missing.
-
Expand the linked data source.
-
Click the Force Full Sync button.
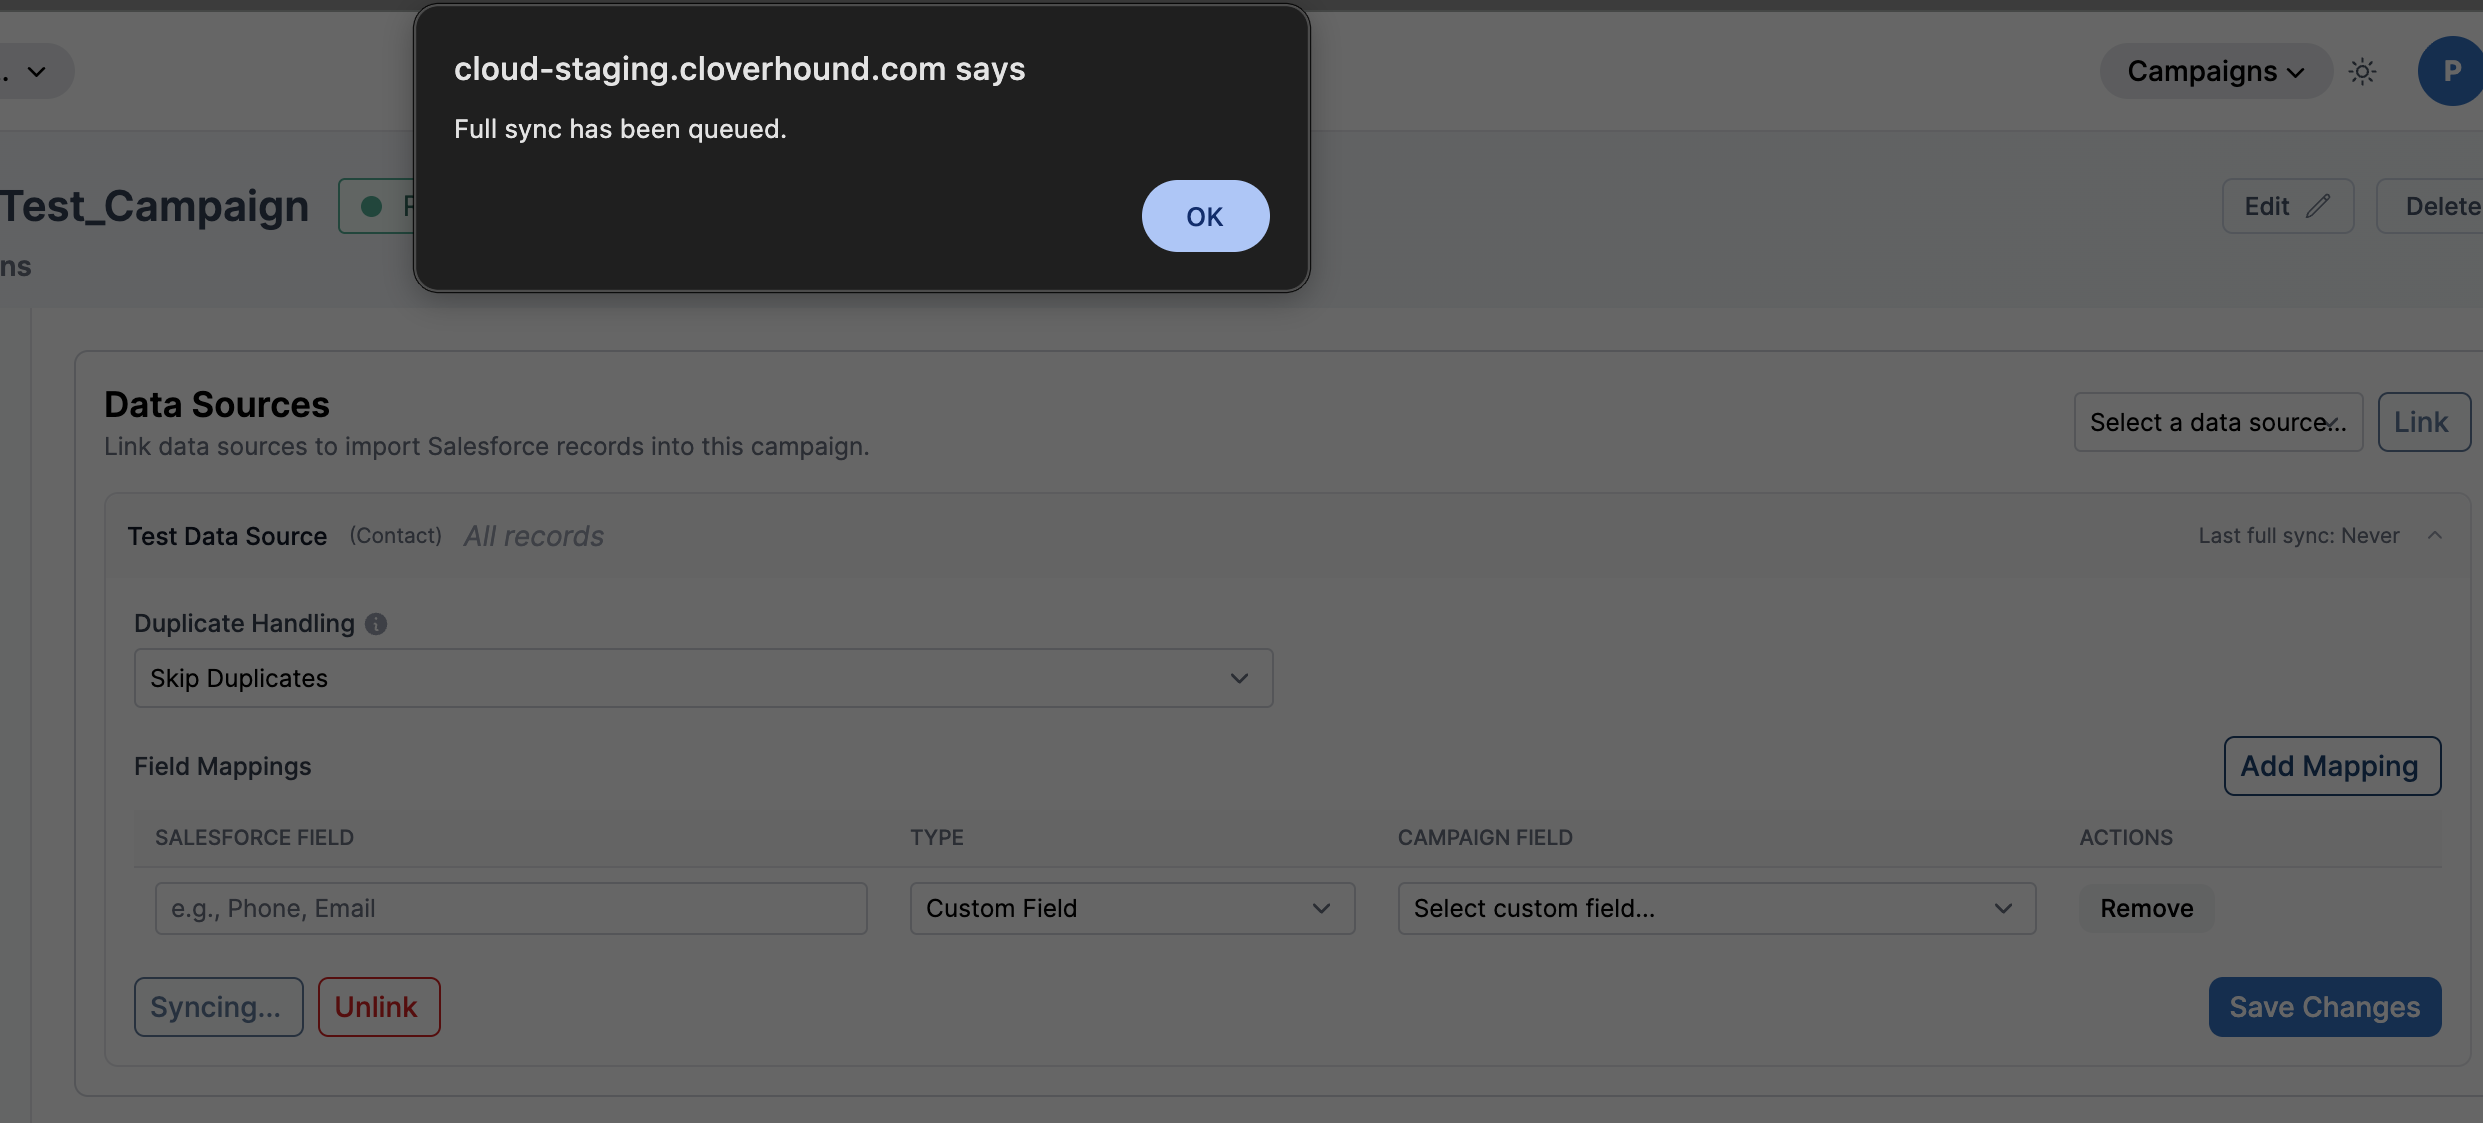
Cloverhound Cloud queues the full sync and shows the message "Full sync has been queued." The Last full sync timestamp on the link header updates when the sync job runs.
Full syncs run in the background and can take several minutes depending on the number of matching records. Ongoing change events from Salesforce continue to flow in during and after the backfill.
Unlinking a Data Source
-
Expand the linked data source.
-
Click the Unlink button.
-
Confirm the prompt. Existing records that were already imported remain in the campaign; only the link and its field mappings are removed.
Unlinking stops all future Salesforce changes for that data source from reaching this campaign. Records imported before unlinking stay in the campaign but will no longer be updated when the source Salesforce record changes.
With Data Source Links configured, each campaign pulls exactly the Salesforce records it needs, with the field mappings and duplicate behavior you define.