Creating a New Outbound Campaign
Creating an outbound campaign in Cloverhound Cloud is a straightforward process. This guide will walk you through the initial steps of setting up a new campaign.
Prerequisites
Before creating a campaign in Cloverhound Cloud, ensure that the necessary configurations have been completed in the Webex Contact Center platform. These configurations are essential for the proper functioning of your campaign.
Starting the Campaign Creation Process
To begin creating a new campaign:
- Navigate to the Campaign Management module in Cloverhound Cloud.
- Look for and click the "+ New Dialer Campaign" button.
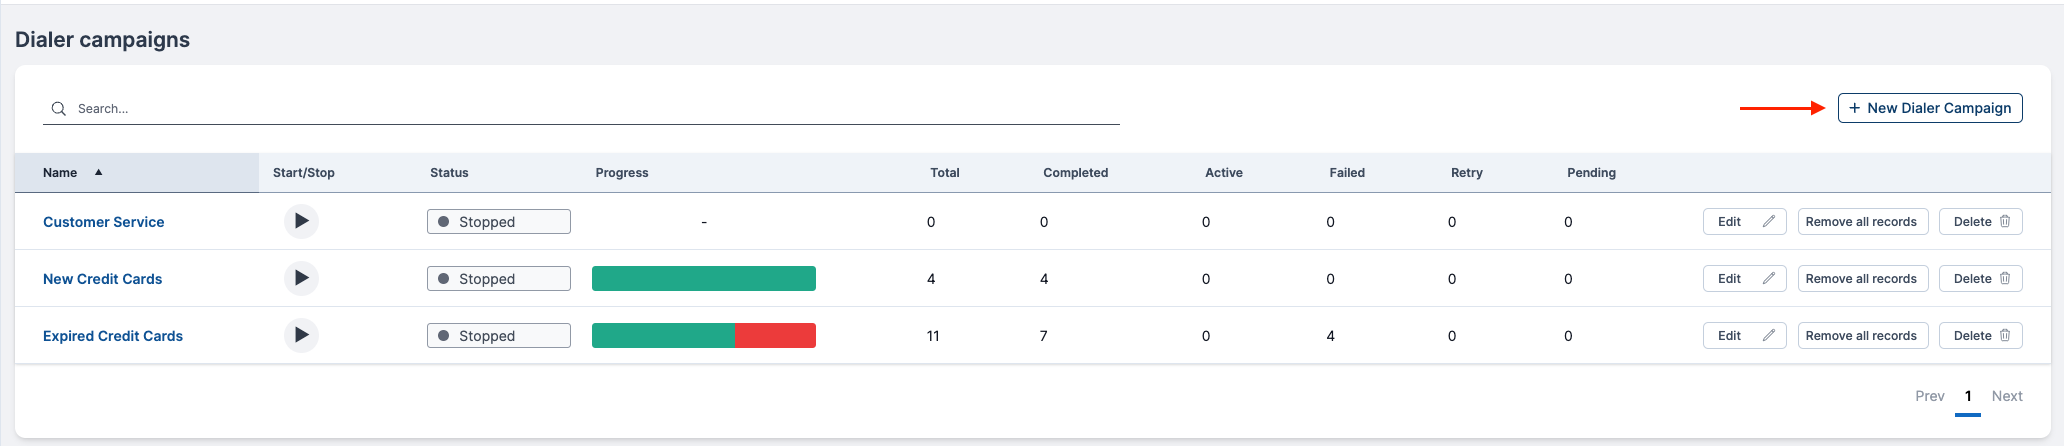
This action will open the New Dialer Campaign dialog, which is a multi-step form guiding you through the campaign configuration process.
Configuring Initial Campaign Settings
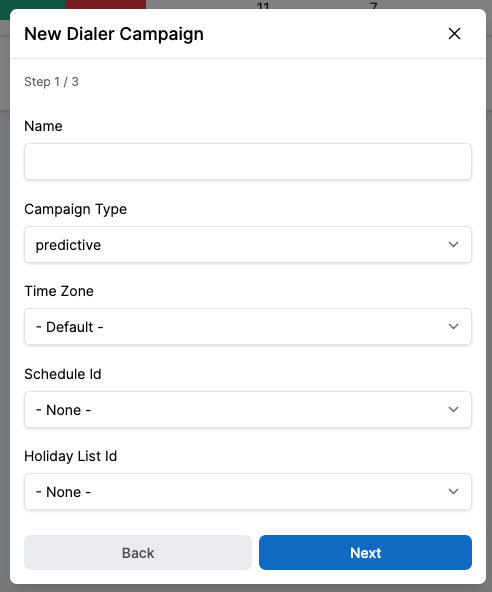
Step 1
In the first step of the New Dialer Campaign dialog, you'll need to configure the following fields:
-
Name
- Enter a unique name for your campaign.
- This name should be distinct within your organization to avoid confusion.
-
Sync with Contacts
- If enabled, each imported record will be linked to a Contact record via it's reference_id.
- Enabling it allows administrators to define dialing limits for a contact across multiple campaigns.
-
Campaign Type
- Reference Outbound Campaign Types
- Select the type of campaign you want to execute.
- Options include:
- Agent Preview
- Progressive Agent-Based
- Predictive Agent-Based
- Progressive IVR-Based
-
Number of IVR Ports (IVR campaigns only)
- Set the number of IVR ports available for the IVR campaign.
- This setting only appears for the Progressive IVR-Based campaign type.
- The range is from 1 to 1000.
- This setting works in conjunction with the max dialing rate to dial calls.
-
Time Zone
- Choose the default time zone for the campaign.
- This setting works in conjunction with the campaign schedule to determine active periods for dialing.
-
Schedule
- Set the operating schedule for your campaign.
- This defines when the campaign will be active and when calls can be dialed.
-
Holiday List
- Select a list of holidays.
- On these specified dates, no calls will be dialed from the campaign.
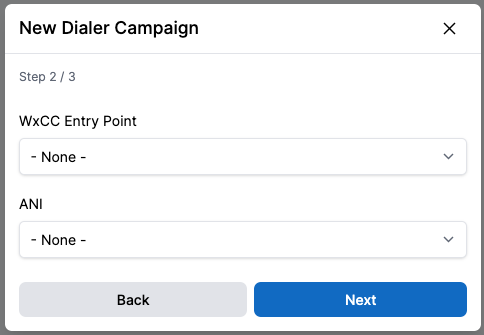
Step 2
After setting up the initial campaign parameters, you'll need to configure some advanced settings that are crucial for the proper routing and identification of your outbound calls.
-
Webex Contact Center Entry Point
- Select the appropriate Entry Point for your campaign.
- An Entry Point is the initial landing place for customer contacts in the Webex Contact Center system.
- For voice contacts, one or more toll-free or dial numbers are typically associated with an Entry Point.
- The Entry Point is where IVR call treatment is performed before the call is routed further.
Why it's important: The Entry Point determines how incoming calls are initially handled and routed within your contact center system. Choosing the correct Entry Point ensures that your outbound calls are properly managed and directed.
-
ANI (Automatic Number Identification)
- Select a phone number to be used as the caller ID for your outdial calls.
- This setting allows you to choose the number that will be displayed to the recipients of your campaign calls.
Why it's important: The ANI, or caller ID, can significantly impact the likelihood of your calls being answered. Choosing an appropriate ANI can increase answer rates and help establish trust with your customers.
Considerations When Configuring These Fields
-
Entry Point Selection: Ensure that the chosen Entry Point aligns with the purpose of your campaign. Different campaigns may require different call treatments or routing strategies.
-
ANI Selection: Consider the nature of your campaign when selecting the ANI. For example:
- Local numbers might be more effective for regional campaigns.
- Toll-free numbers might be preferred for customer service-oriented campaigns.
- Consistent use of a recognizable number can build familiarity with your customers.
-
Compliance: Ensure that your chosen ANI complies with all relevant telemarketing and communication regulations in your target regions.
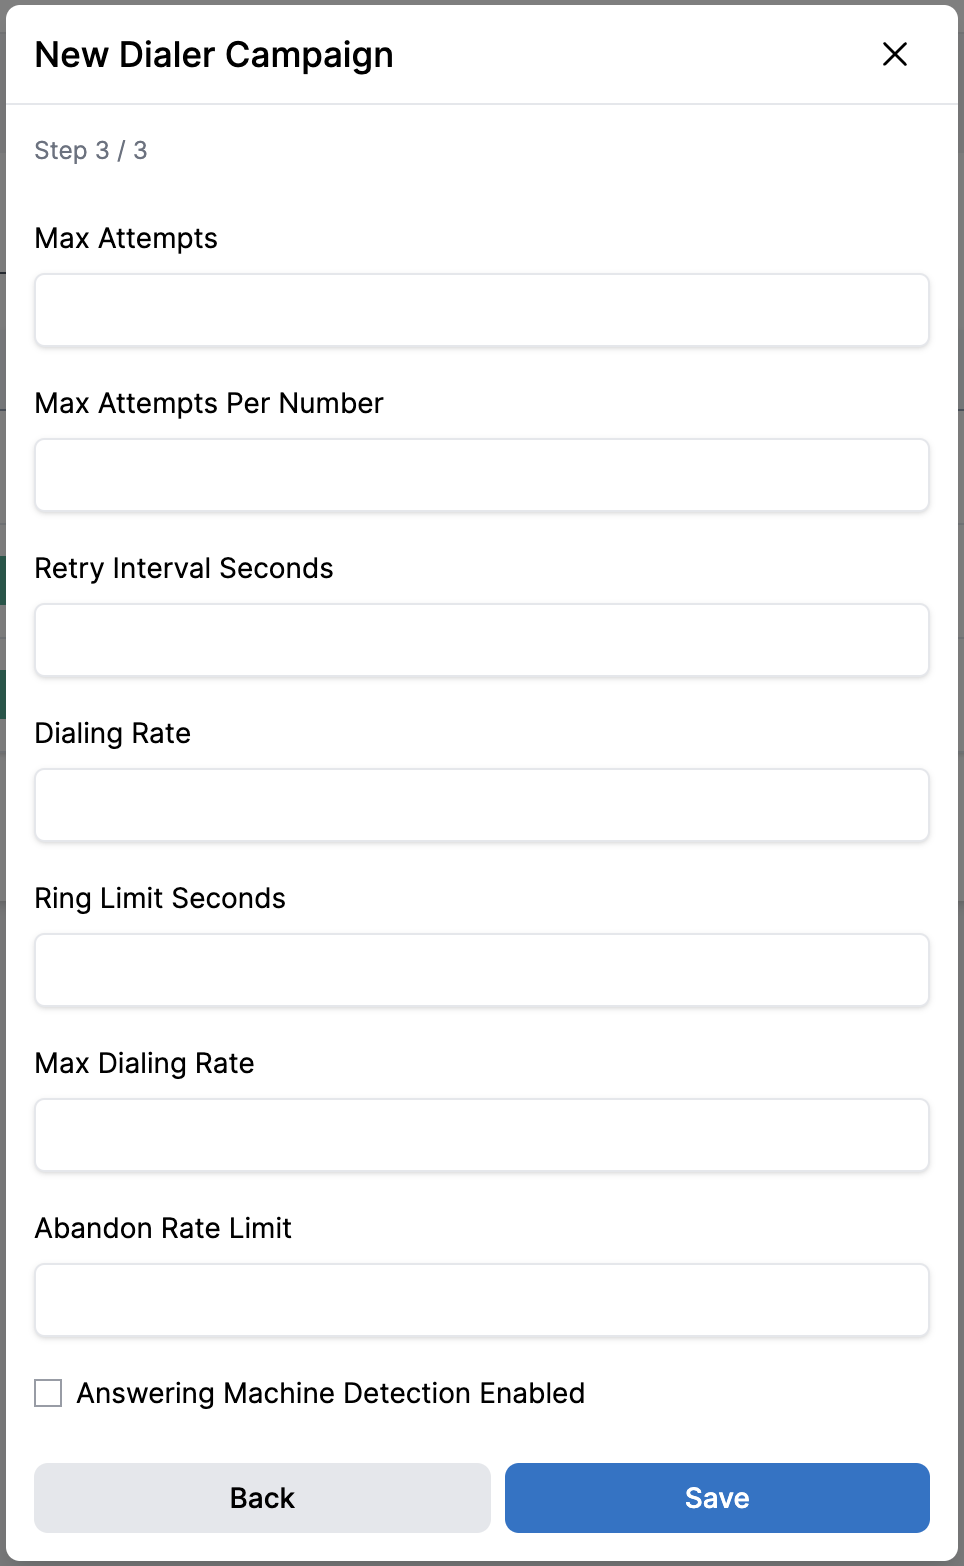
Step 3
After setting up the initial and advanced campaign parameters, you'll need to configure settings that directly affect the behavior of your campaign. These settings control how aggressively your campaign operates and how it handles retry attempts.
-
Max Attempts
- Set the maximum number of attempts allowed per record in your contact list.
- This prevents excessive attempts to reach a single contact.
-
Max Attempts per Number
- Specify the maximum number of attempts allowed for each individual phone number.
- This can differ from Max Attempts if a record has multiple numbers.
- Phone Number Rotation Mode
- Choose how the campaign rotates through multiple phone numbers for a record.
- Sequential (Exhaust Each Number): The default mode. When a record has multiple phone numbers, the campaign will exhaust all retry attempts on Phone 1 before moving to Phone 2, then Phone 3, and so on. For example, with 3 phone numbers and 3 attempts per number:
- Attempts 1-3: Phone 1
- Attempts 4-6: Phone 2
- Attempts 7-9: Phone 3
- Round Robin (Rotate Each Attempt): The campaign will rotate through available phone numbers on each attempt. For example, with 3 phone numbers:
- Attempt 1: Phone 1
- Attempt 2: Phone 2
- Attempt 3: Phone 3
- Attempt 4: Phone 1 (cycle repeats)
- Round Robin mode can be useful when you want to try different numbers at different times of day, or when phone numbers have different schedules assigned to them.
-
Retry Interval Seconds
- Define the minimum time (in seconds) that must elapse before retrying a number or record.
- This helps prevent annoying customers with rapid, repeated calls.
-
Dialing Rate
- Set the number of contacts to be dialed per available agent.
- For Progressive 1:1 Dialer, this will be fixed at 1 contact per agent.
- For Predictive 1:N Dialer, you can set this up to 10 contacts per available agent.
- For Progressive IVR this setting is fixed to 1 contact per agent.
-
Ring Limit Seconds
- Specify the number of seconds a call should ring before being considered unanswered.
- The acceptable range is from 16 to 80 seconds.
-
Max Dialing Rate
- This caps the maximum dialing rate per agent.
- The range is from 1.0 to 10.0, with a default of 1.0.
- This setting helps prevent overwhelming agents with too many calls.
-
Abandon Rate Limit
- Set the maximum percentage of calls that are allowed to be abandoned.
- The range is from 1.0% to 100.0%, with a granularity of 0.1%.
- This helps maintain compliance with regulations and ensures a good customer experience.
-
Answering Machine Detection Enabled
- Determine whether the system should attempt to detect answering machines.
- When enabled, the system can differentiate between live answers and recorded messages.
Optimizing Your Settings
- Start conservative: Begin with a lower dialing rate and a stricter abandon rate limit. Gradually adjust as you monitor performance.
- Test Answering Machine Detection: Enable this feature and monitor its accuracy. Adjust your strategy based on the results - you might choose to leave messages or to only connect agents to live answers.
- Regular review: Continuously monitor your campaign's performance metrics and adjust these settings to optimize results while maintaining compliance and customer satisfaction.
Considerations When Configuring These Fields
-
Balance Efficiency and Customer Experience: Higher dialing rates and shorter retry intervals can increase efficiency but may negatively impact customer experience. Strike a balance that suits your campaign goals.
-
Compliance: Ensure your settings comply with local regulations regarding outbound calling practices, particularly concerning retry attempts and intervals.
-
Agent Capacity: Consider your agents' ability to handle calls when setting dialing rates. A higher rate might increase contact volume but could also lead to more abandoned calls if agents can't keep up.
-
Campaign Type: Adjust these settings based on your campaign type. For example, a sales campaign might use different settings than a customer service follow-up campaign.
-
Number of IVR Ports: Adjust these settings based on your maximum expected simultaneous calls, and the typical traffic flow to anticipate busy periods to handle surges without delay.
-
Time of Day: Consider adjusting these settings based on the time of day. You might use more aggressive settings during peak hours and more conservative ones during off-peak times.
-
Abandon Rate Compliance: Many jurisdictions have regulations limiting abandon rates. Set your Abandon Rate Limit in compliance with these rules, typically keeping it below 3% for most situations.
-
Answering Machine Strategy: Enabling Answering Machine Detection can improve agent efficiency by avoiding connecting them to voicemails. However, consider your campaign goals - sometimes leaving messages can be beneficial.
Impact on Campaign Performance
These settings directly influence your campaign's performance metrics, including:
- Contact rate
- Agent utilization
- Abandonment rate
- Overall campaign efficiency
- Message delivery rate (if leaving voicemails is part of your strategy)
The Abandon Rate Limit and Answering Machine Detection settings can significantly impact how your dialer behaves, especially in predictive dialing scenarios. They help balance efficiency with compliance and customer experience.
Regularly review your campaign performance and adjust these settings as needed to optimize your results while maintaining a positive customer experience.
Next Steps
After configuring these initial settings, you'll proceed to the next steps in the campaign creation process, which include setting up dialing rules, and uploading contact lists.
Remember, the success of your campaign often depends on these initial configuration choices. Take the time to consider each option carefully and align them with your campaign goals and overall customer engagement strategy.
As you proceed, keep in mind that the interaction between these various settings can be complex. It may take some experimentation to find the optimal configuration for your specific campaign goals and regulatory environment.