Introduction to Flow Interactions
The Flow Interactions module shows how each call that hit a Webex Contact Center provider flow executed, step by step. Each flow interaction links the analytics Interaction record to the flow version that ran, so supervisors can see which activities the call passed through, the values captured at each step, and the final result.
This page describes where to find flow interactions, what the table shows, and how to open the detail view for a single execution.
Accessing Flow Interactions
-
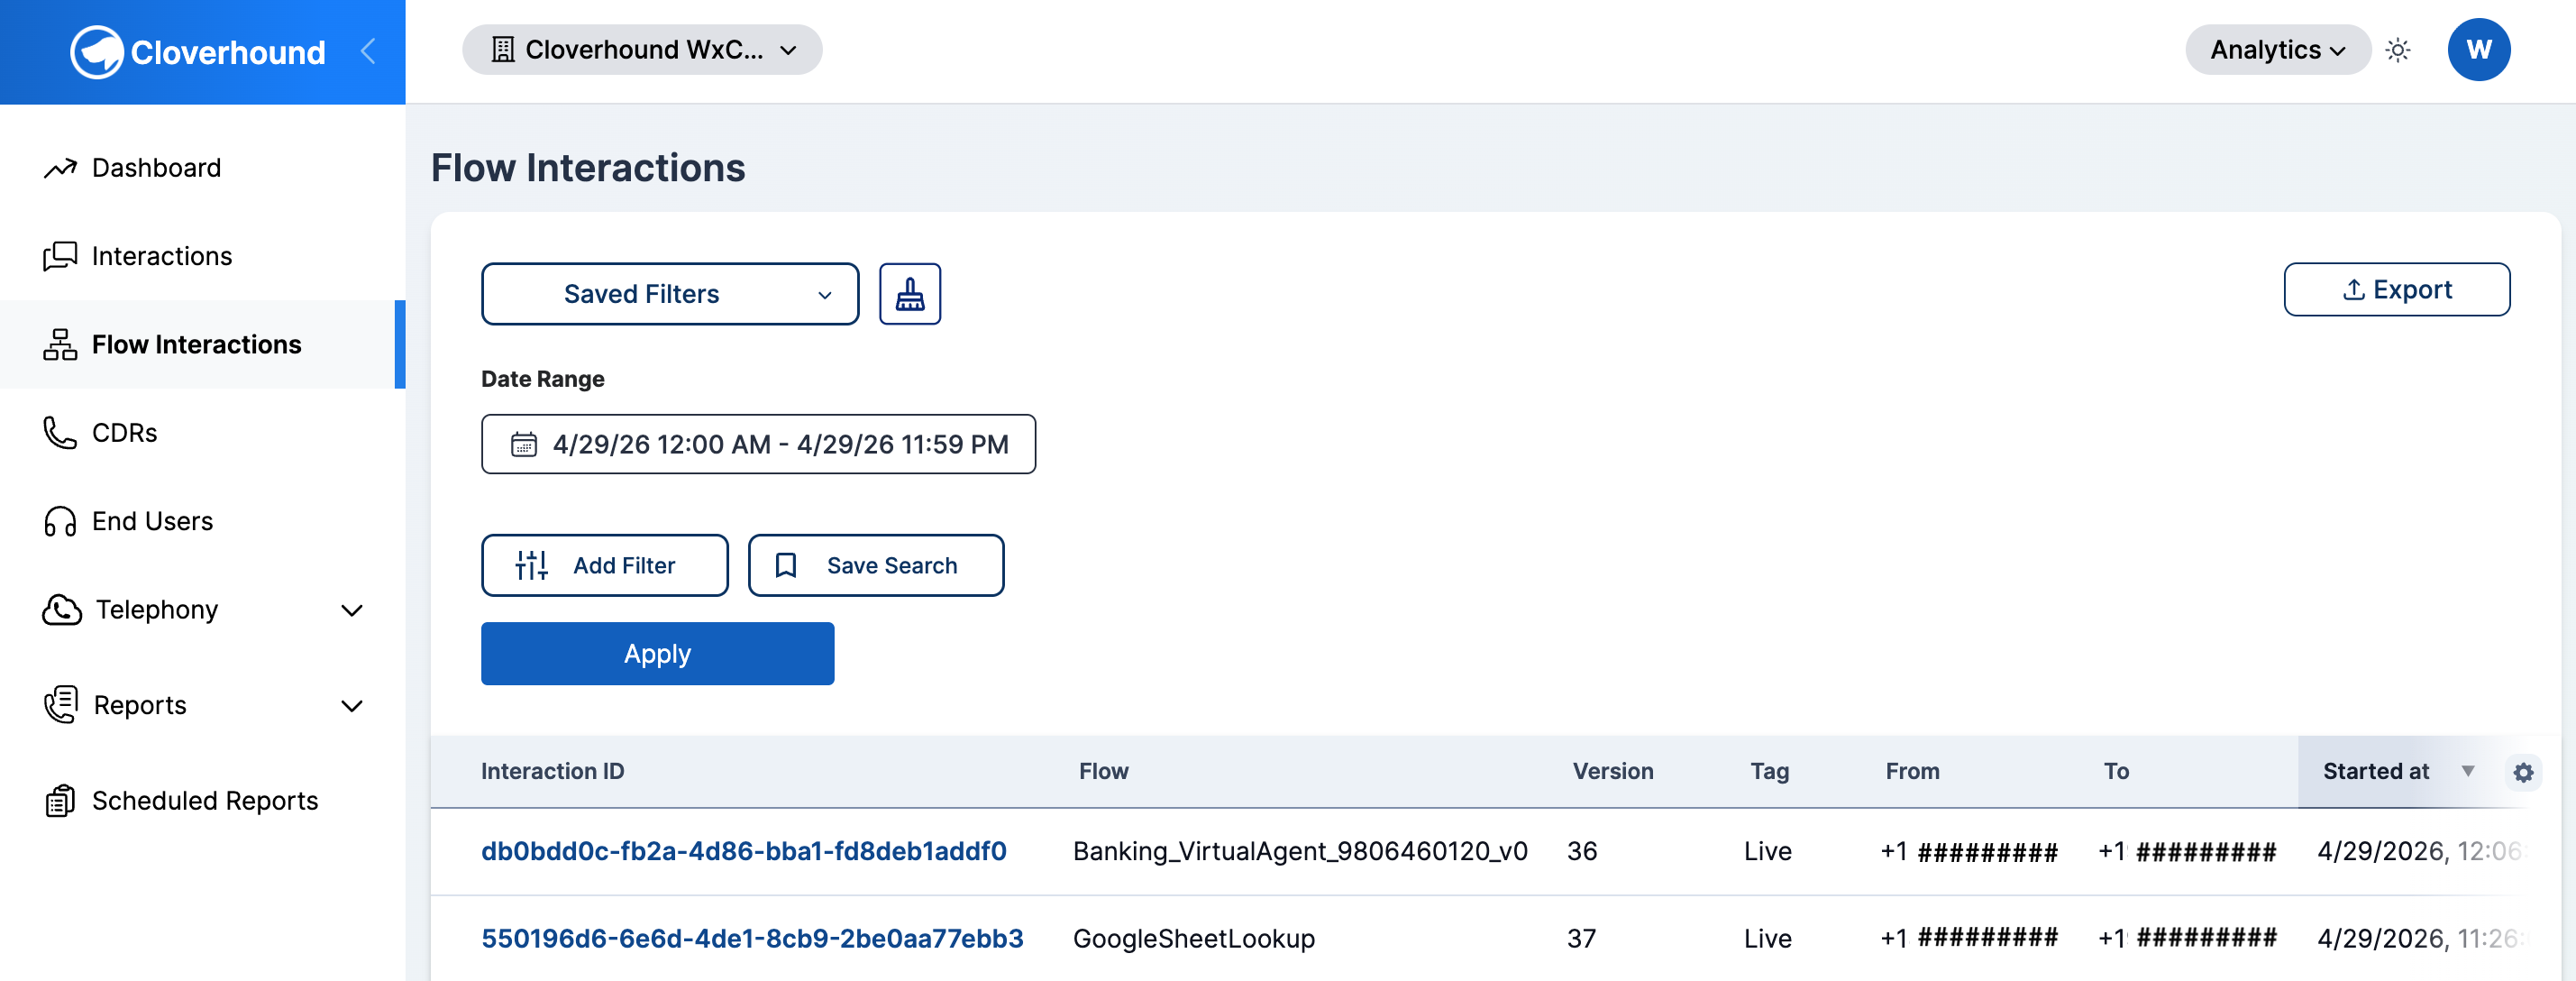
Open the Analytics module in your Cloverhound Cloud dashboard.
-
Click Flow Interactions in the navigation menu.
-
Locate the Flow Interactions table. By default it shows flow executions that started today in your organization's time zone, sorted by Started at descending.
Reading the Flow Interactions Table
Each row represents one execution of a provider flow for a single interaction. The table includes the following columns:
- Interaction ID — The provider's reference ID for the interaction. Click the value to open the flow interaction detail page.
- Flow — The name of the provider flow that ran.
- Version — The version number of the provider flow that executed.
- Tag — The tag recorded by the flow, when present.
- From — The originating phone number or contact. Links to the matching contact record when one exists.
- To — The destination phone number or contact. Links to the matching contact record when one exists.
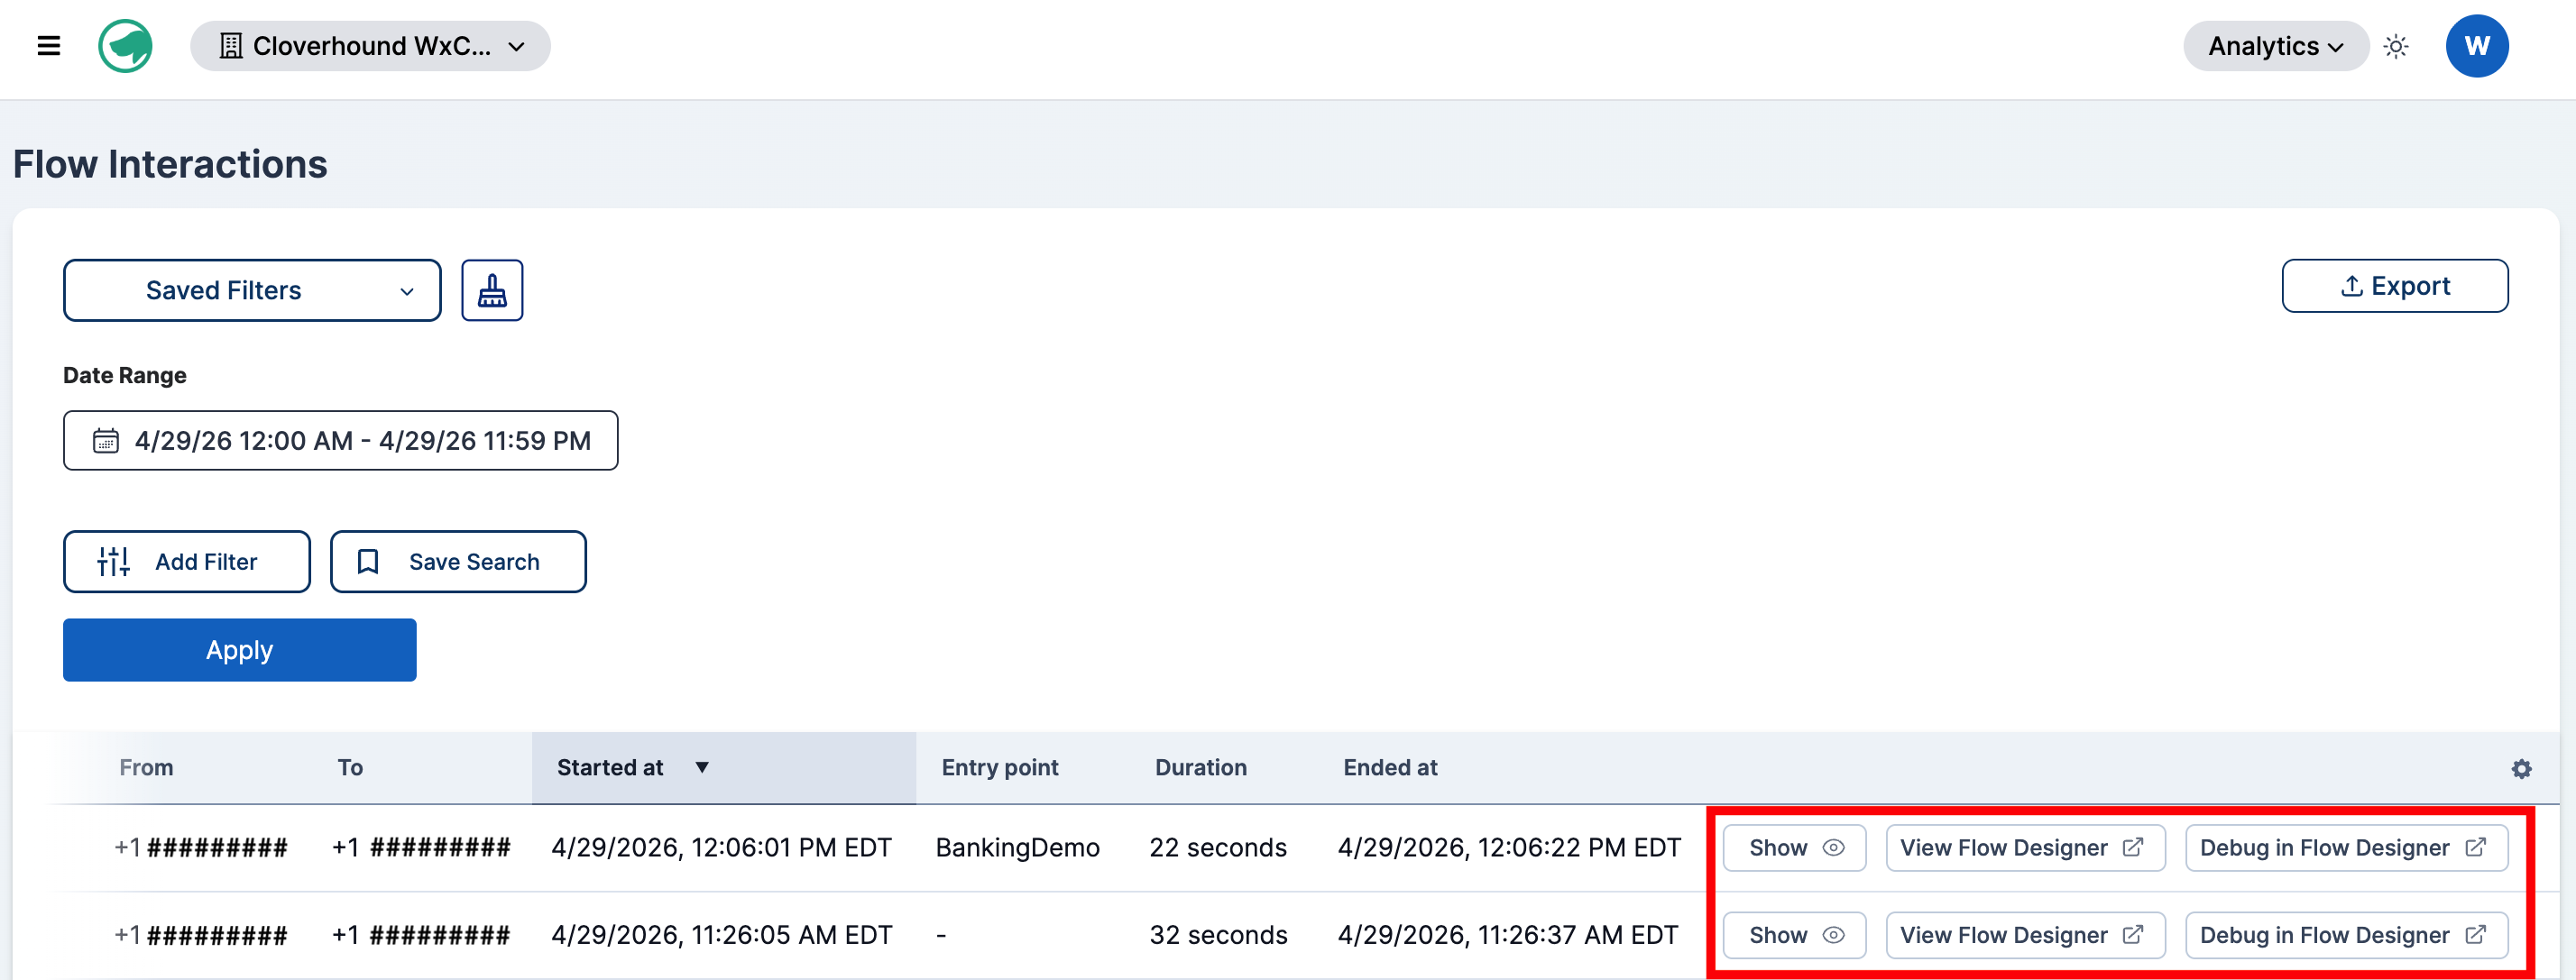
- Started at — When the flow execution began, rendered in your organization's time zone.
- Entry point — The entry point the call used to enter the flow.
- Duration — The total elapsed time between the flow's start and end.
- Ended at — When the flow execution ended, rendered in your organization's time zone.
The last column in each row includes three action buttons:
- Show — Opens a modal with the raw JSON payload captured for the execution.
- View Flow Designer — Opens the flow version in Webex Control Hub's Flow Designer in a new tab.
- Debug in Flow Designer — Opens the same flow version in Flow Designer with the debug session pre-loaded for this interaction.
View Flow Designer and Debug in Flow Designer open Webex Control Hub in a new tab. You must be signed in to a Webex administrator account with access to the flow to load either view.
Filtering Flow Interactions
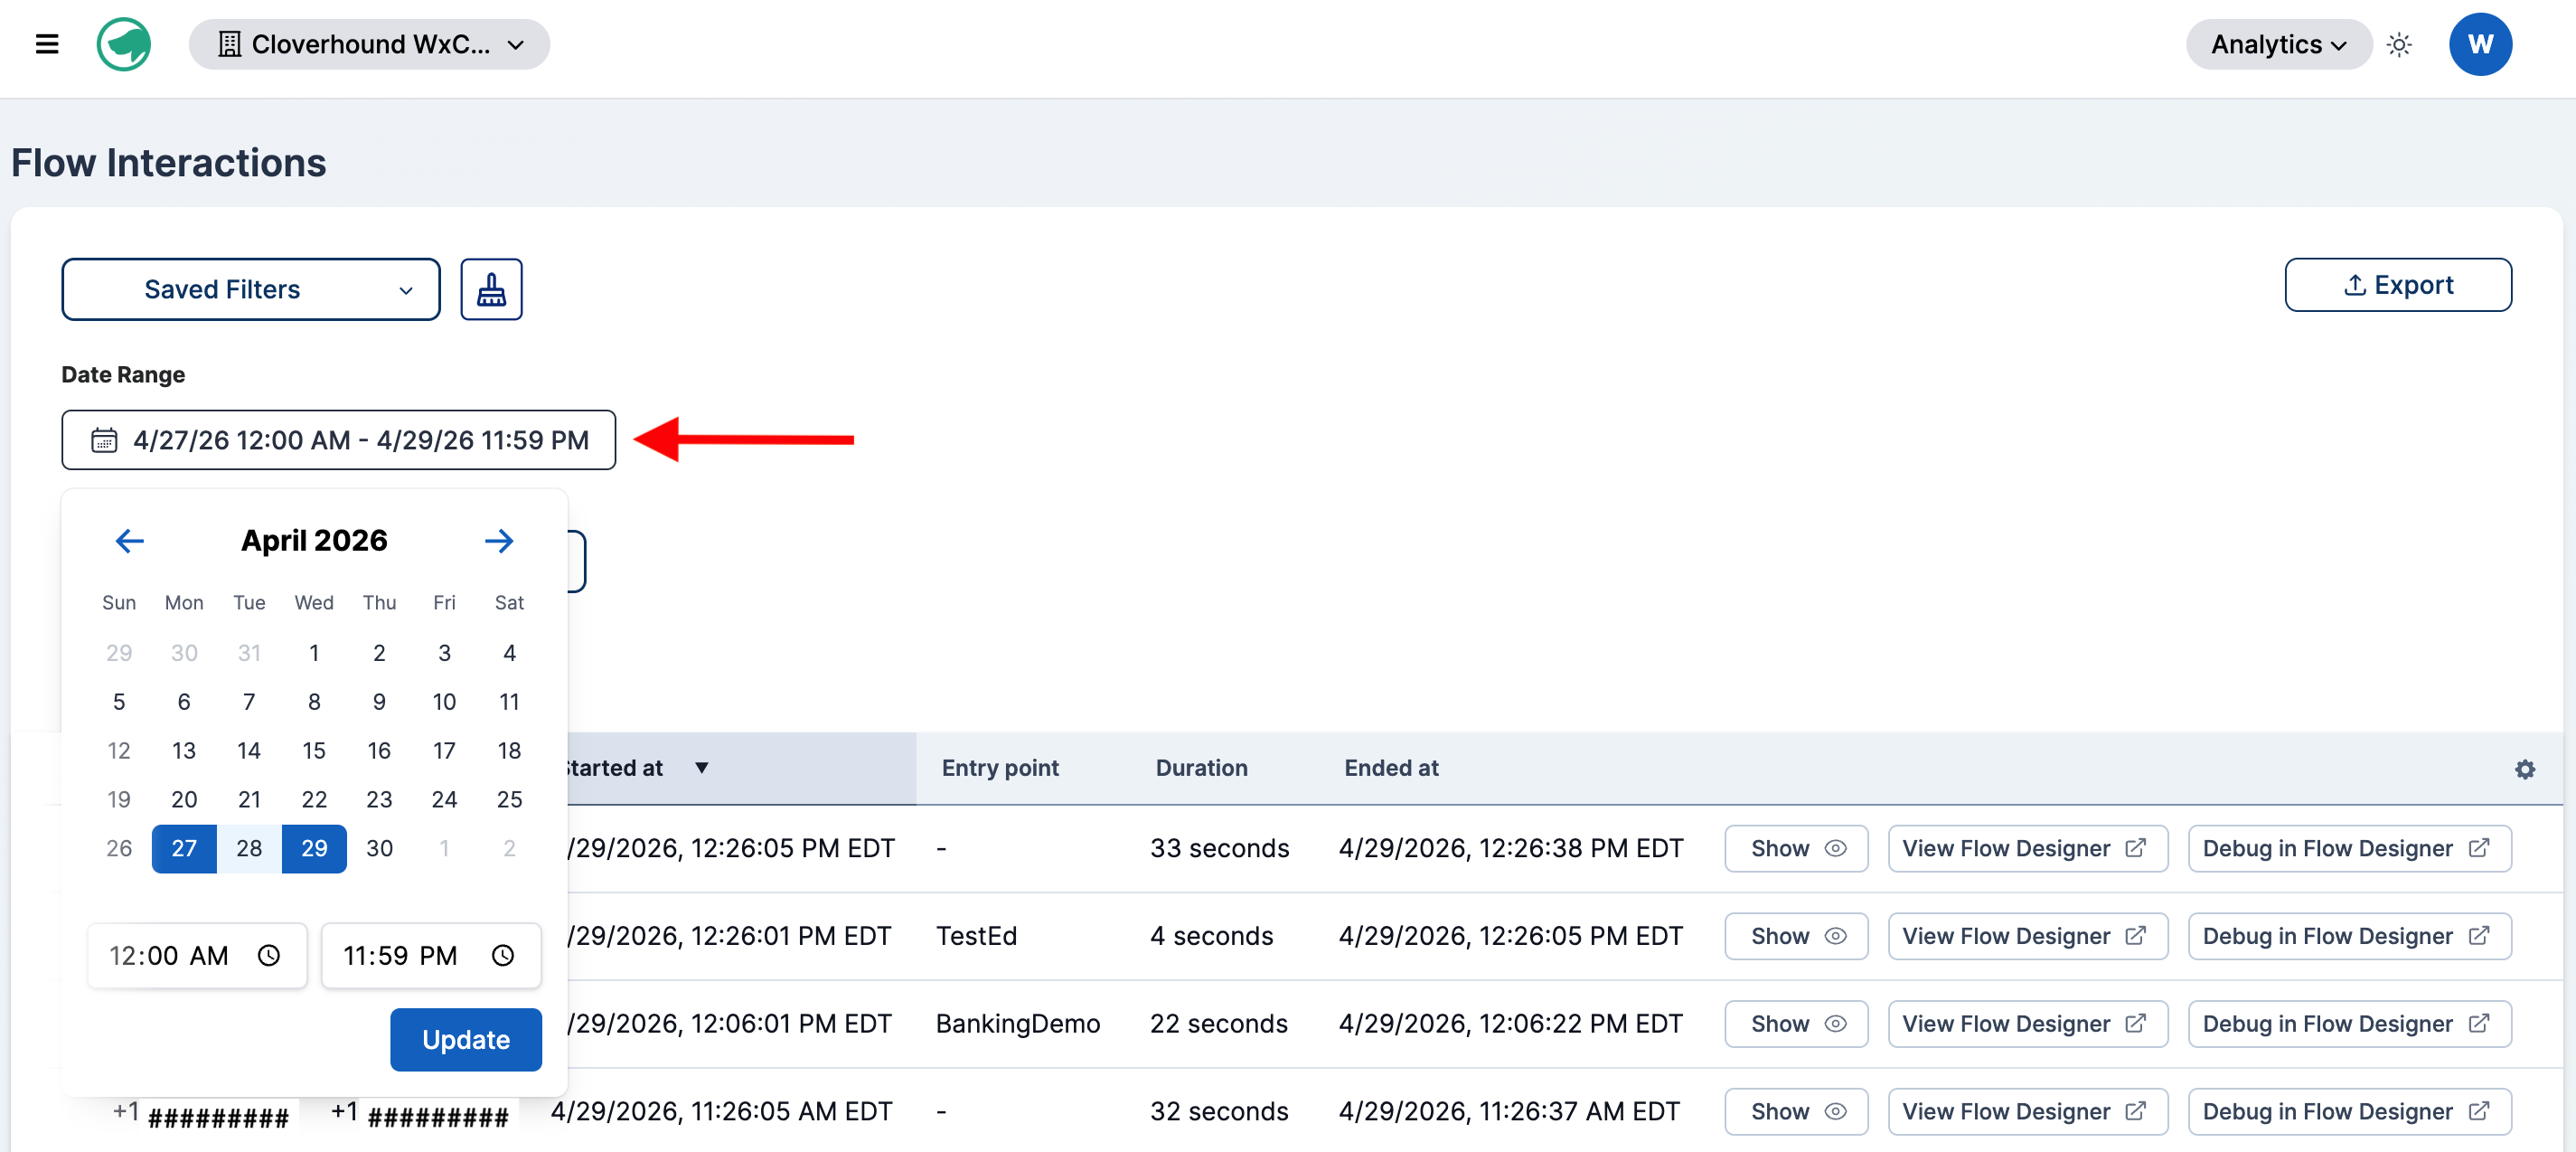
Use the filter panel on the left of the table to narrow the results. The Date Range filter is always visible and cannot be removed; all other filters are optional.
-
Set the Date Range to cover the window you want to inspect. After picking the days from the calendar and the start and end times from the dropdowns, click Update to apply the date filter.
-
Add any of the following filters as needed:
- Phone Number — Match on From, To, or Both fields of the linked interaction.
- Interaction ID — Match against the
interactionIdrecorded in the flow details. - Flow name — Pick one or more flows from the list of provider flows in your organization.
- Entry point — Pick one or more entry points recorded on the currently loaded flow interactions.
- Flow Version — Filter by a specific flow version number.
- Tag — Match on the tag captured by the flow.
- Duration (seconds) — Compare execution duration using
>,<,>=, or<=.
-
Click Apply to run the search. The table updates to show only matching executions.
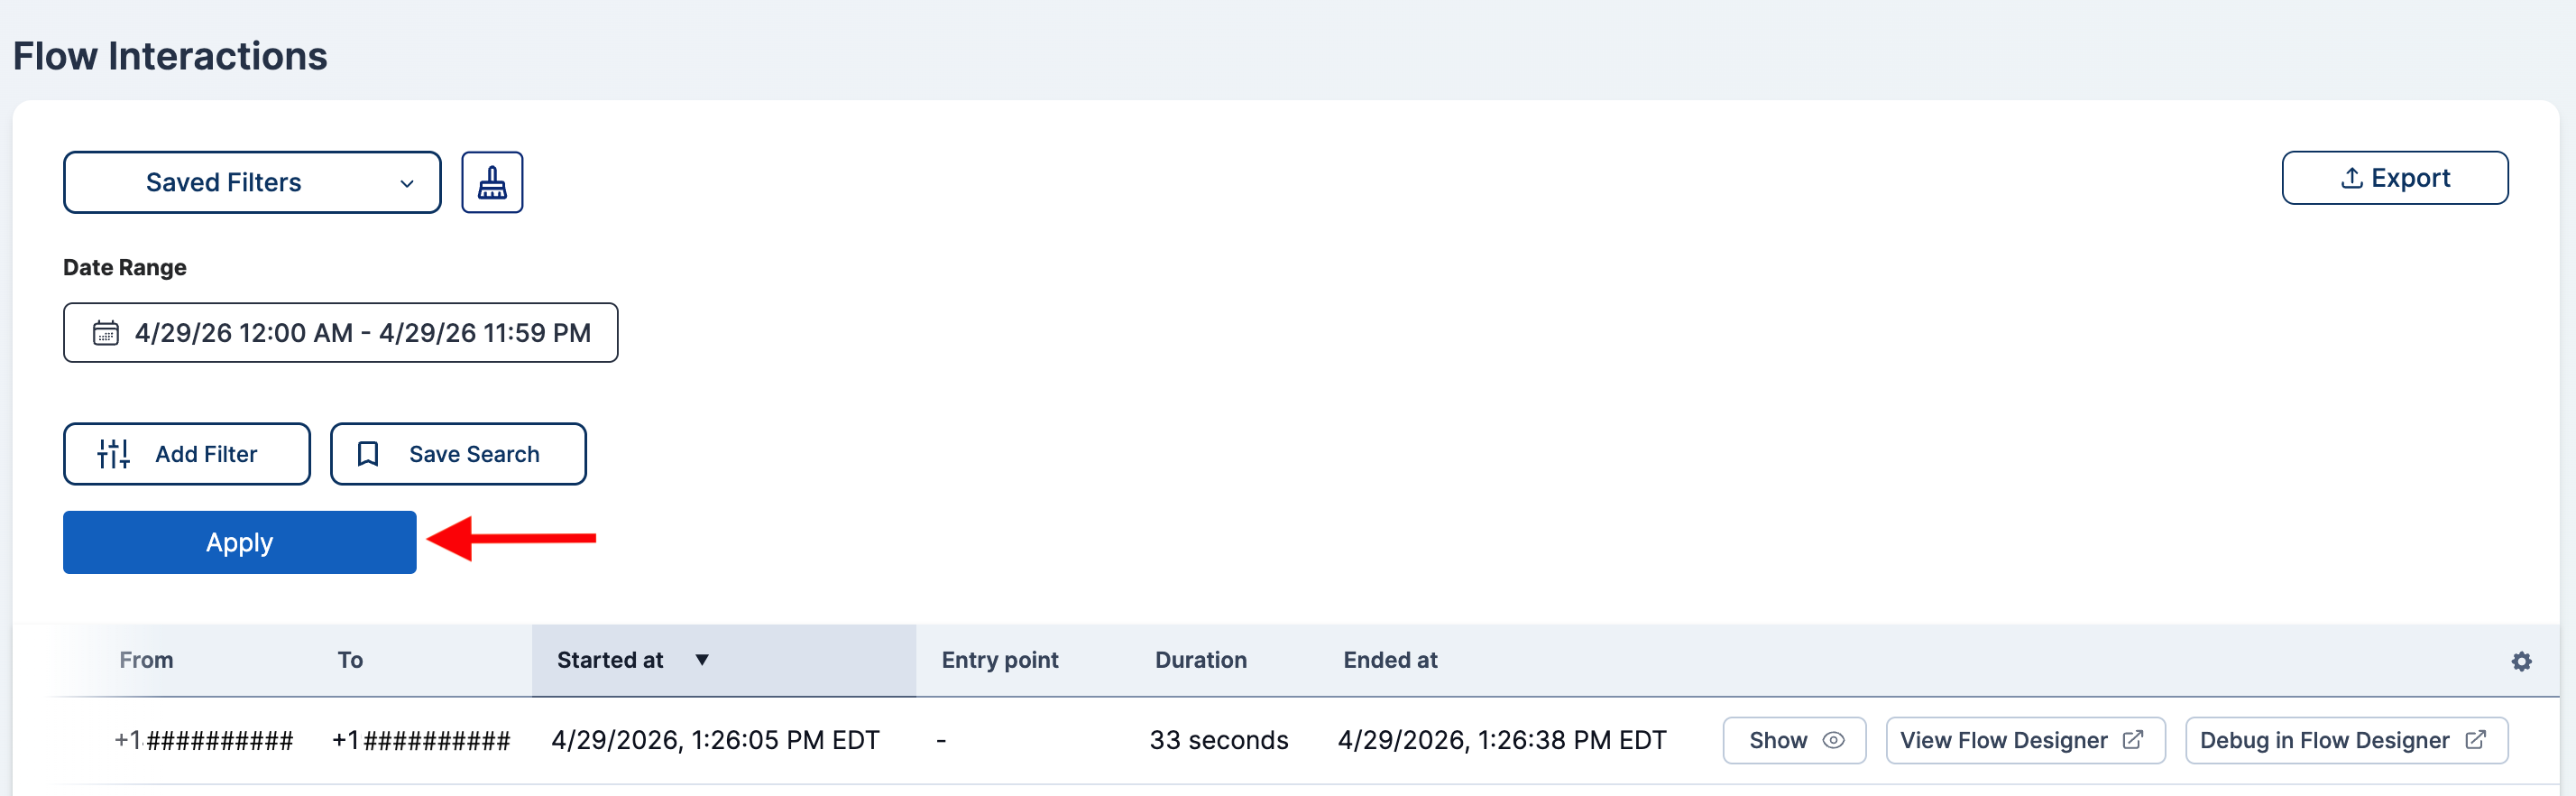
Saved filter configurations, the Save Search button, and pagination controls behave the same way as on The Interactions Table.
Exporting Flow Interactions
-
Configure the date range and any filters you want the export to honor.
-
Click the export dropdown above the table and choose CSV, Excel, or PDF.
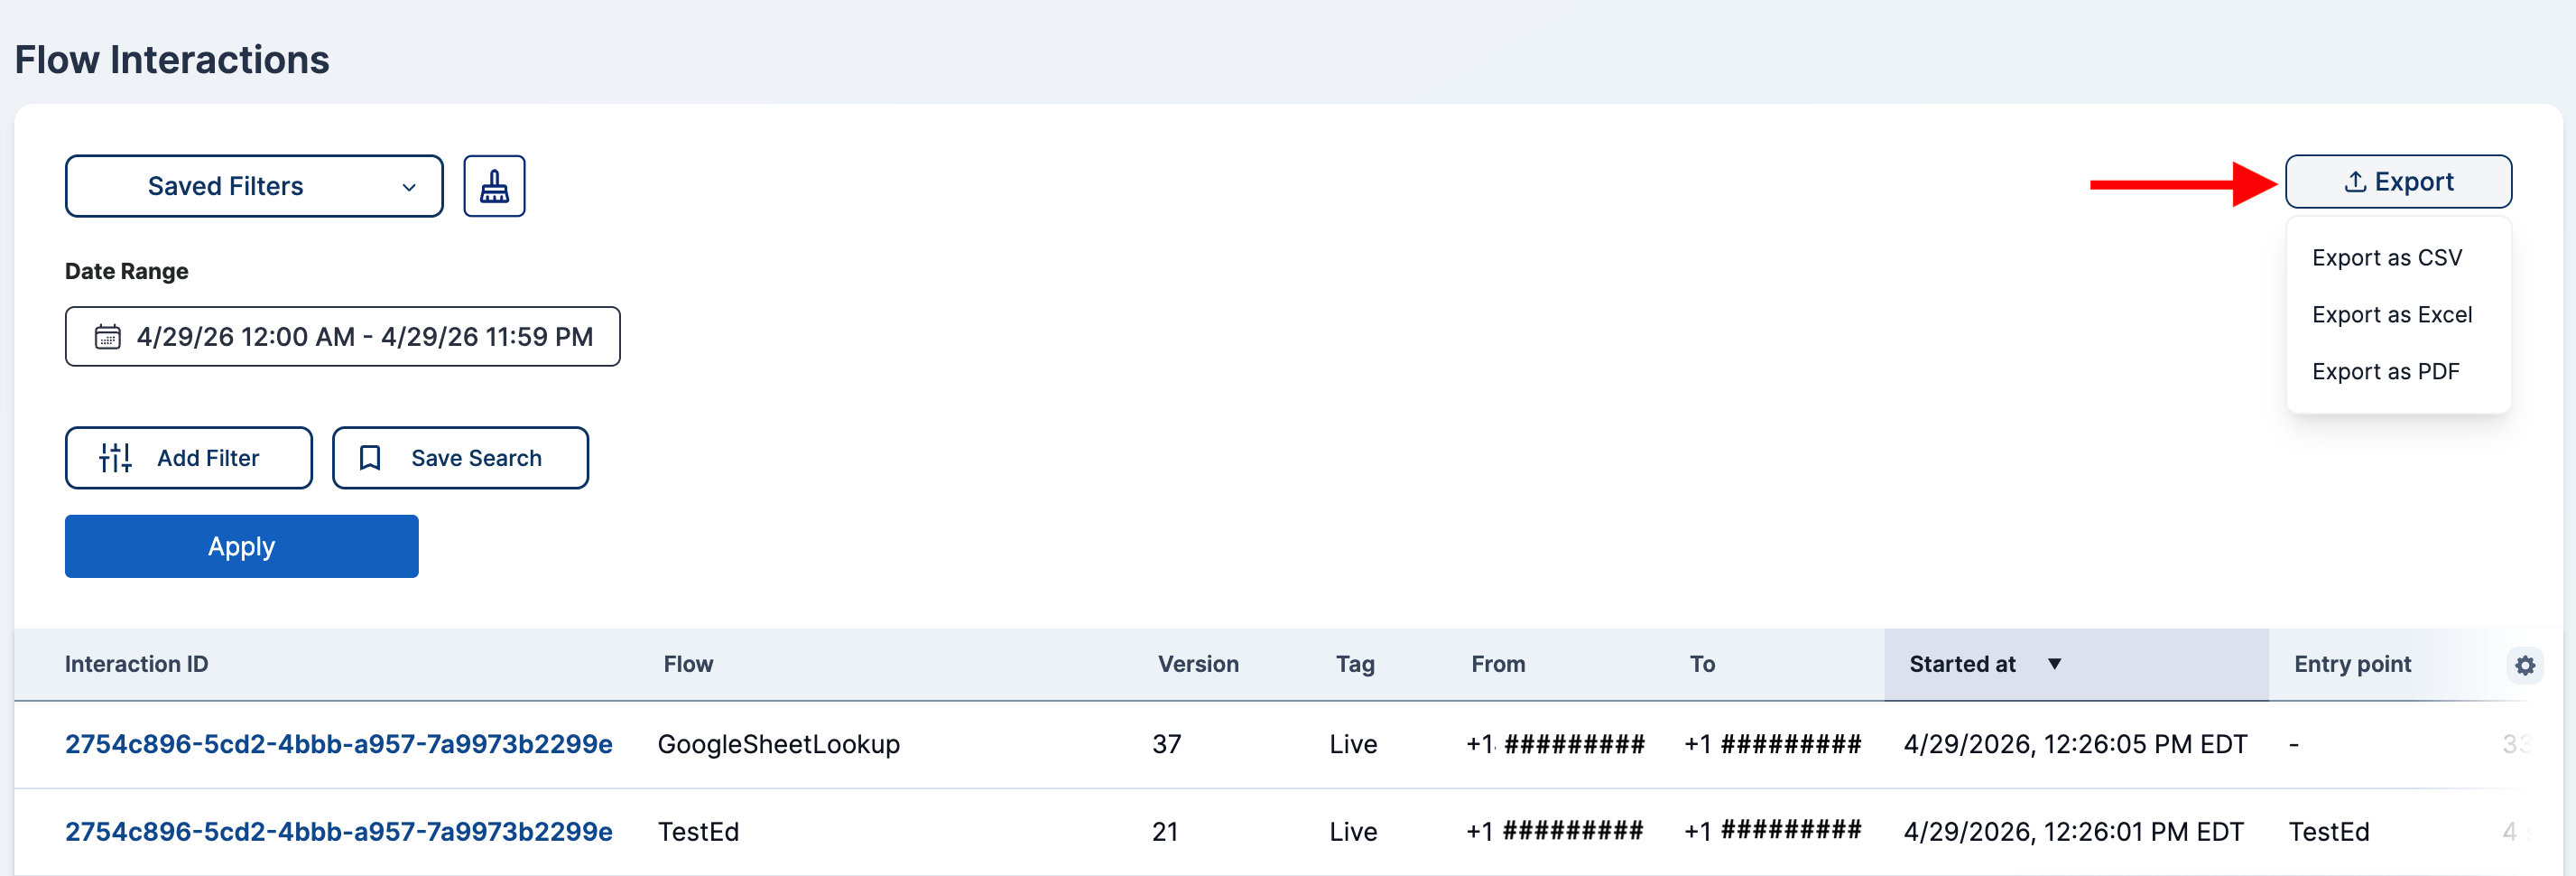
-
Download the generated file. The filename includes the start and end dates you selected, for example
flow-interactions-January 01, 2026-to-January 31, 2026.csv.
PDF exports are capped at 1,000 rows. CSV and Excel exports are capped at 10,000 rows. Tighten the date range or add filters to stay within the limit.
Viewing a Single Flow Interaction
Click the Interaction ID link in any row to open the detail page.
The detail header shows the interaction ID (linked to the matching Interaction record when one is linked) and the flow name and version. Three actions are available in the top right:
- Raw Details — Opens the full JSON payload for the execution.
- View Flow — Opens the flow version in Flow Designer.
- Debug Flow — Opens the flow version in Flow Designer's debug view.
Below the header are two tabs:
- Steps — Lists every step the flow executed, in order. See the Steps tab details below.
- Details — Shows key fields from the execution payload: From, To, Started at, Ended at, Flow ID, Flow Version ID, Last Step Executed, and Tag.
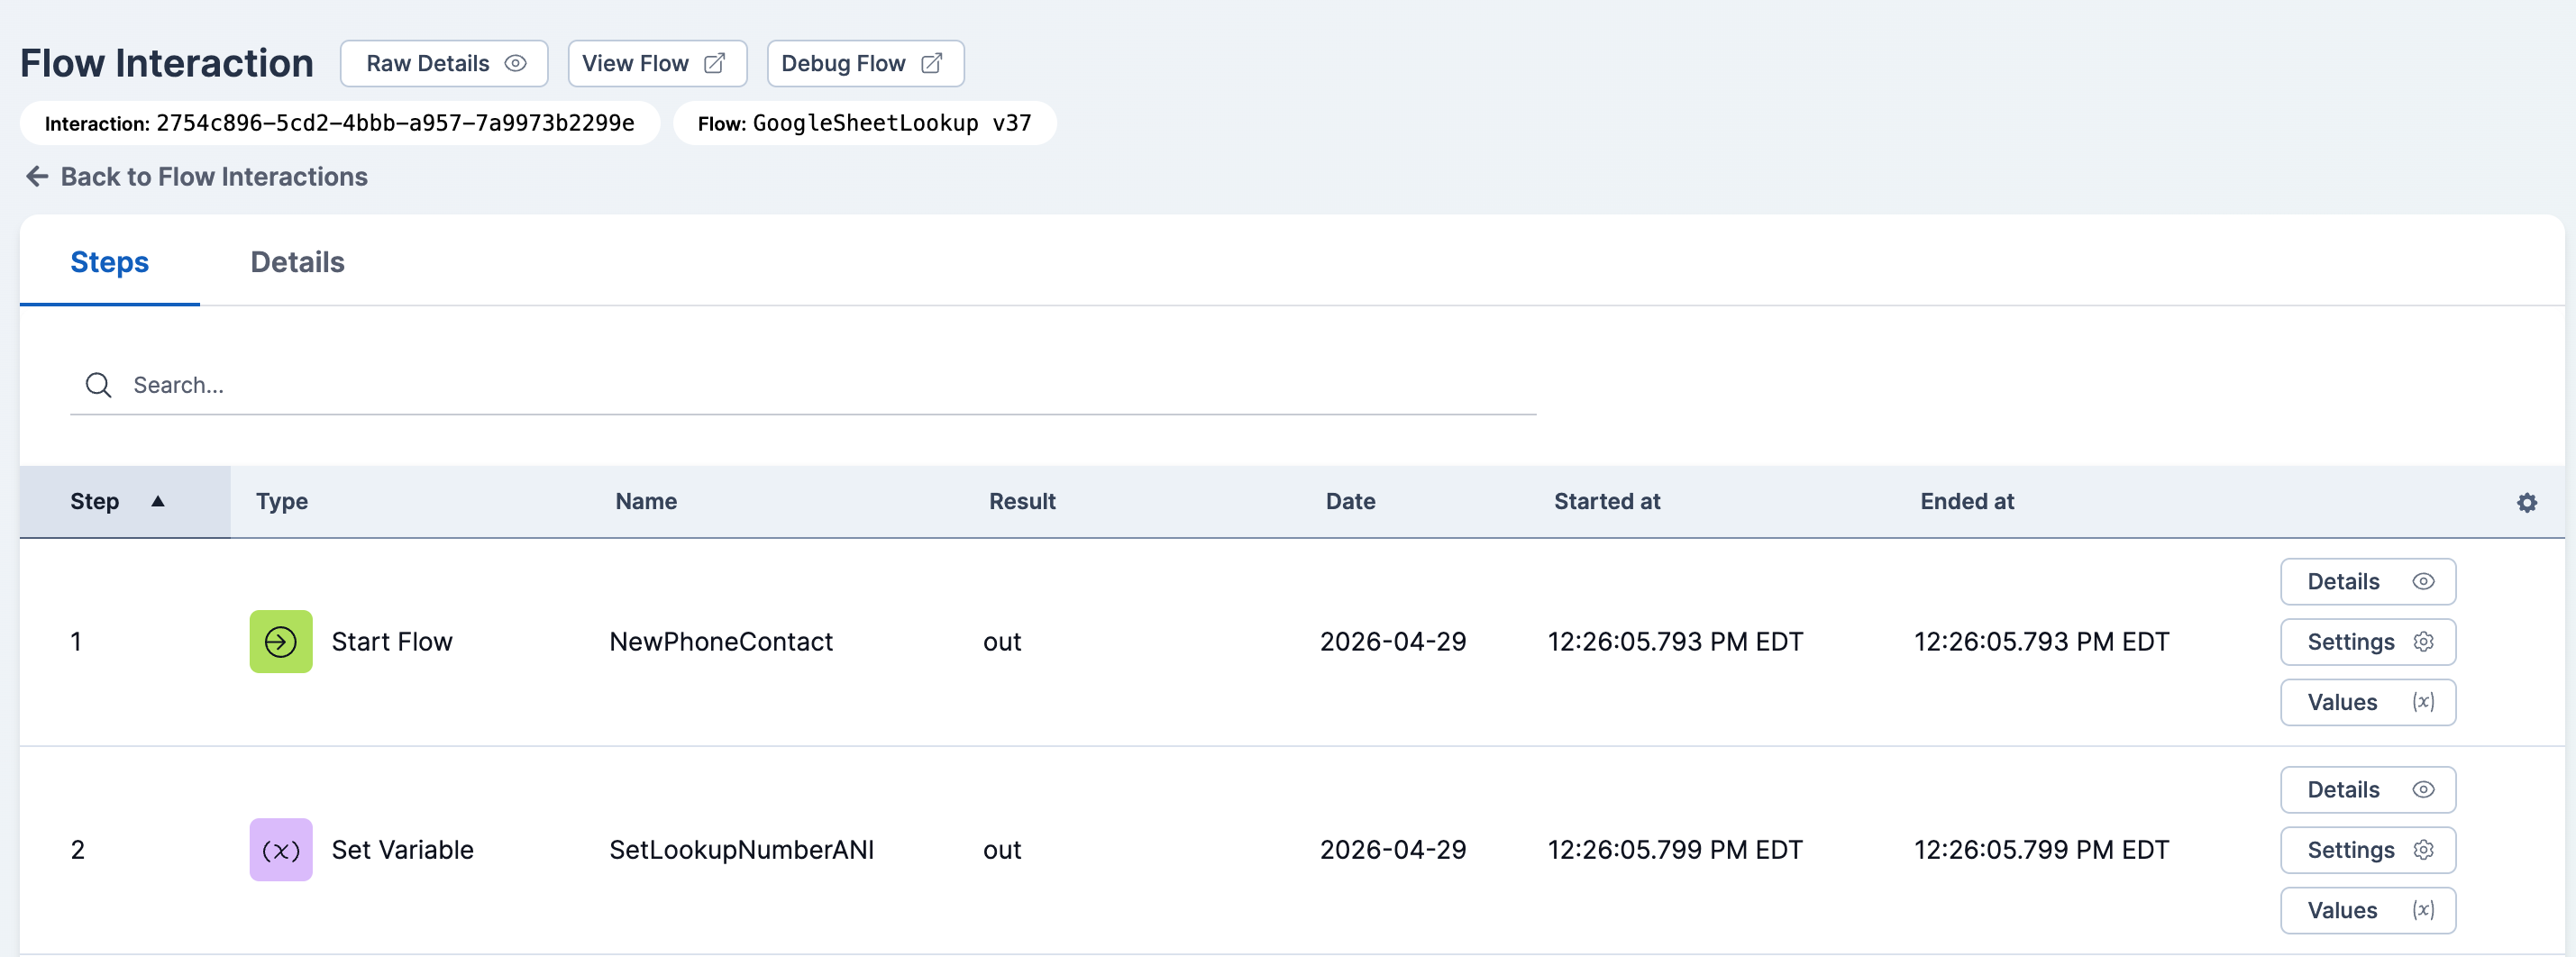
The Steps Tab
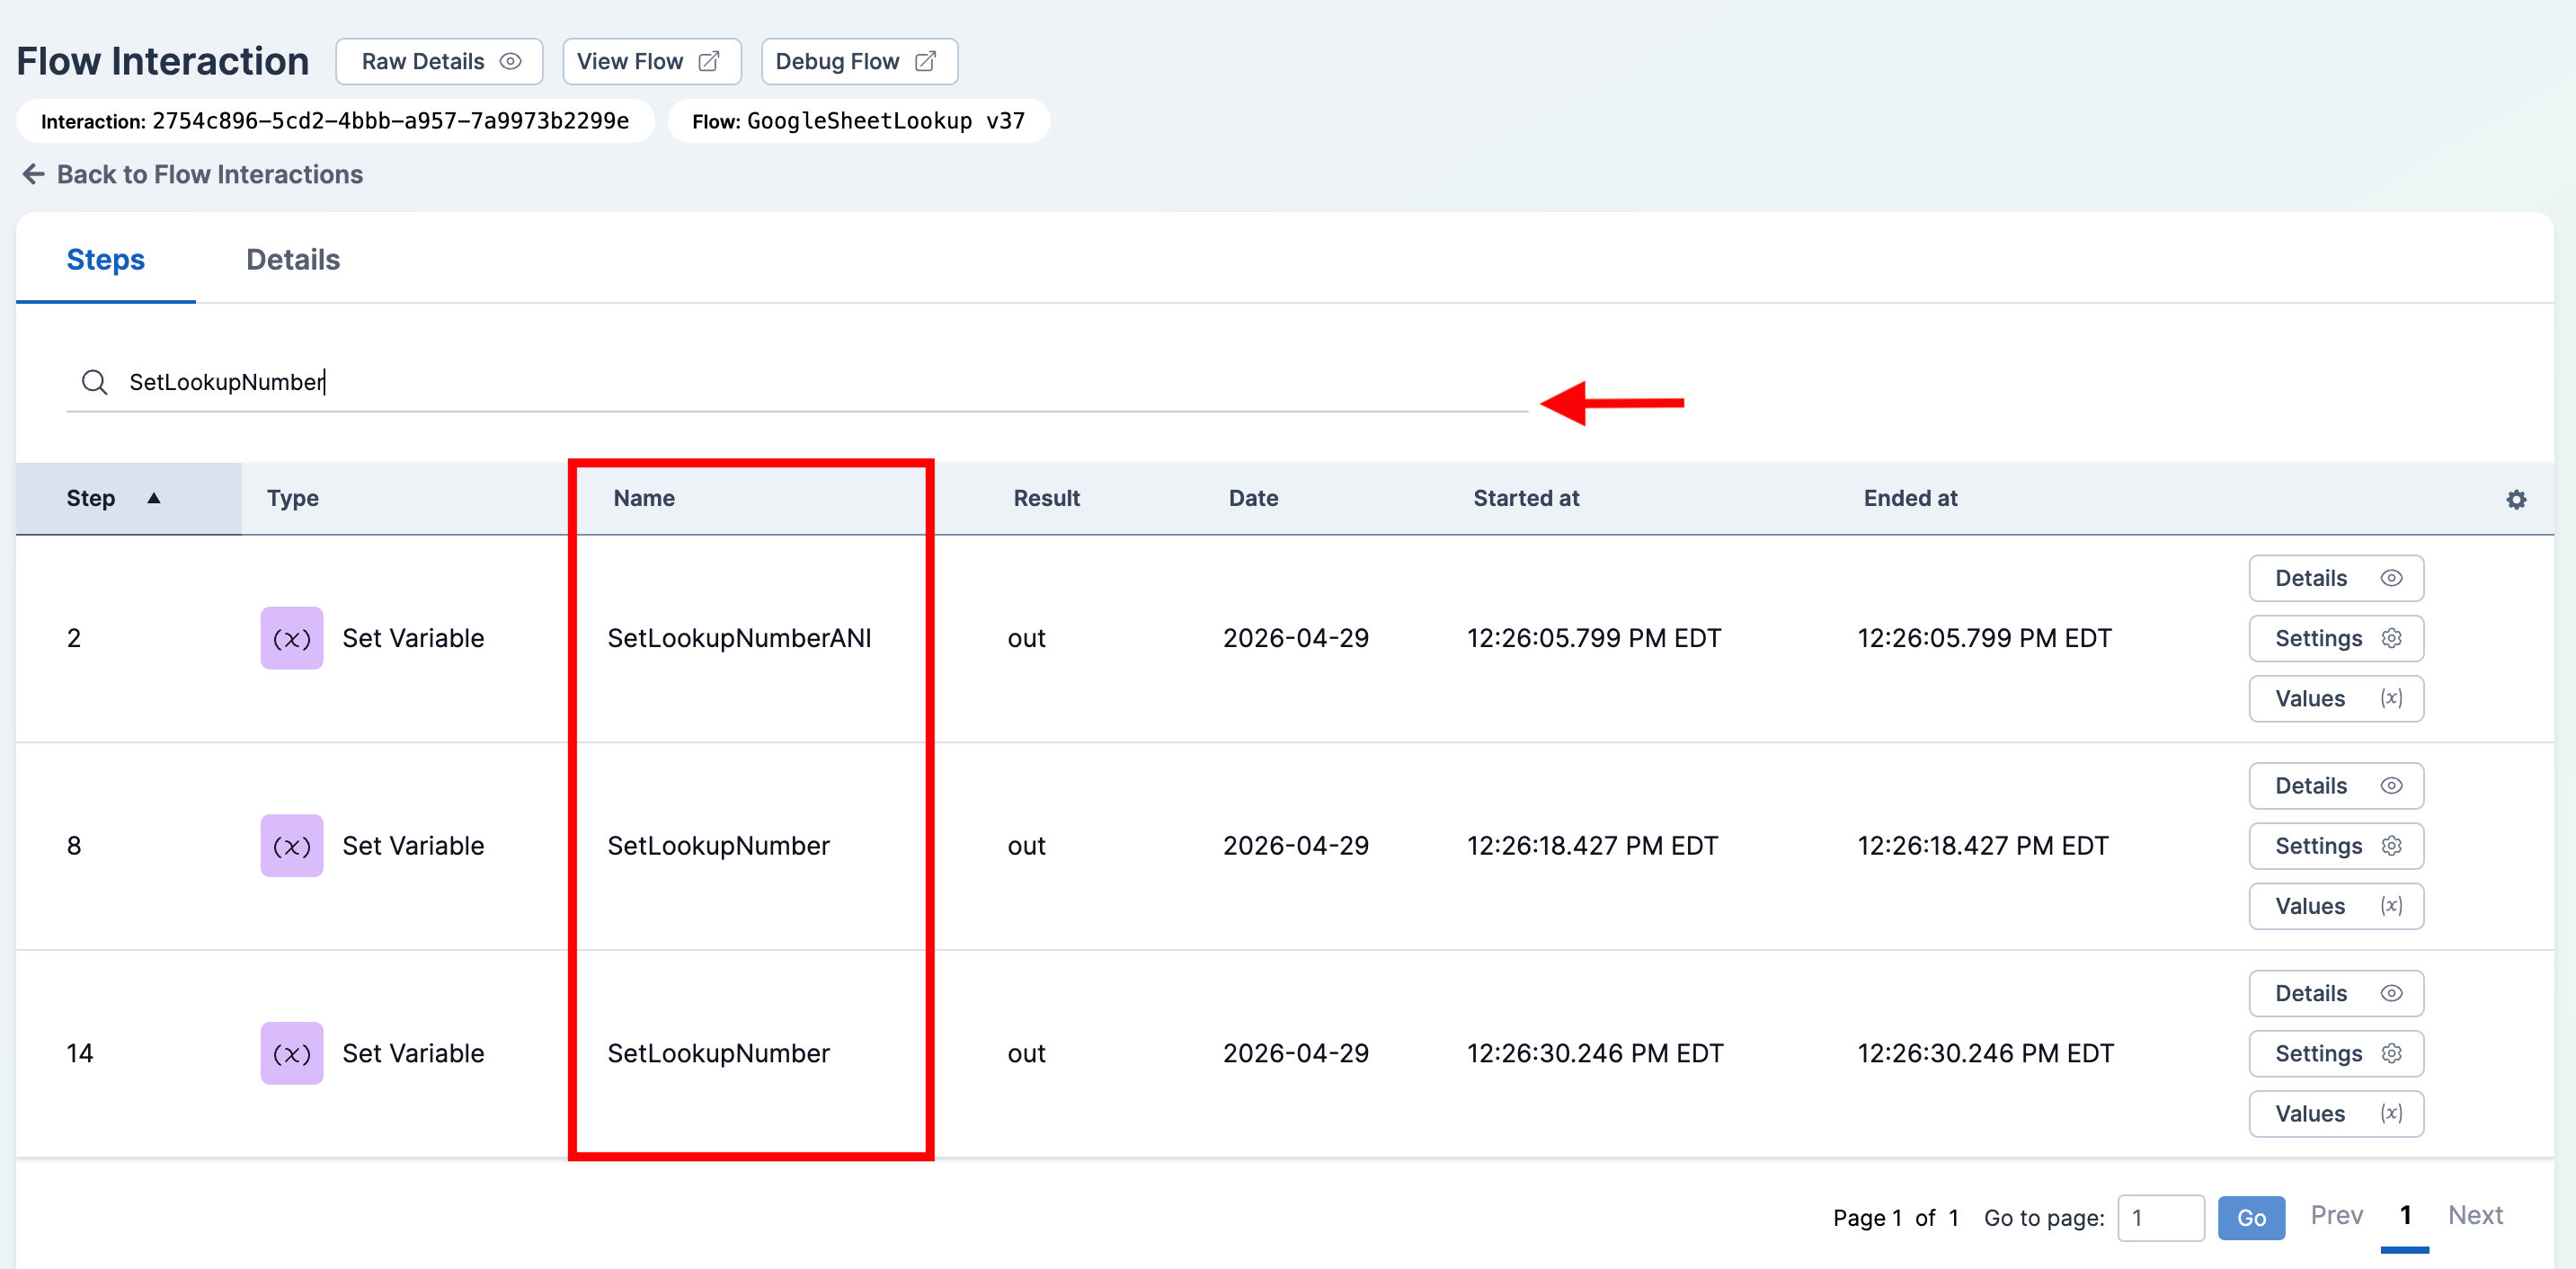
The Steps tab lists each activity the flow ran, ordered by sequence number. Each row shows:
- Step — The step's sequence number in the execution.
- Type — The activity type with an icon (for example, Play Message, Collect Digits, HTTP Request, Menu, Queue Contact, End Flow).
- Name — The activity name as configured in Flow Designer.
- Result — The outcome of the step. For HTTP Request steps, the HTTP status code is rendered as a colored pill (green for 2xx, blue for 3xx, red for 4xx/5xx). Steps that failed show a red
errorpill. - Date and Started at / Ended at — Timestamps rendered in your organization's time zone with millisecond precision.
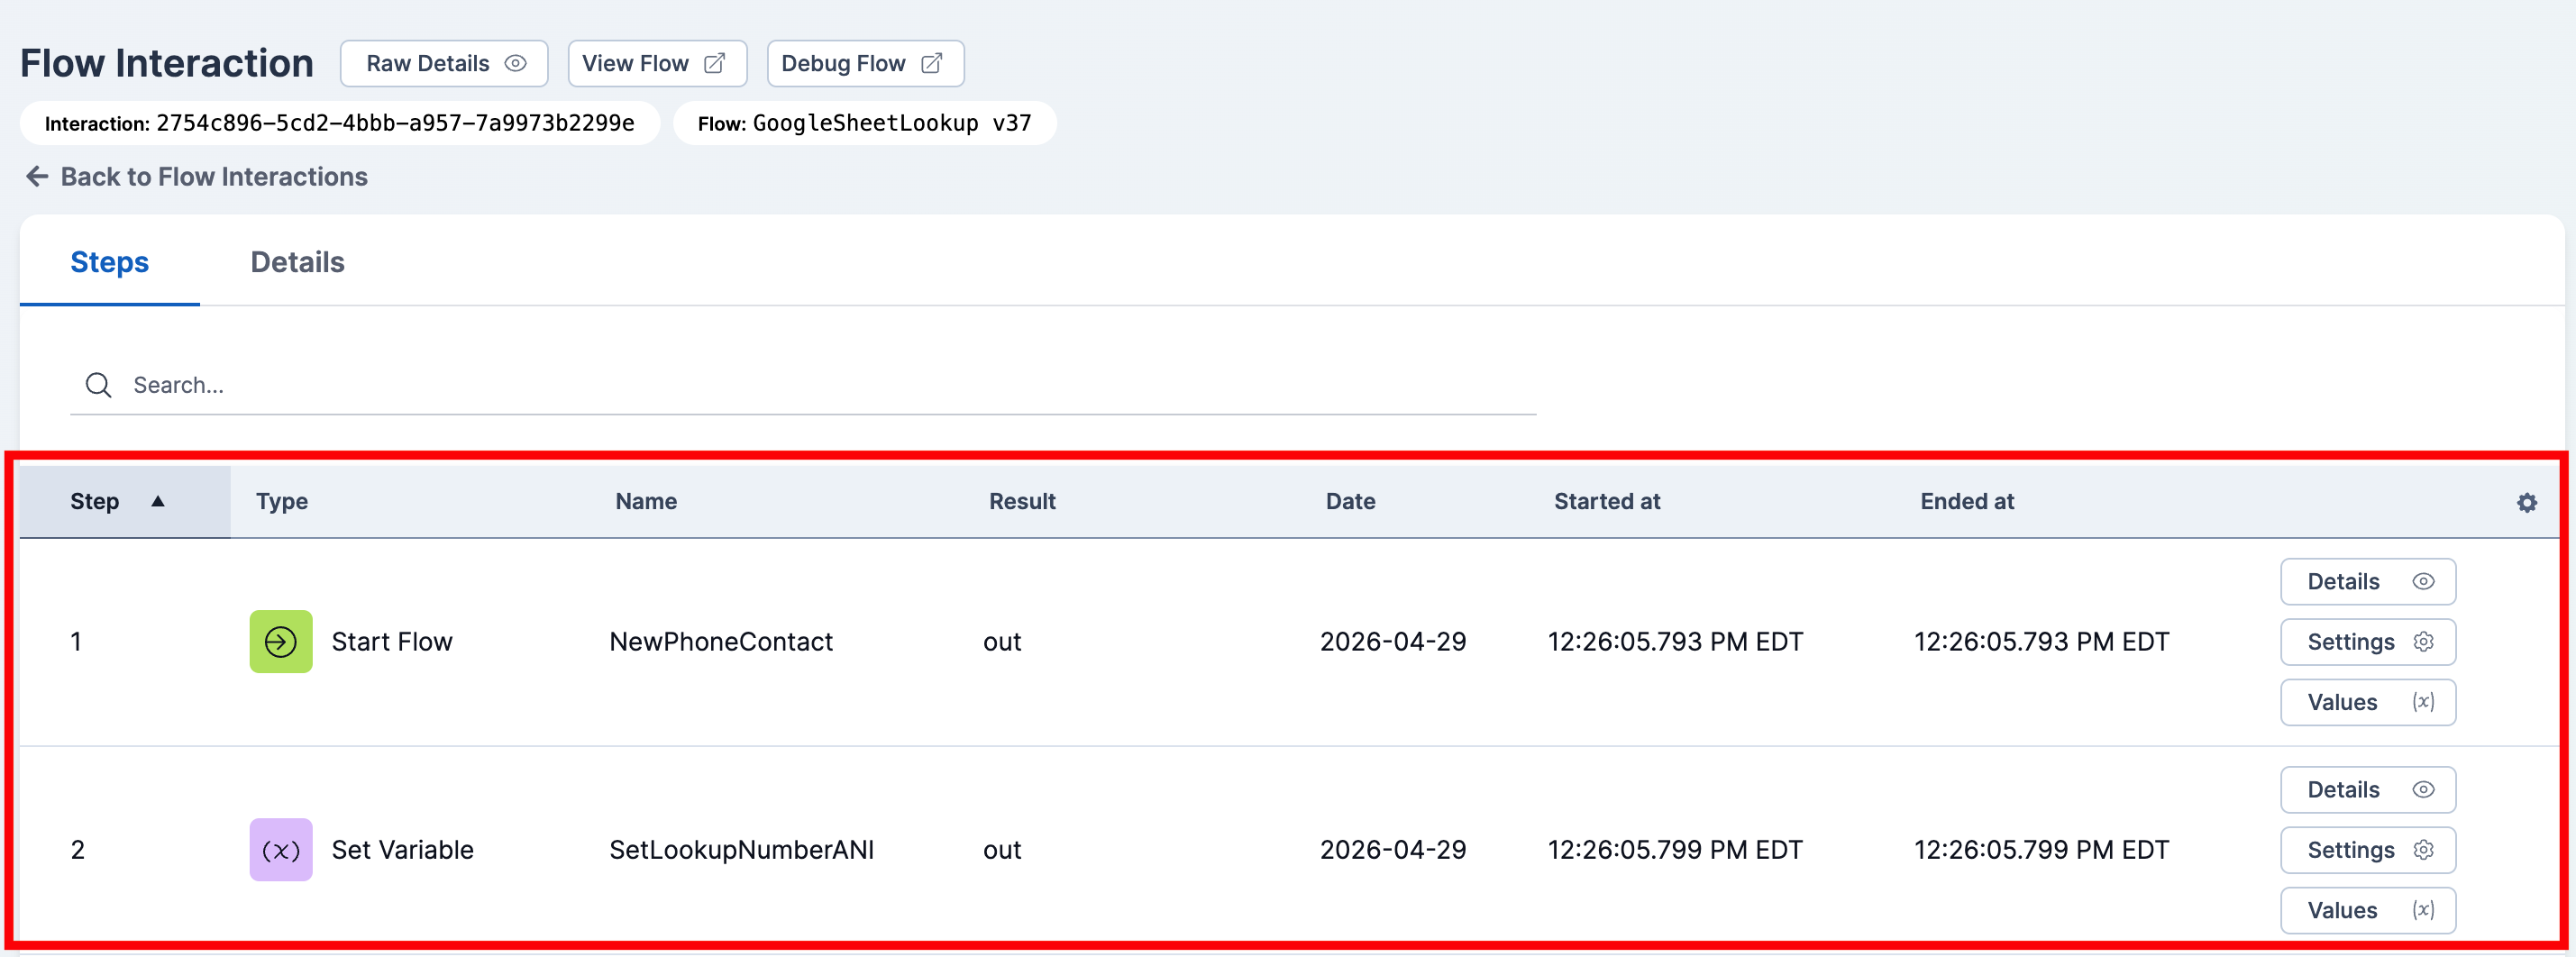
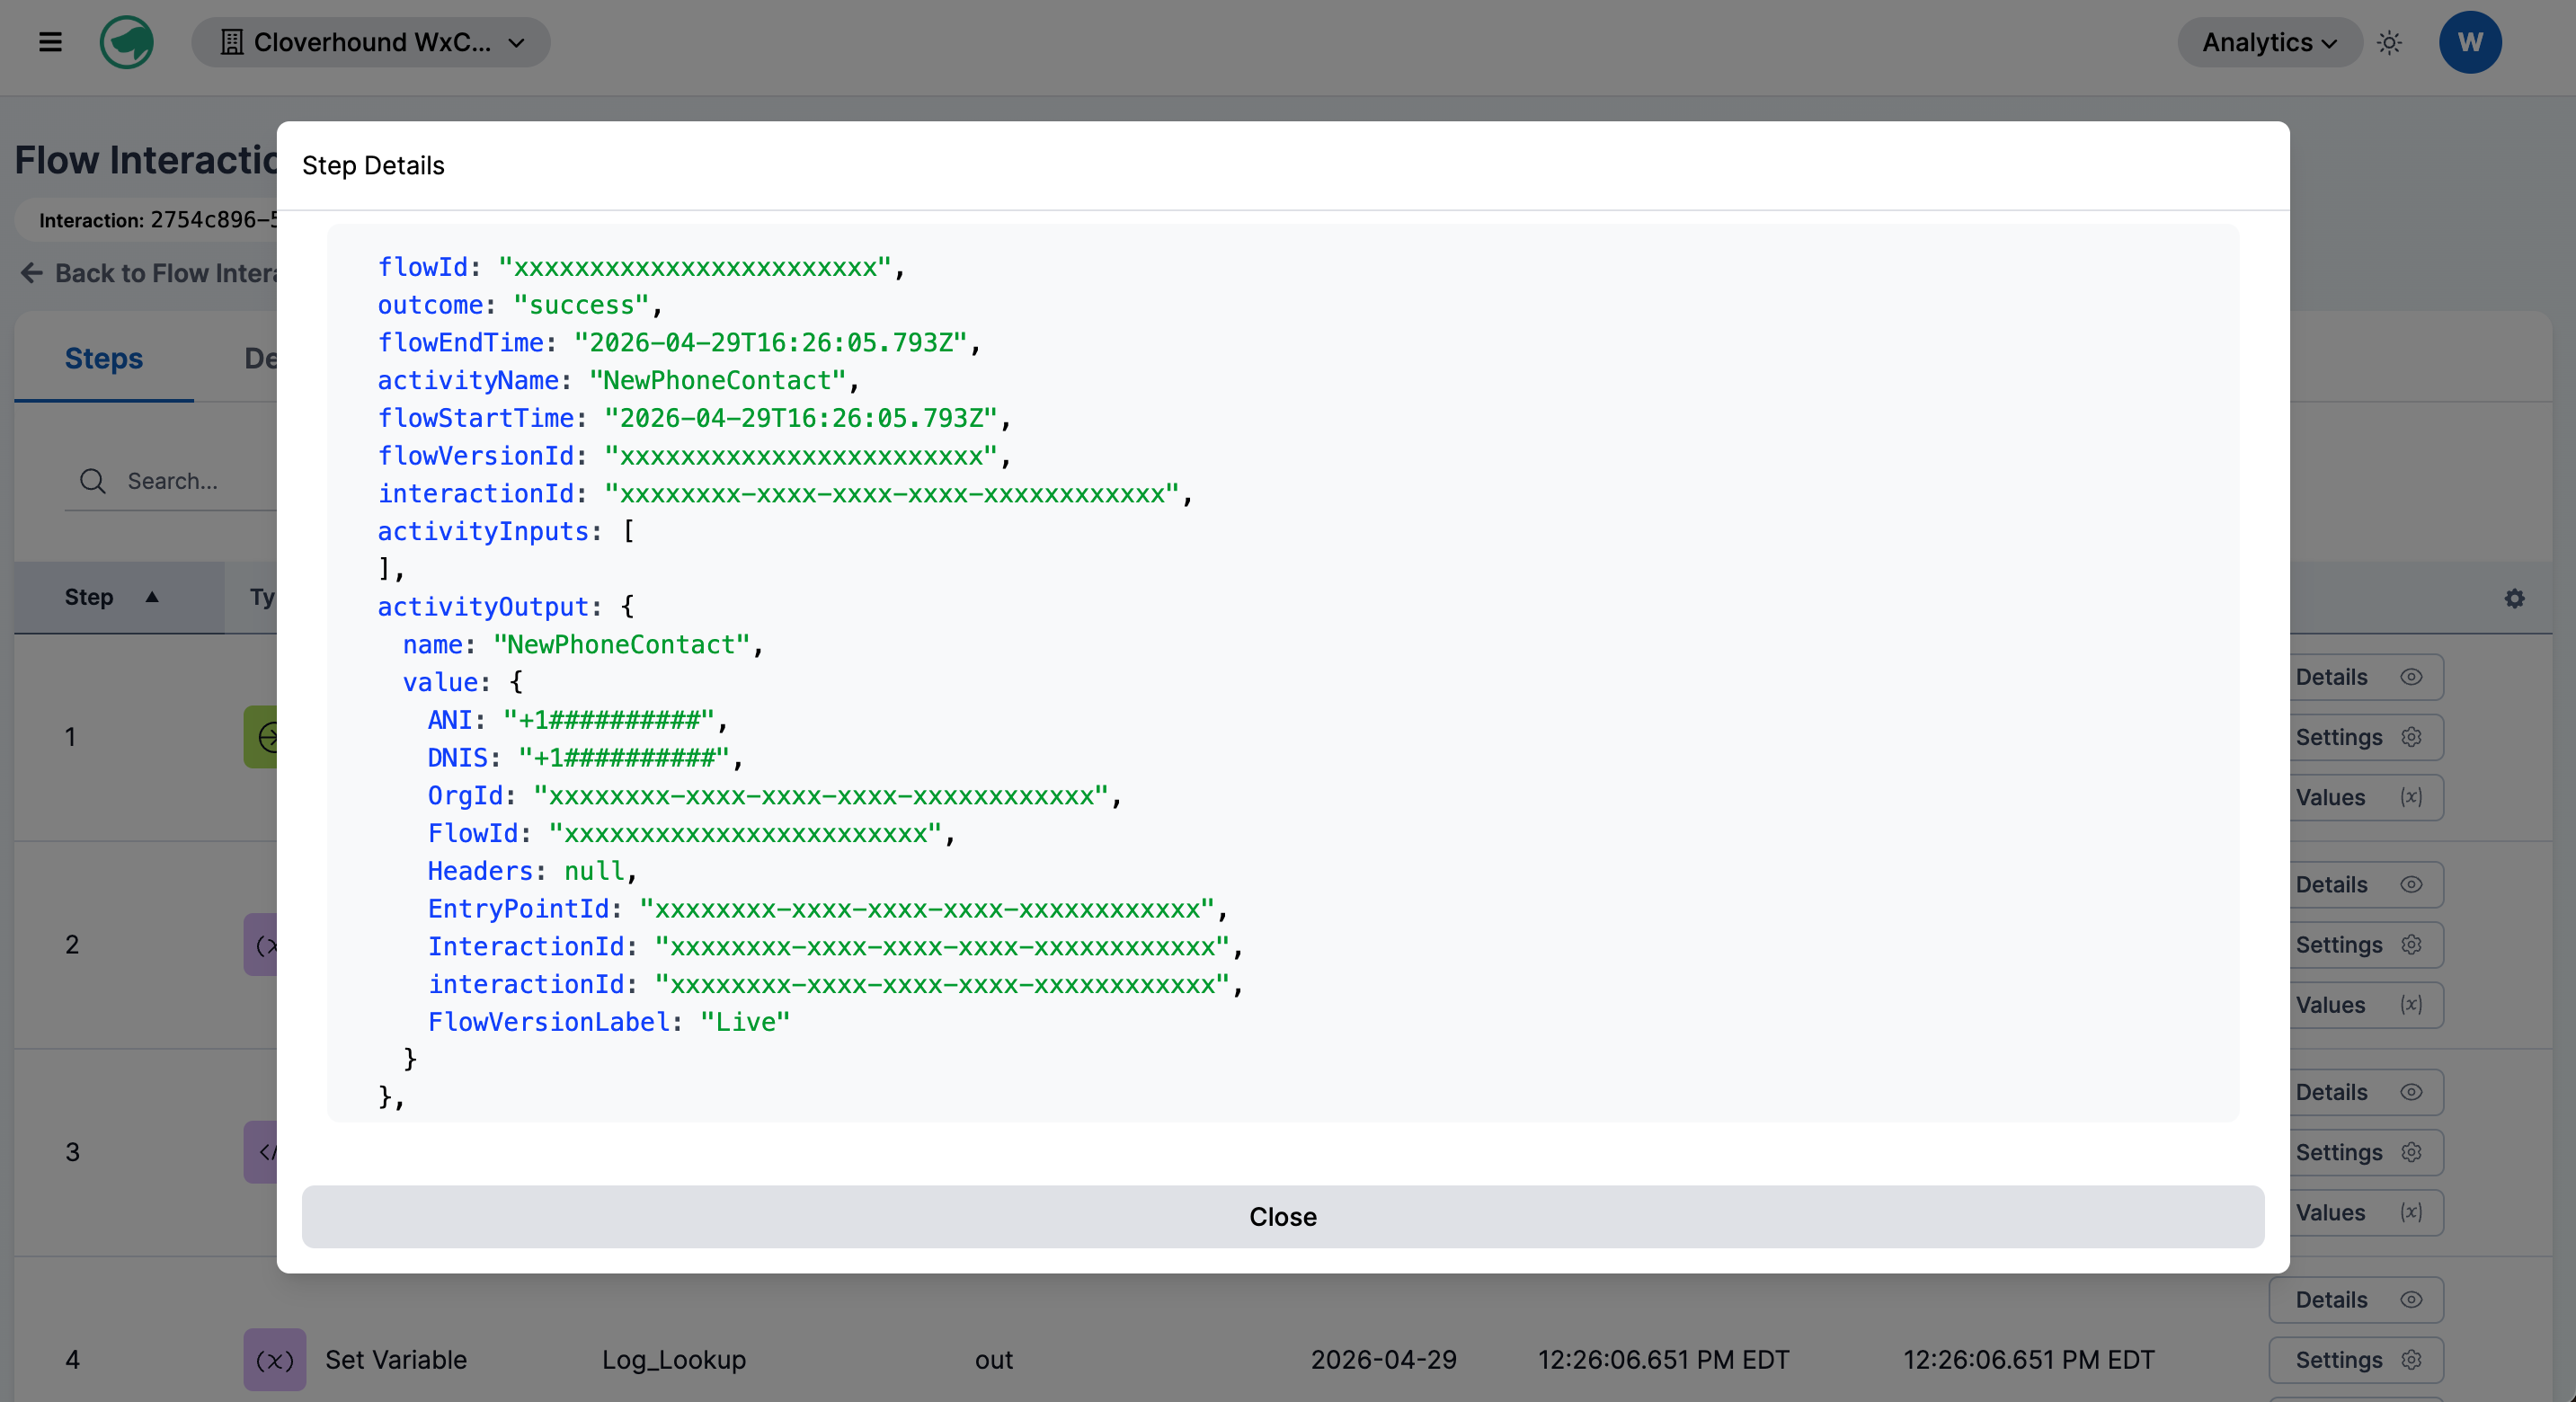
Each step row has three detail buttons:
-
Details — Opens the raw payload captured for the step.
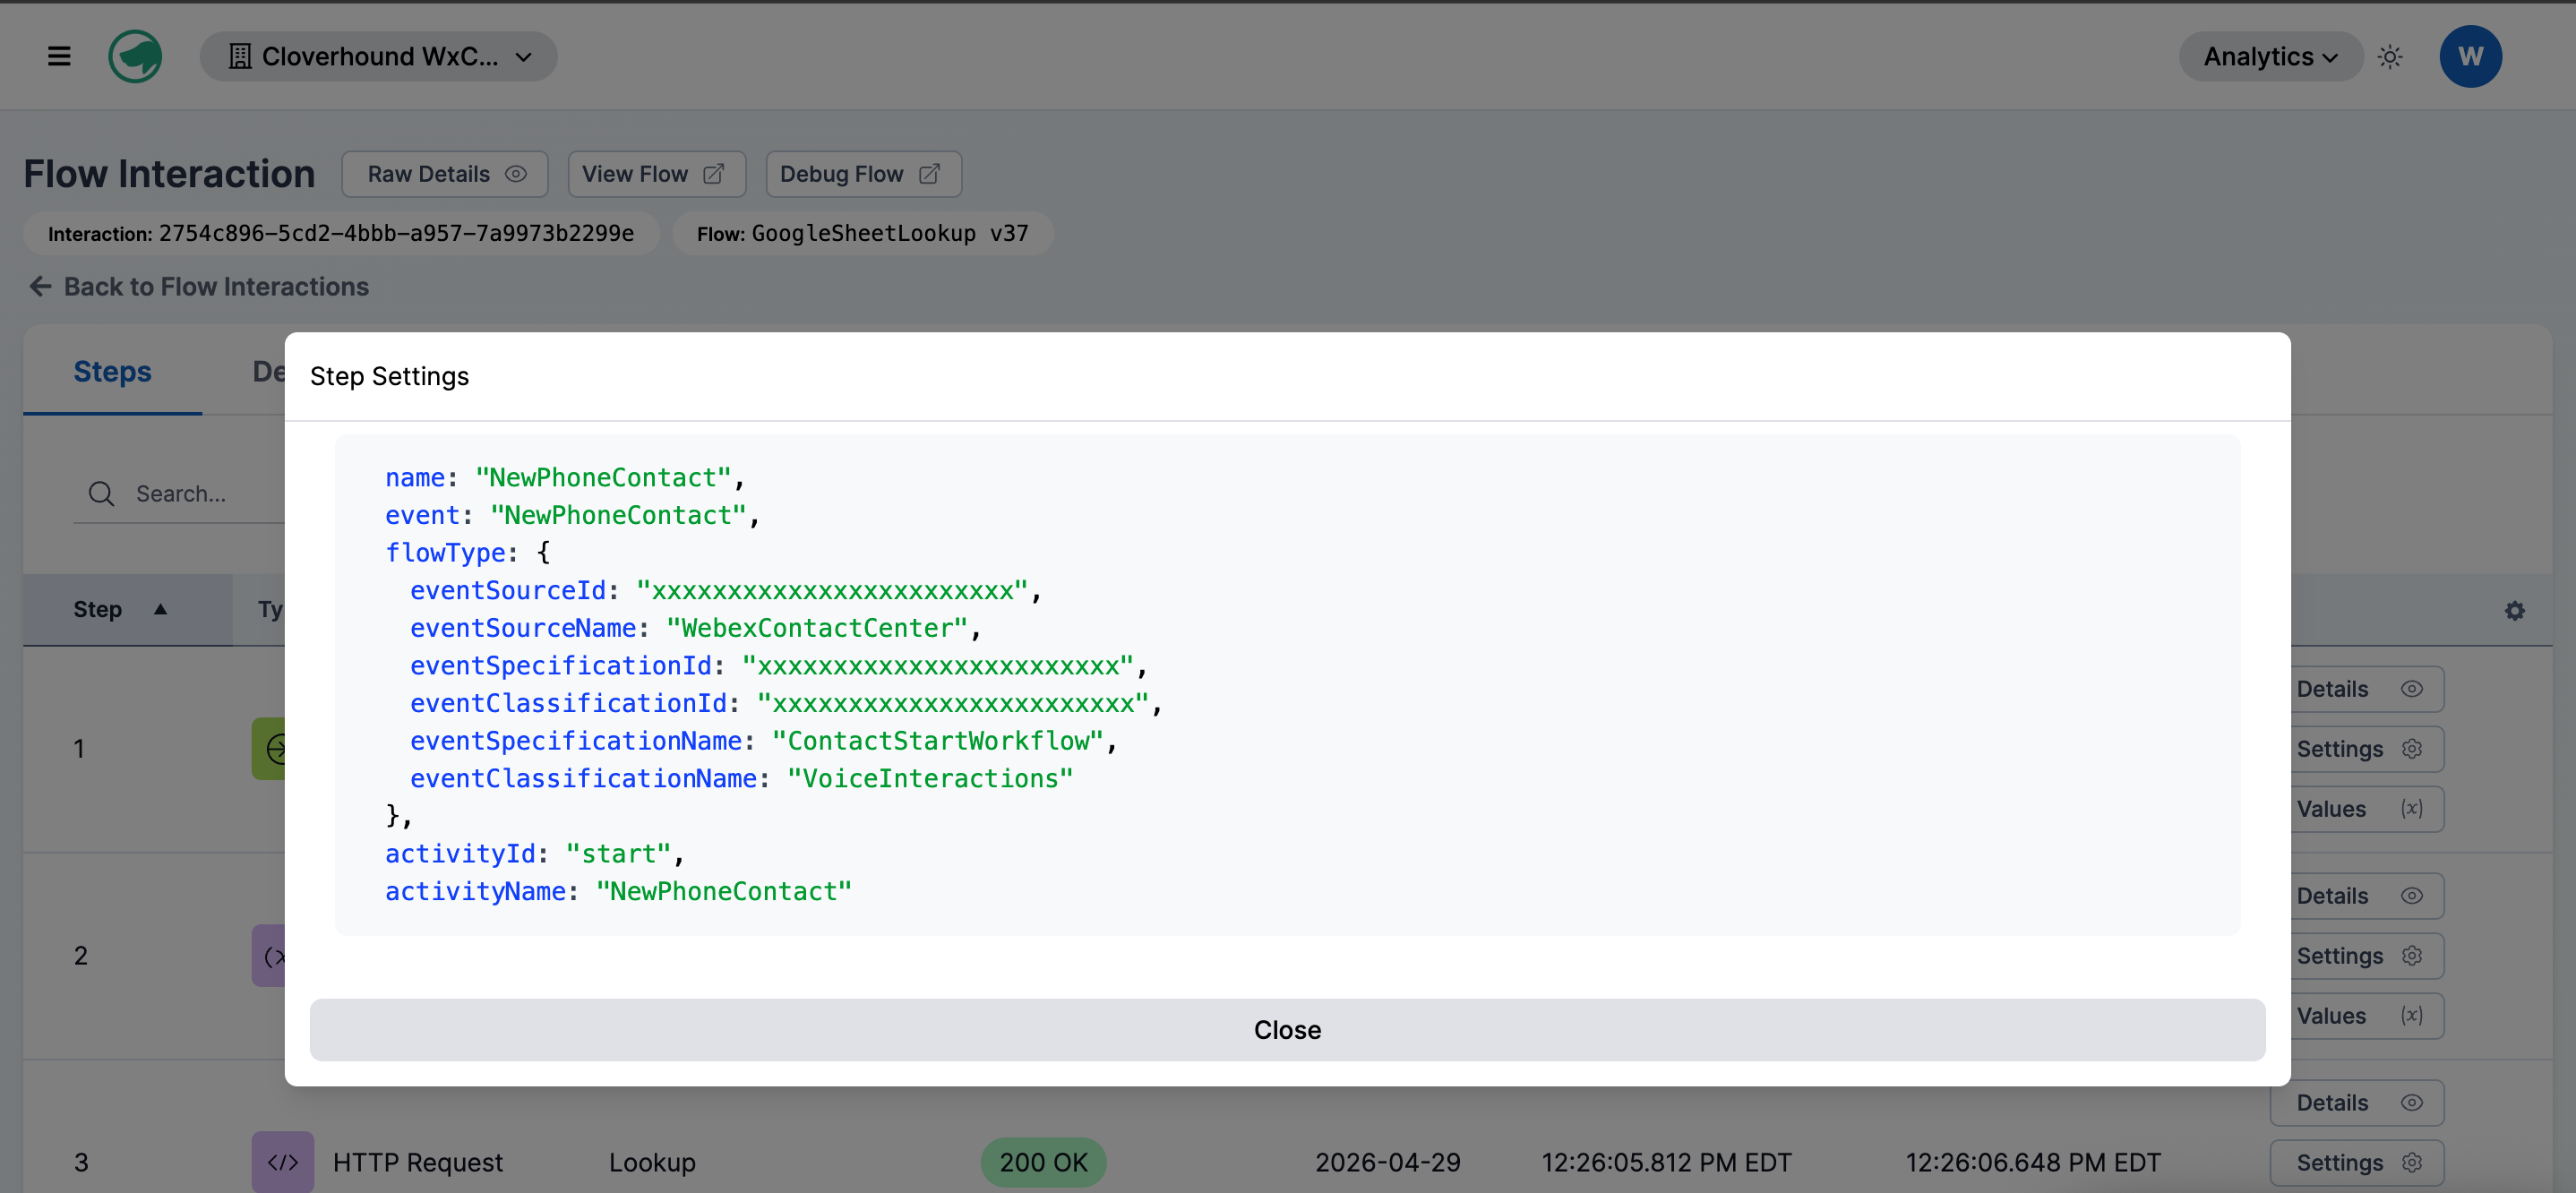
-
Settings — Opens the configuration of the matching activity in the flow version (for example, the URL and headers of an HTTP Request).
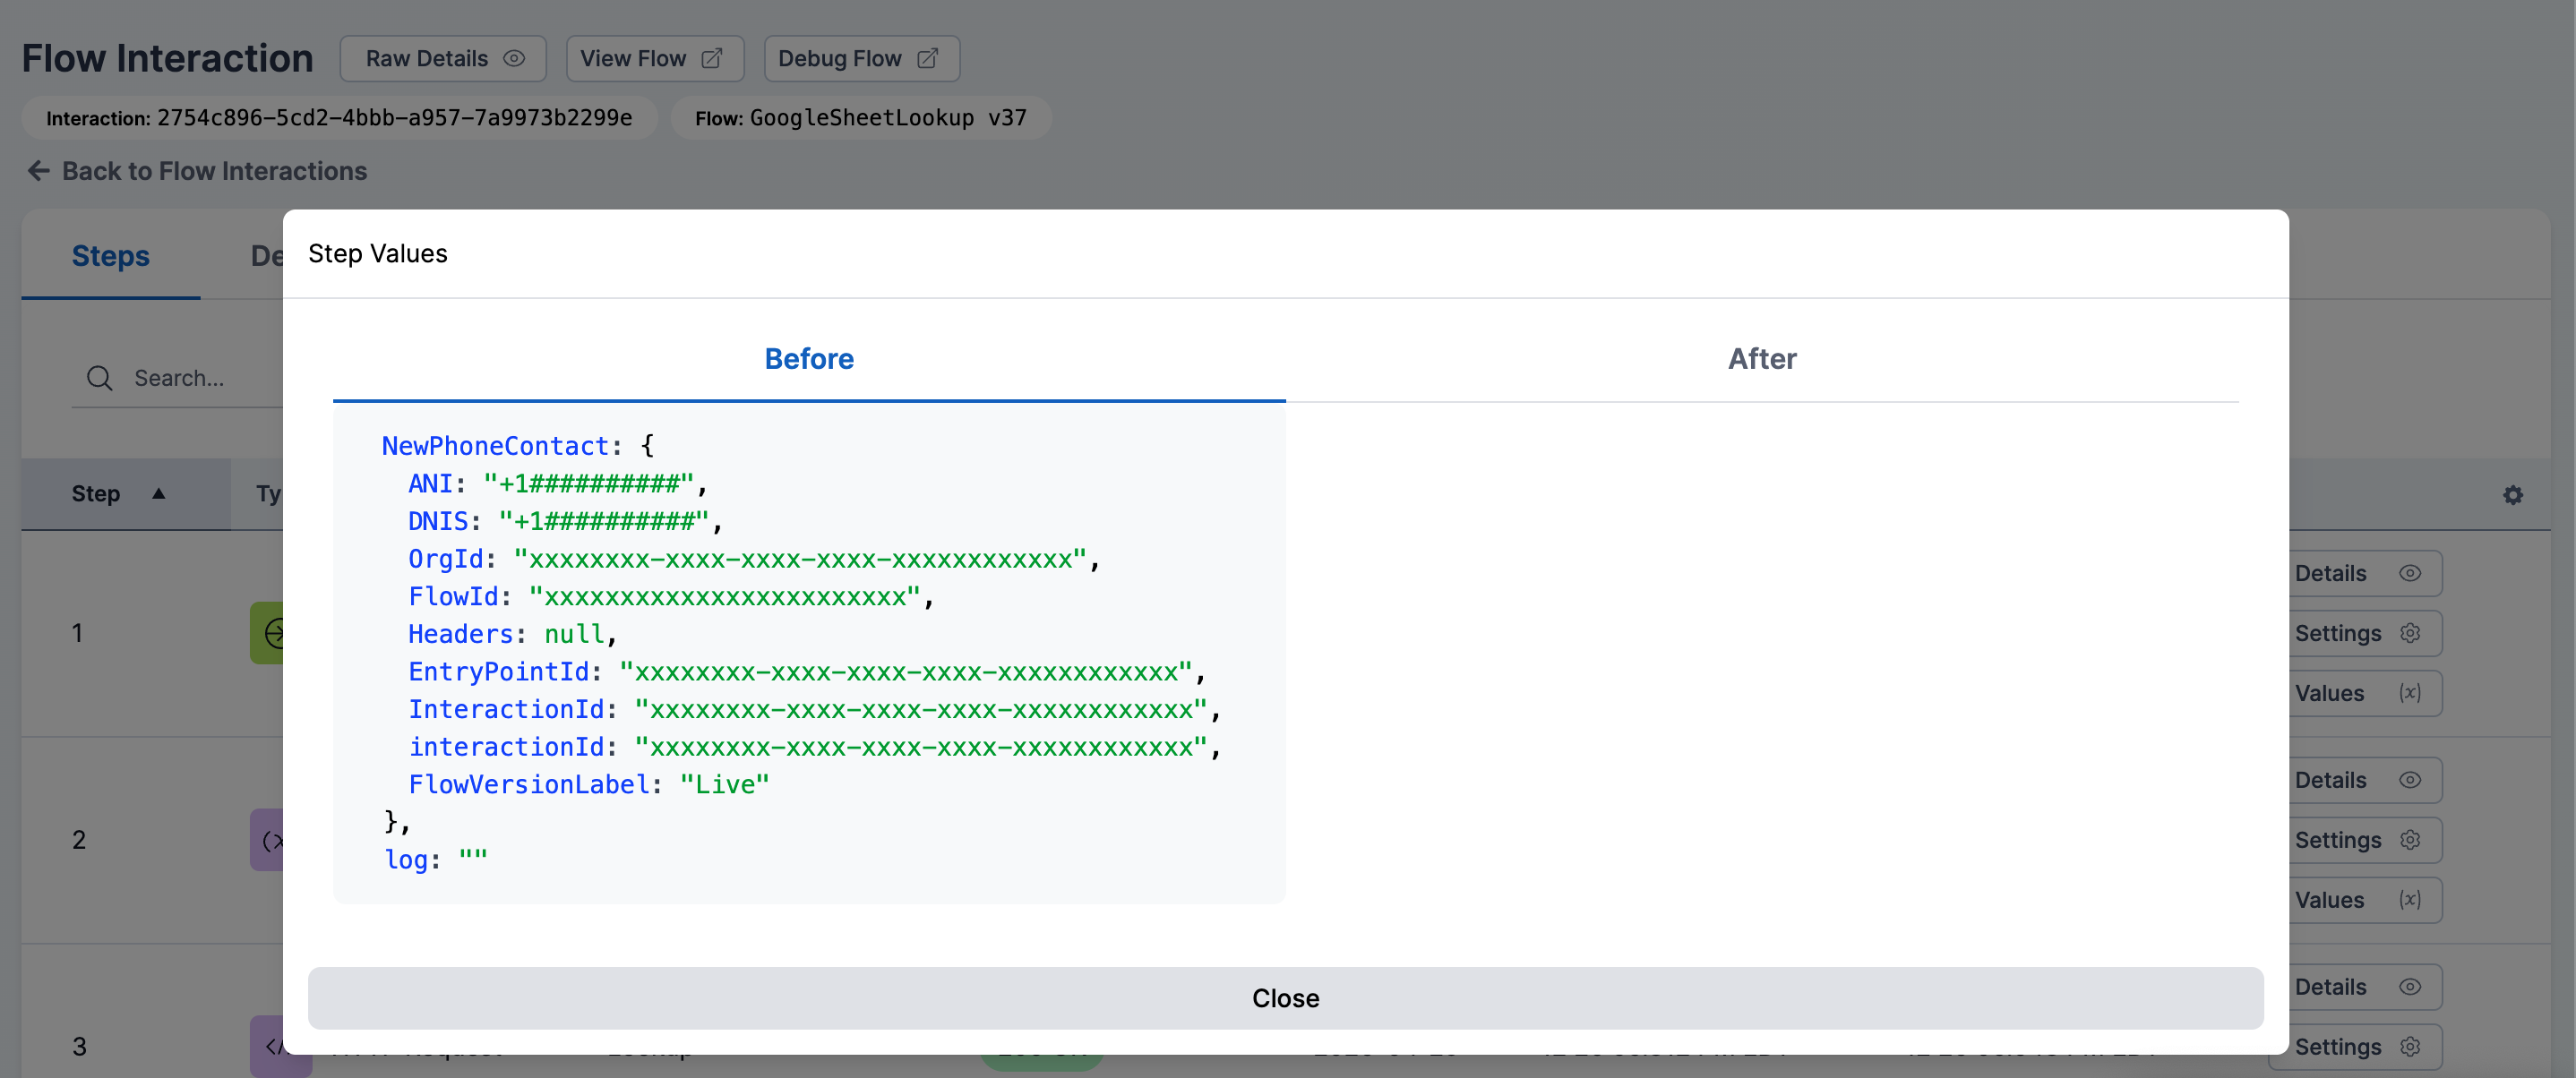
-
Values — Opens flow variable values captured Before and After the step ran, so you can see how the step changed the flow context. Select the tab corresponding to the values captured Before and After you want to review.
Use the search box above the steps table to filter the list by step name.
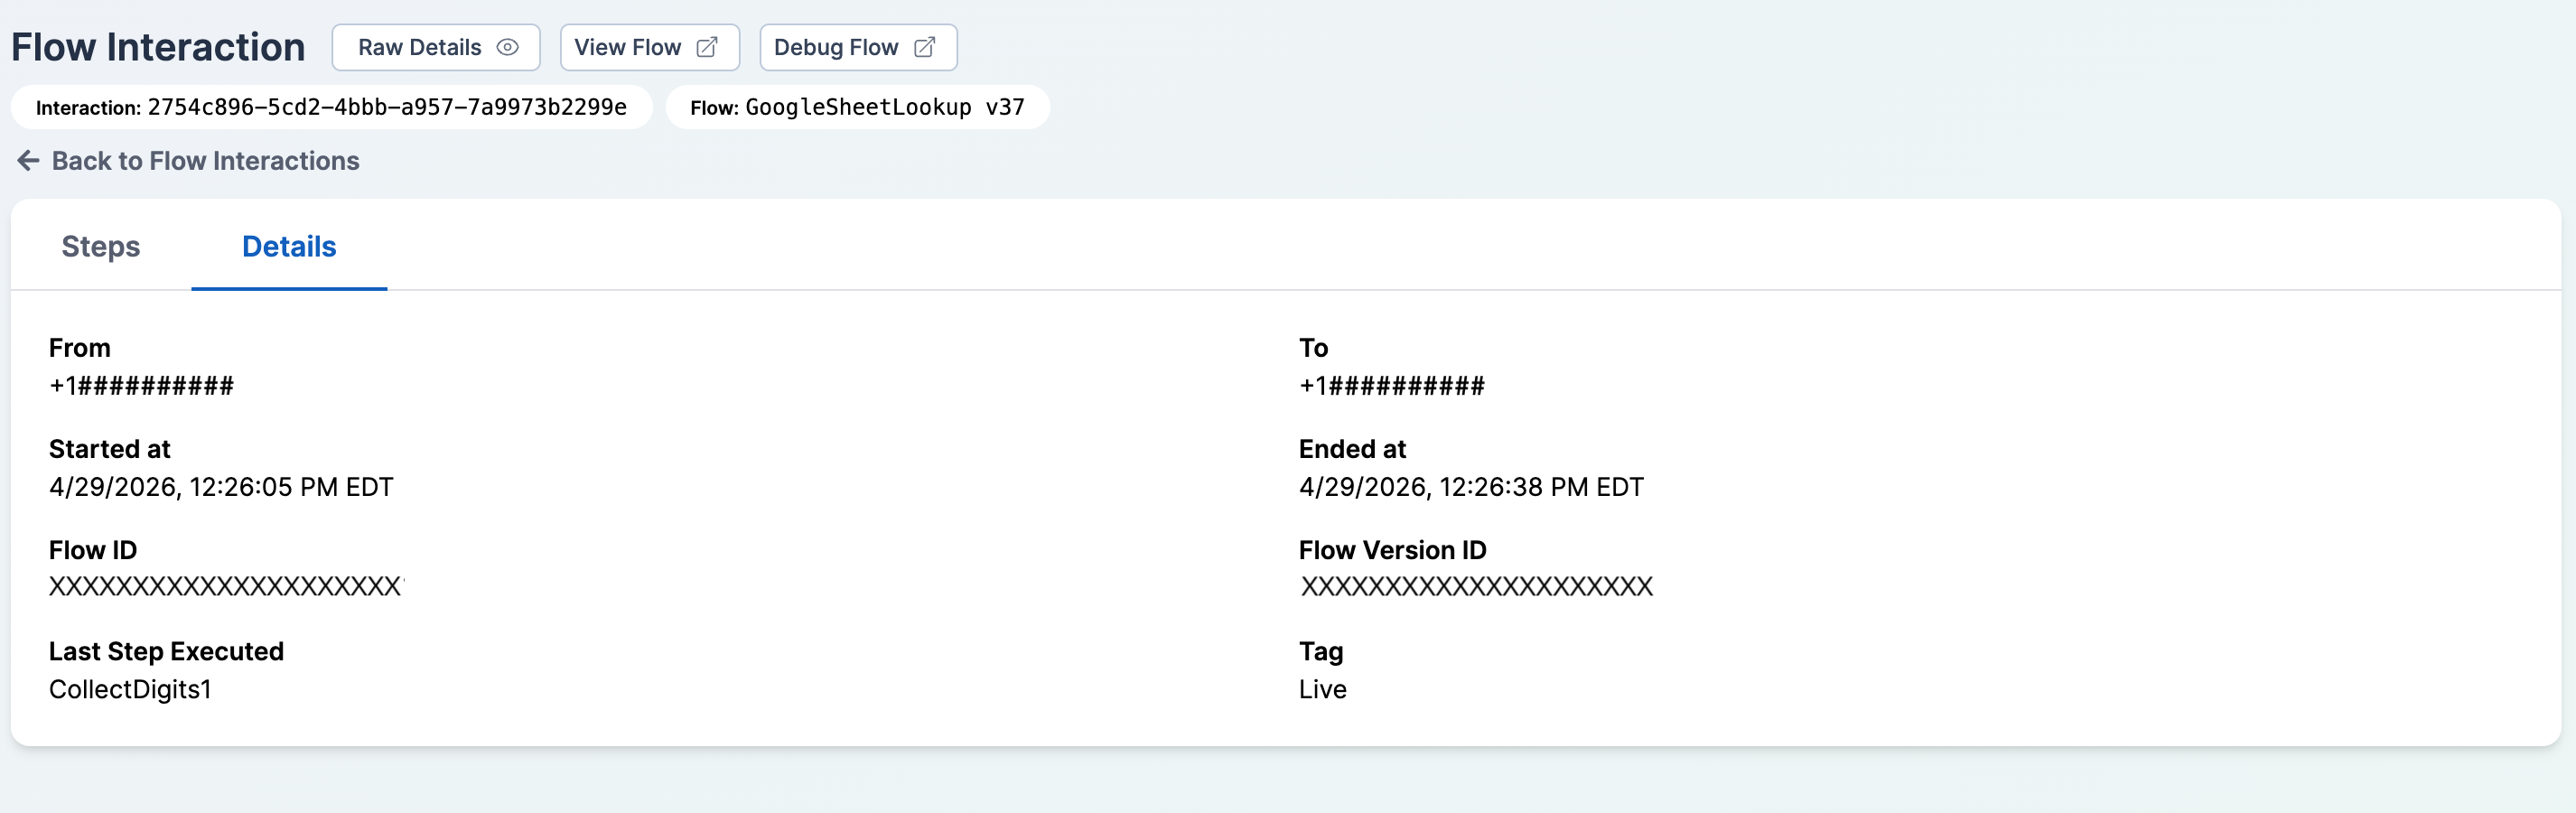
The Details Tab
The Details tab displays summary information about the flow execution in a simple two-column layout. The following fields are shown:
- From — The originating phone number or contact for the interaction.
- To — The destination phone number or contact for the interaction.
- Started at — When the flow execution began, rendered in your organization's time zone.
- Ended at — When the flow execution ended, rendered in your organization's time zone.
- Flow ID — The provider's unique identifier for the flow definition.
- Flow Version ID — The provider's unique identifier for the specific flow version that executed.
- Last Step Executed — The name of the final activity the flow ran before the execution ended.
- Tag — The tag recorded by the flow, when present (for example,
Live).
With the Flow Interactions module, you can trace exactly how each call moved through your Webex Contact Center flows and jump straight to the Flow Designer or the linked analytics interaction for deeper investigation.