Managing Call Script Nodes
A Call Script is a branching guide that agents follow during a call. Each script is made up of ordered nodes (also called steps) that contain the prompt text an agent reads and optional Yes/No branches that route to other nodes. You manage nodes from the show page of a Call Script in the Admin module.
This page covers the node editor. For creating, renaming, or deleting the parent Call Script itself, see Managing Call Scripts.
How Nodes Work
- Nodes are numbered starting at Node 1 in the order they were created. Agents work through them top to bottom unless a branch sends them to a different node.
- Each node's content is written in a rich-text editor with headers, bold, italic, lists, links, and more.
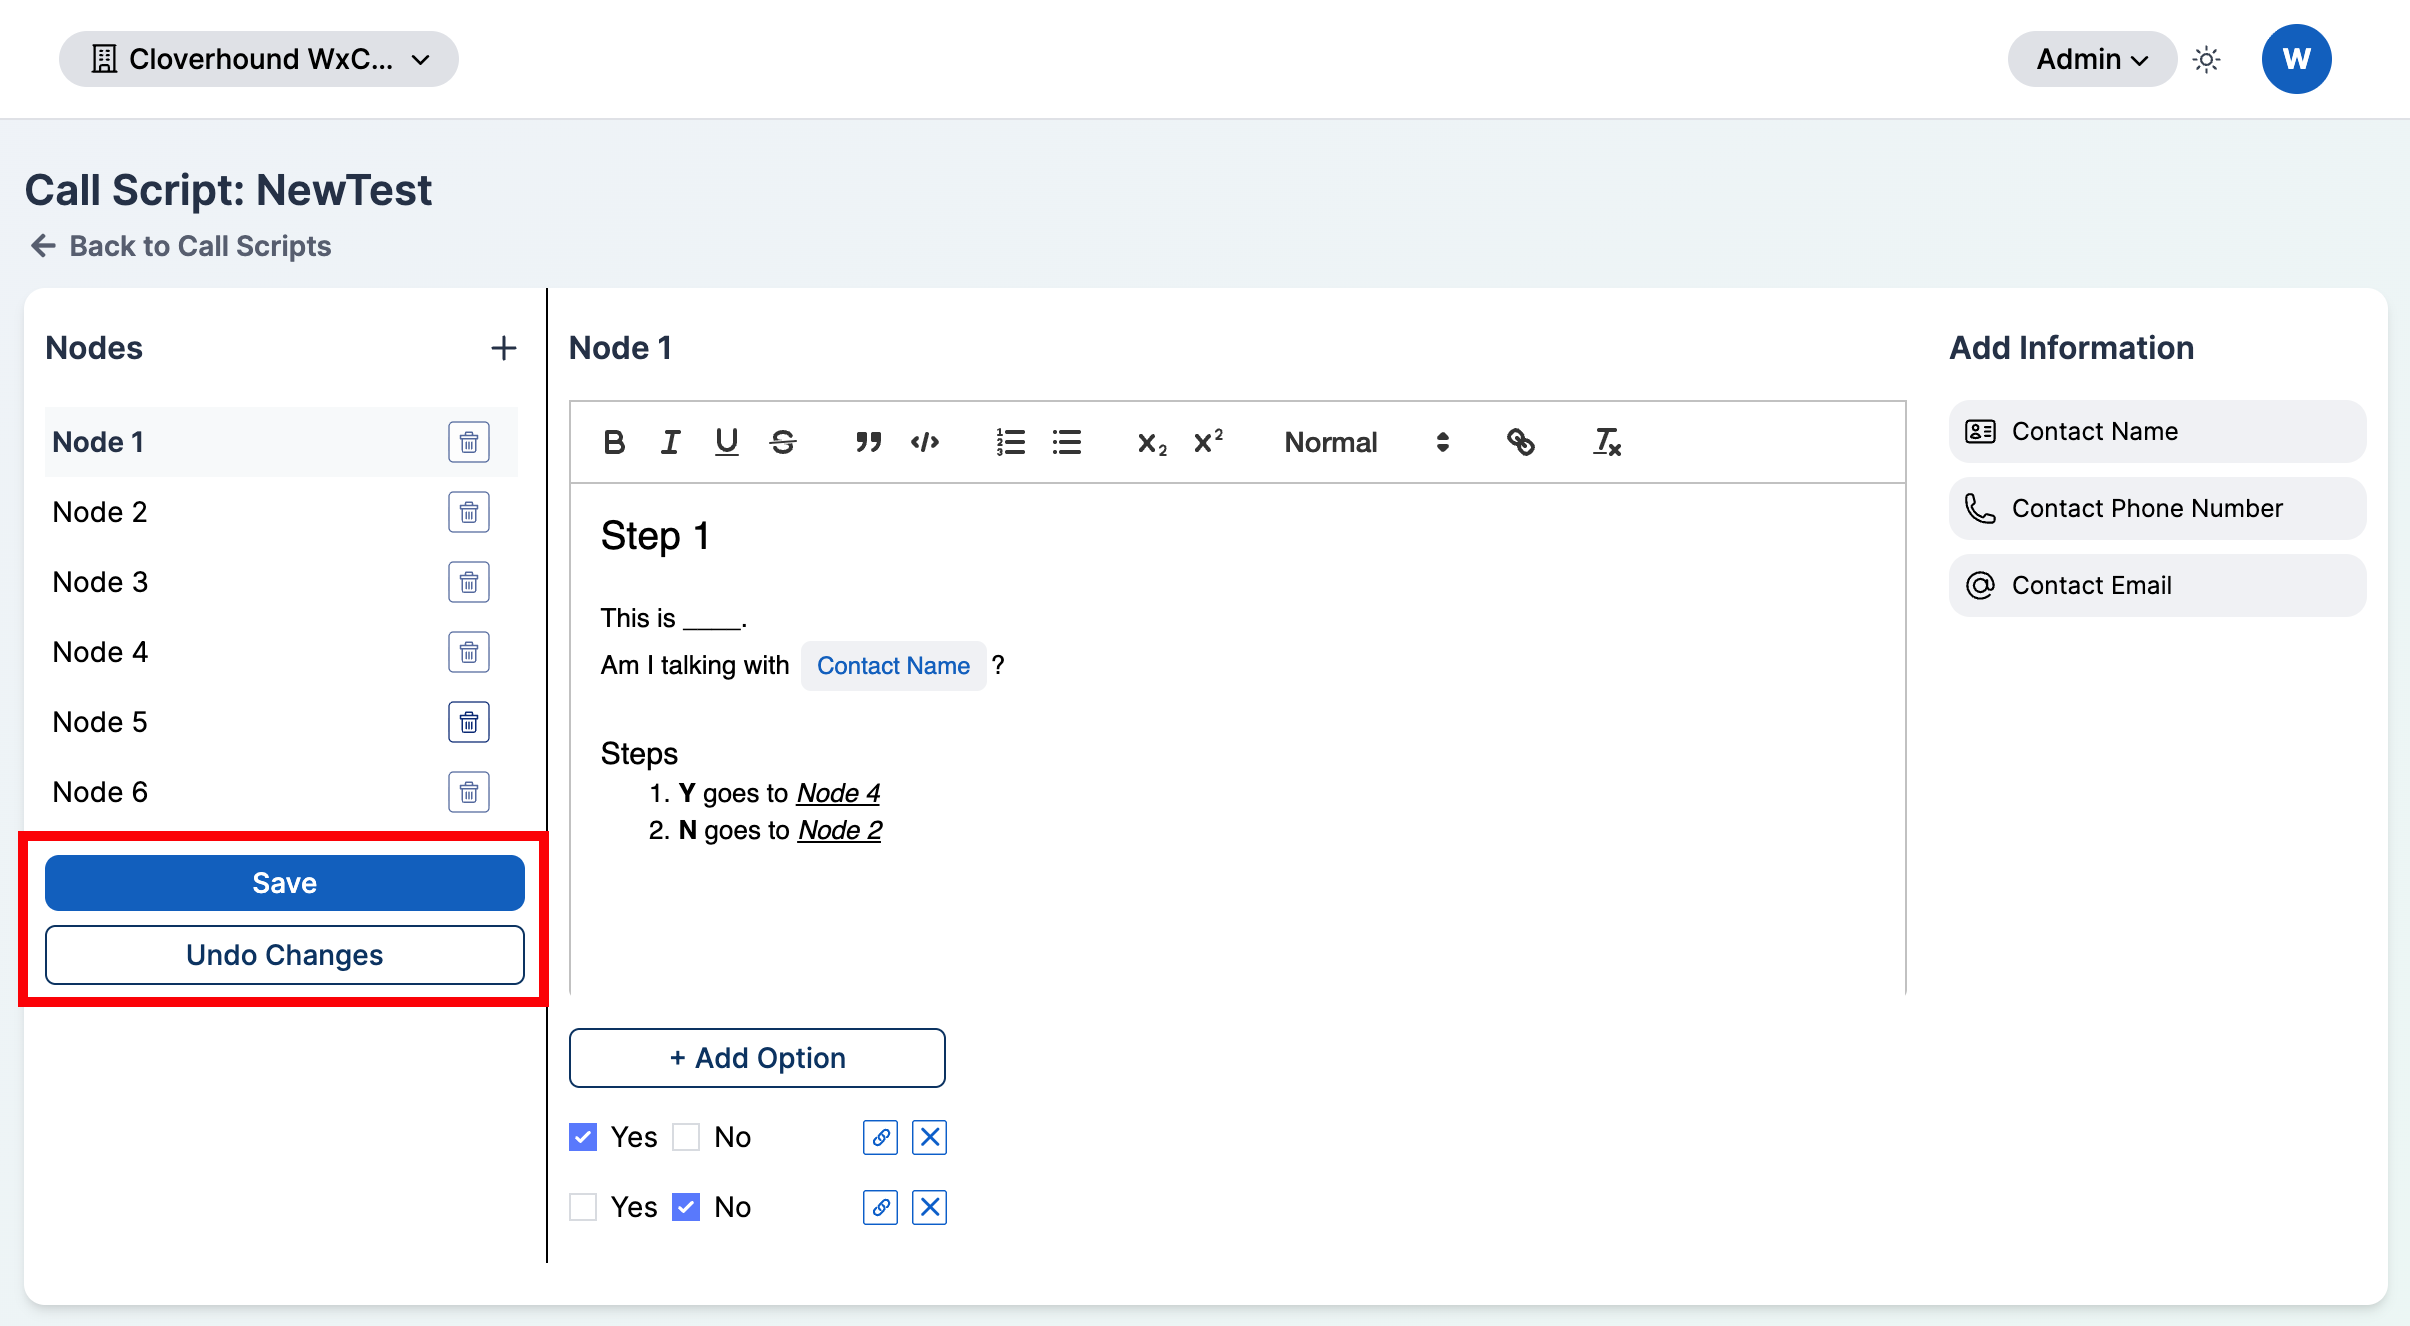
- A node may have up to two Yes/No options. Each option routes to a later node when the agent checks it during a call.
- Destination nodes must come after the source node in the list. You cannot branch backward.
Accessing the Node Editor
-
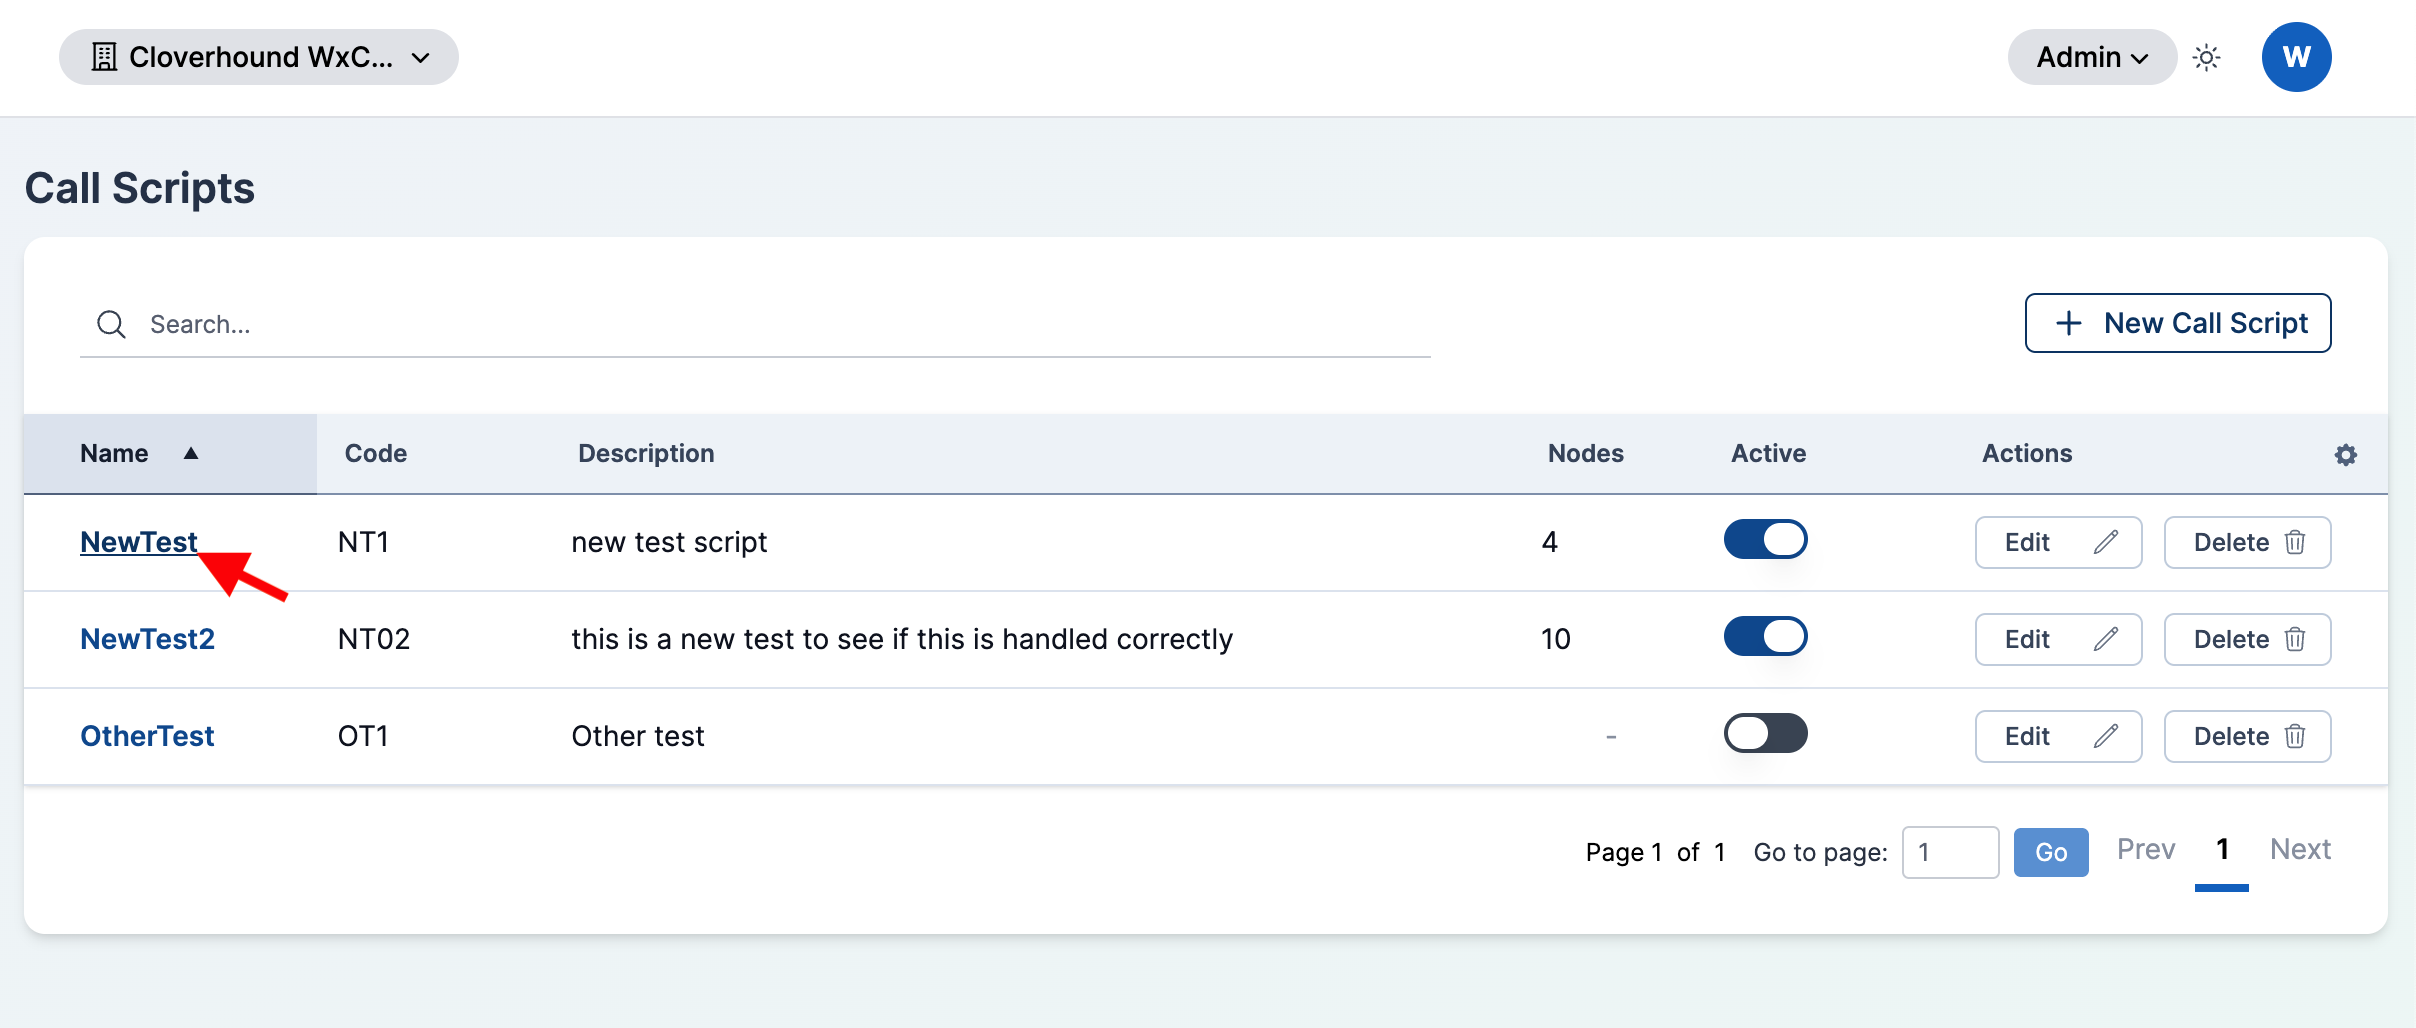
Navigate to the Admin module and open Call Scripts.
-
Click the name of the Call Script you want to edit.
-
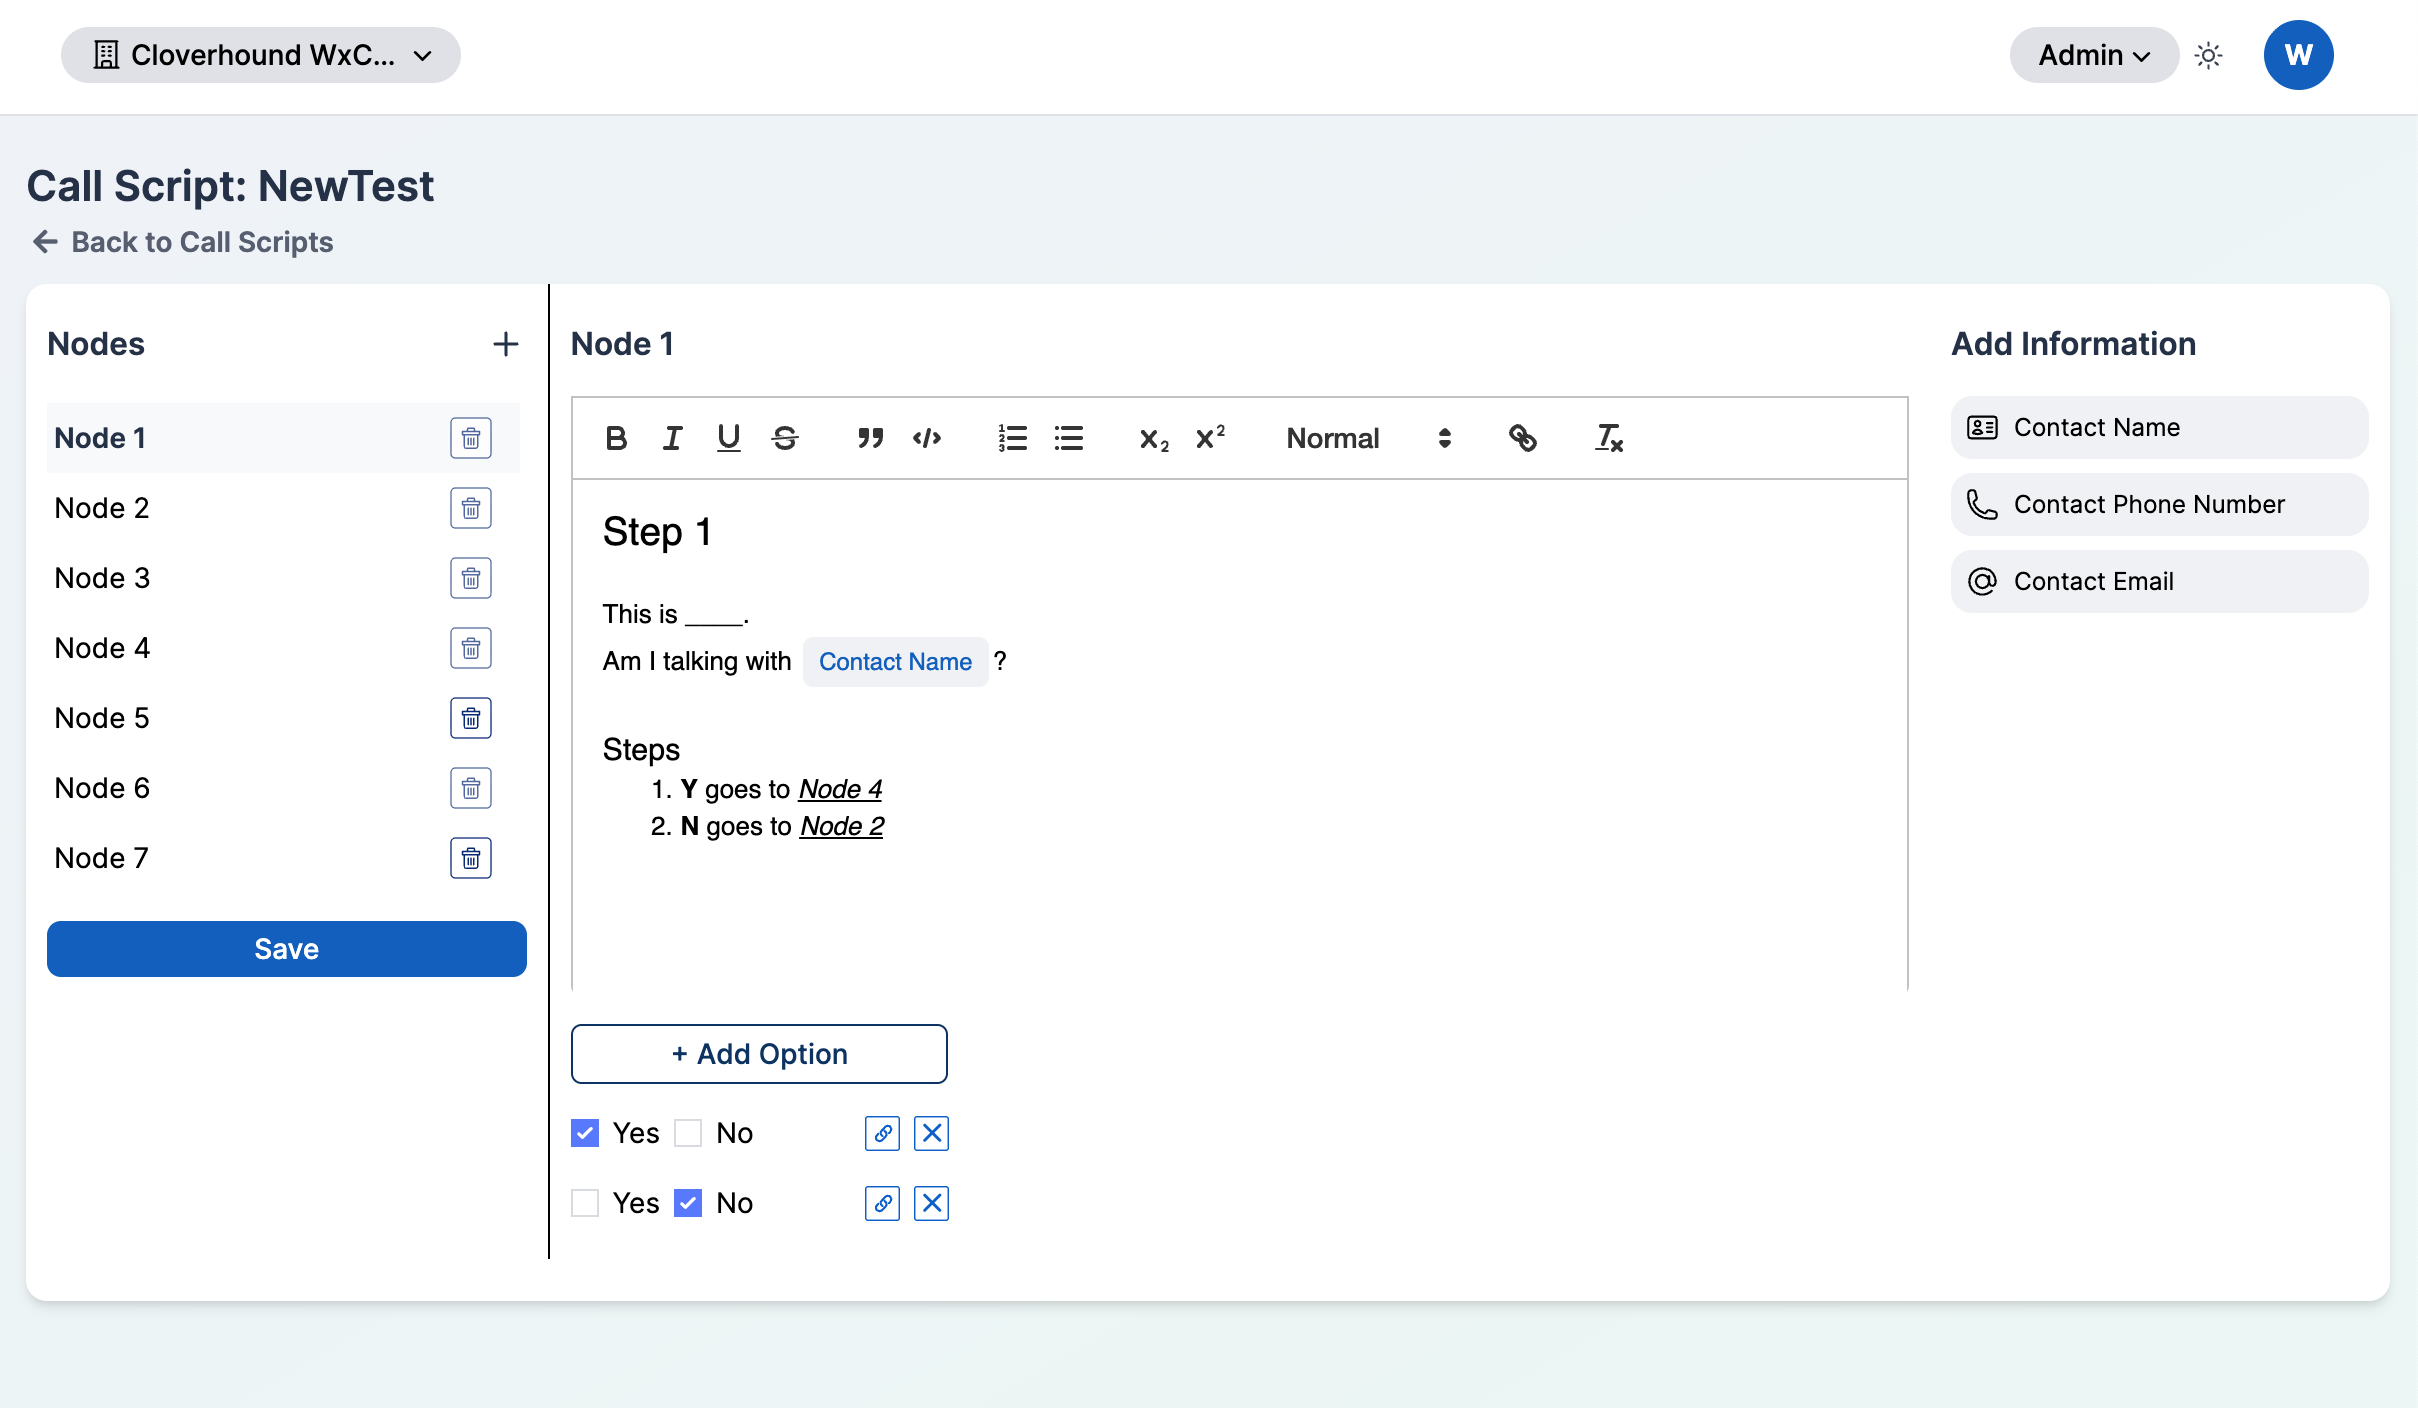
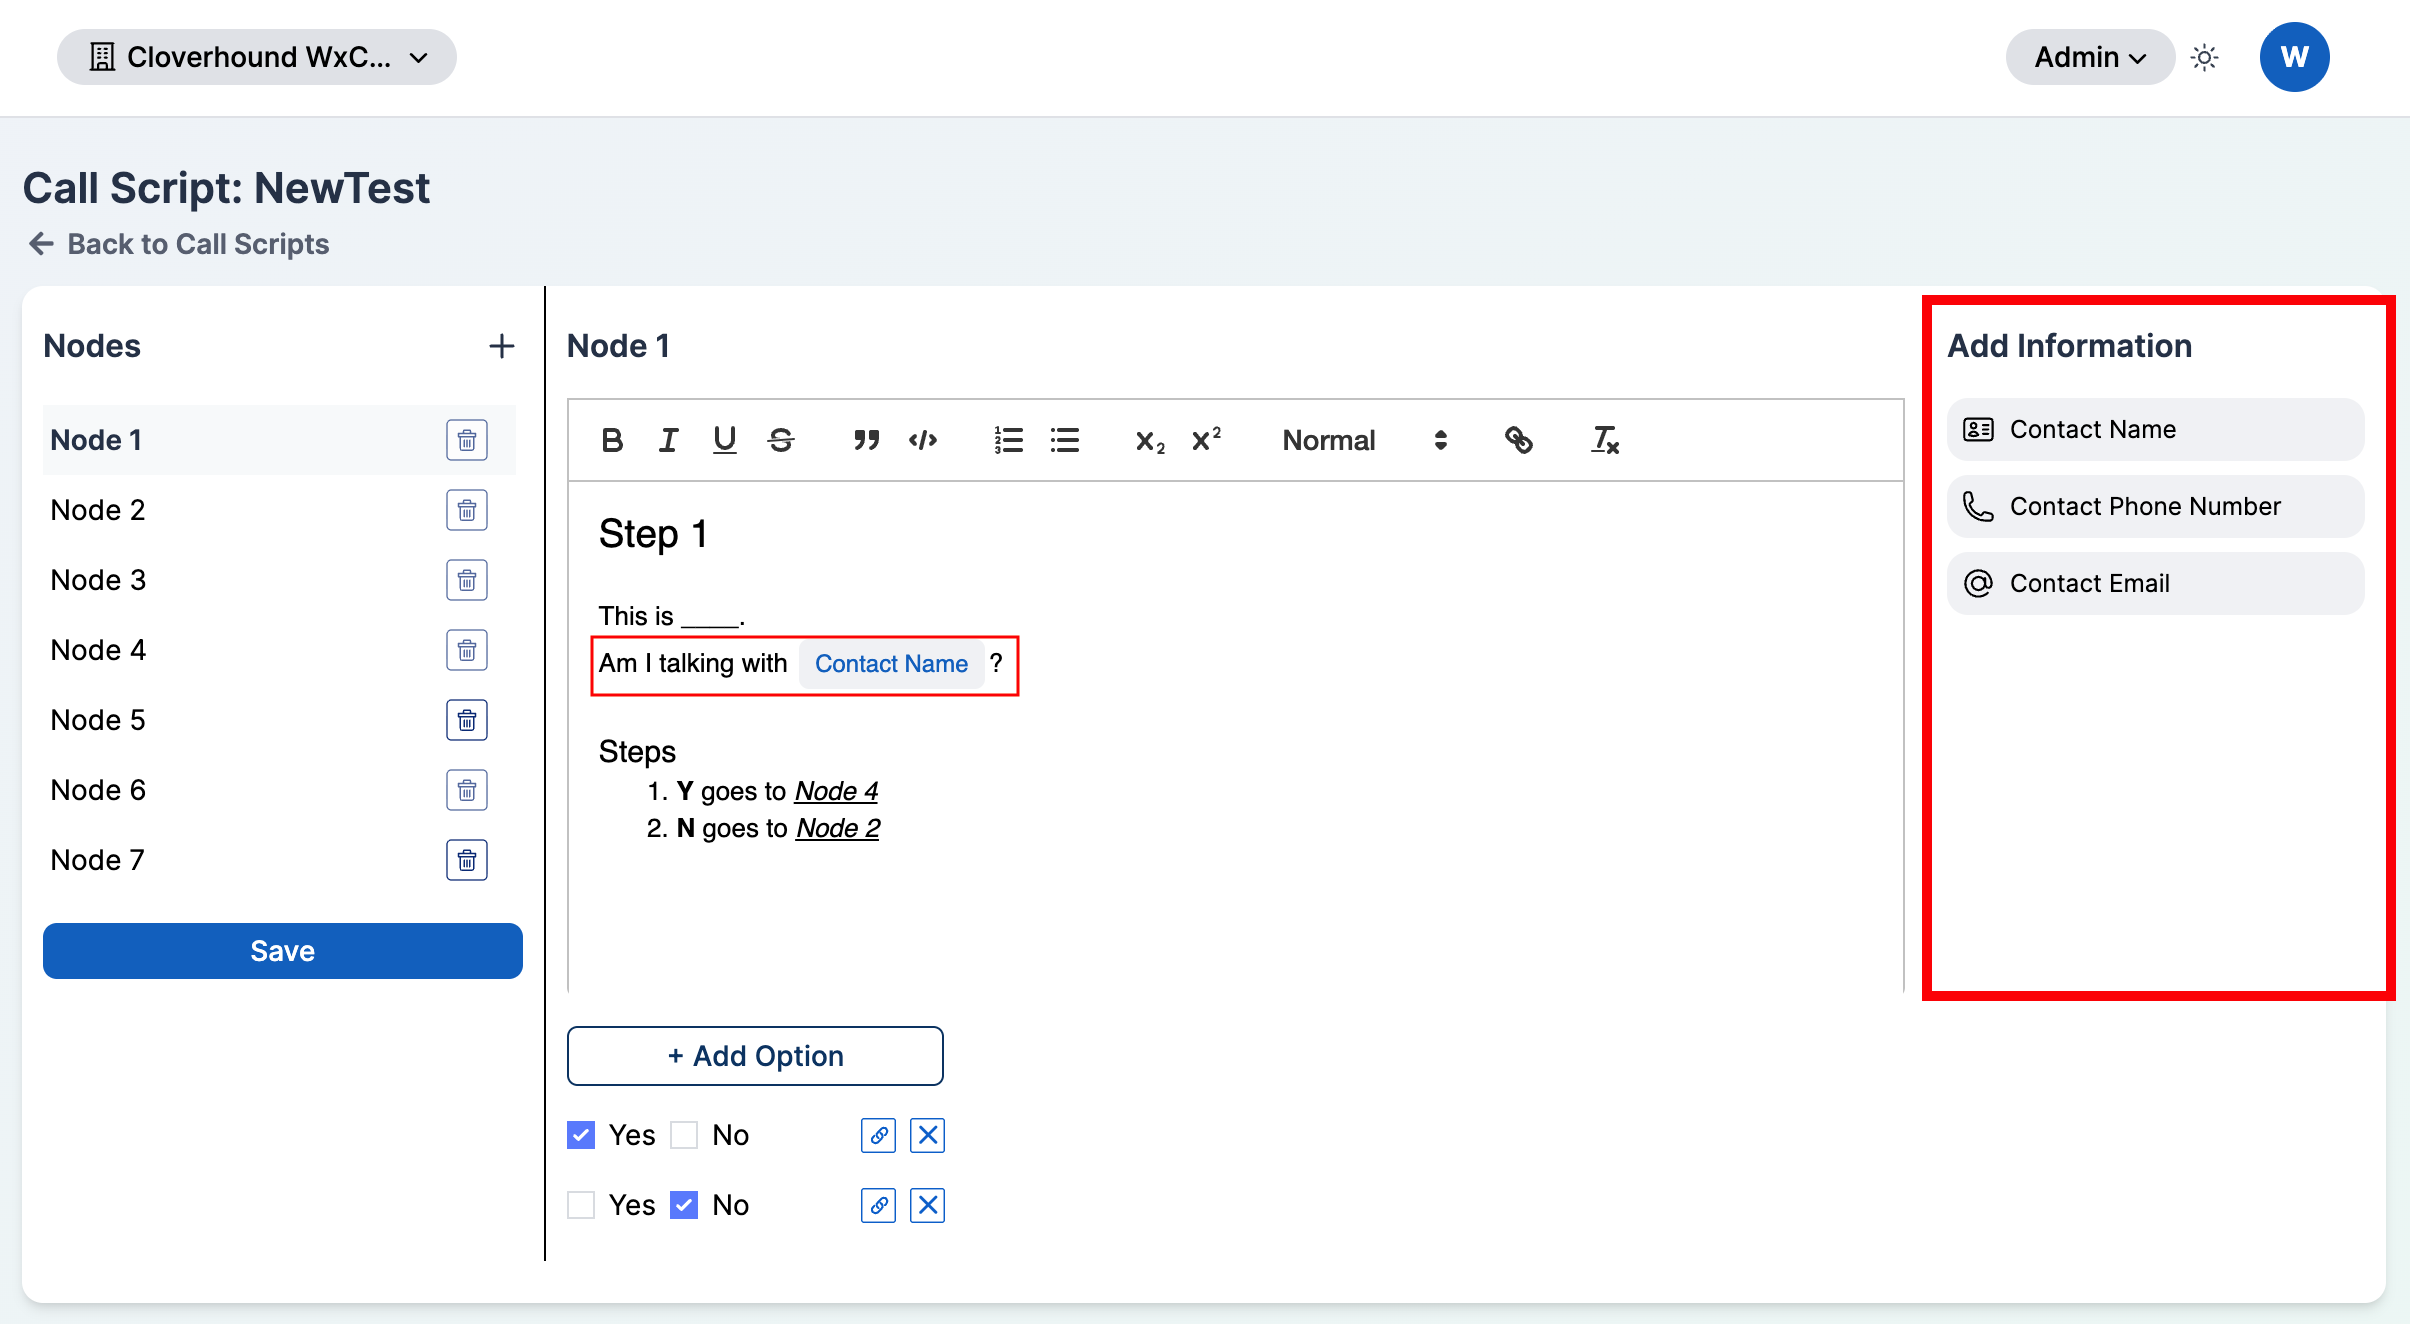
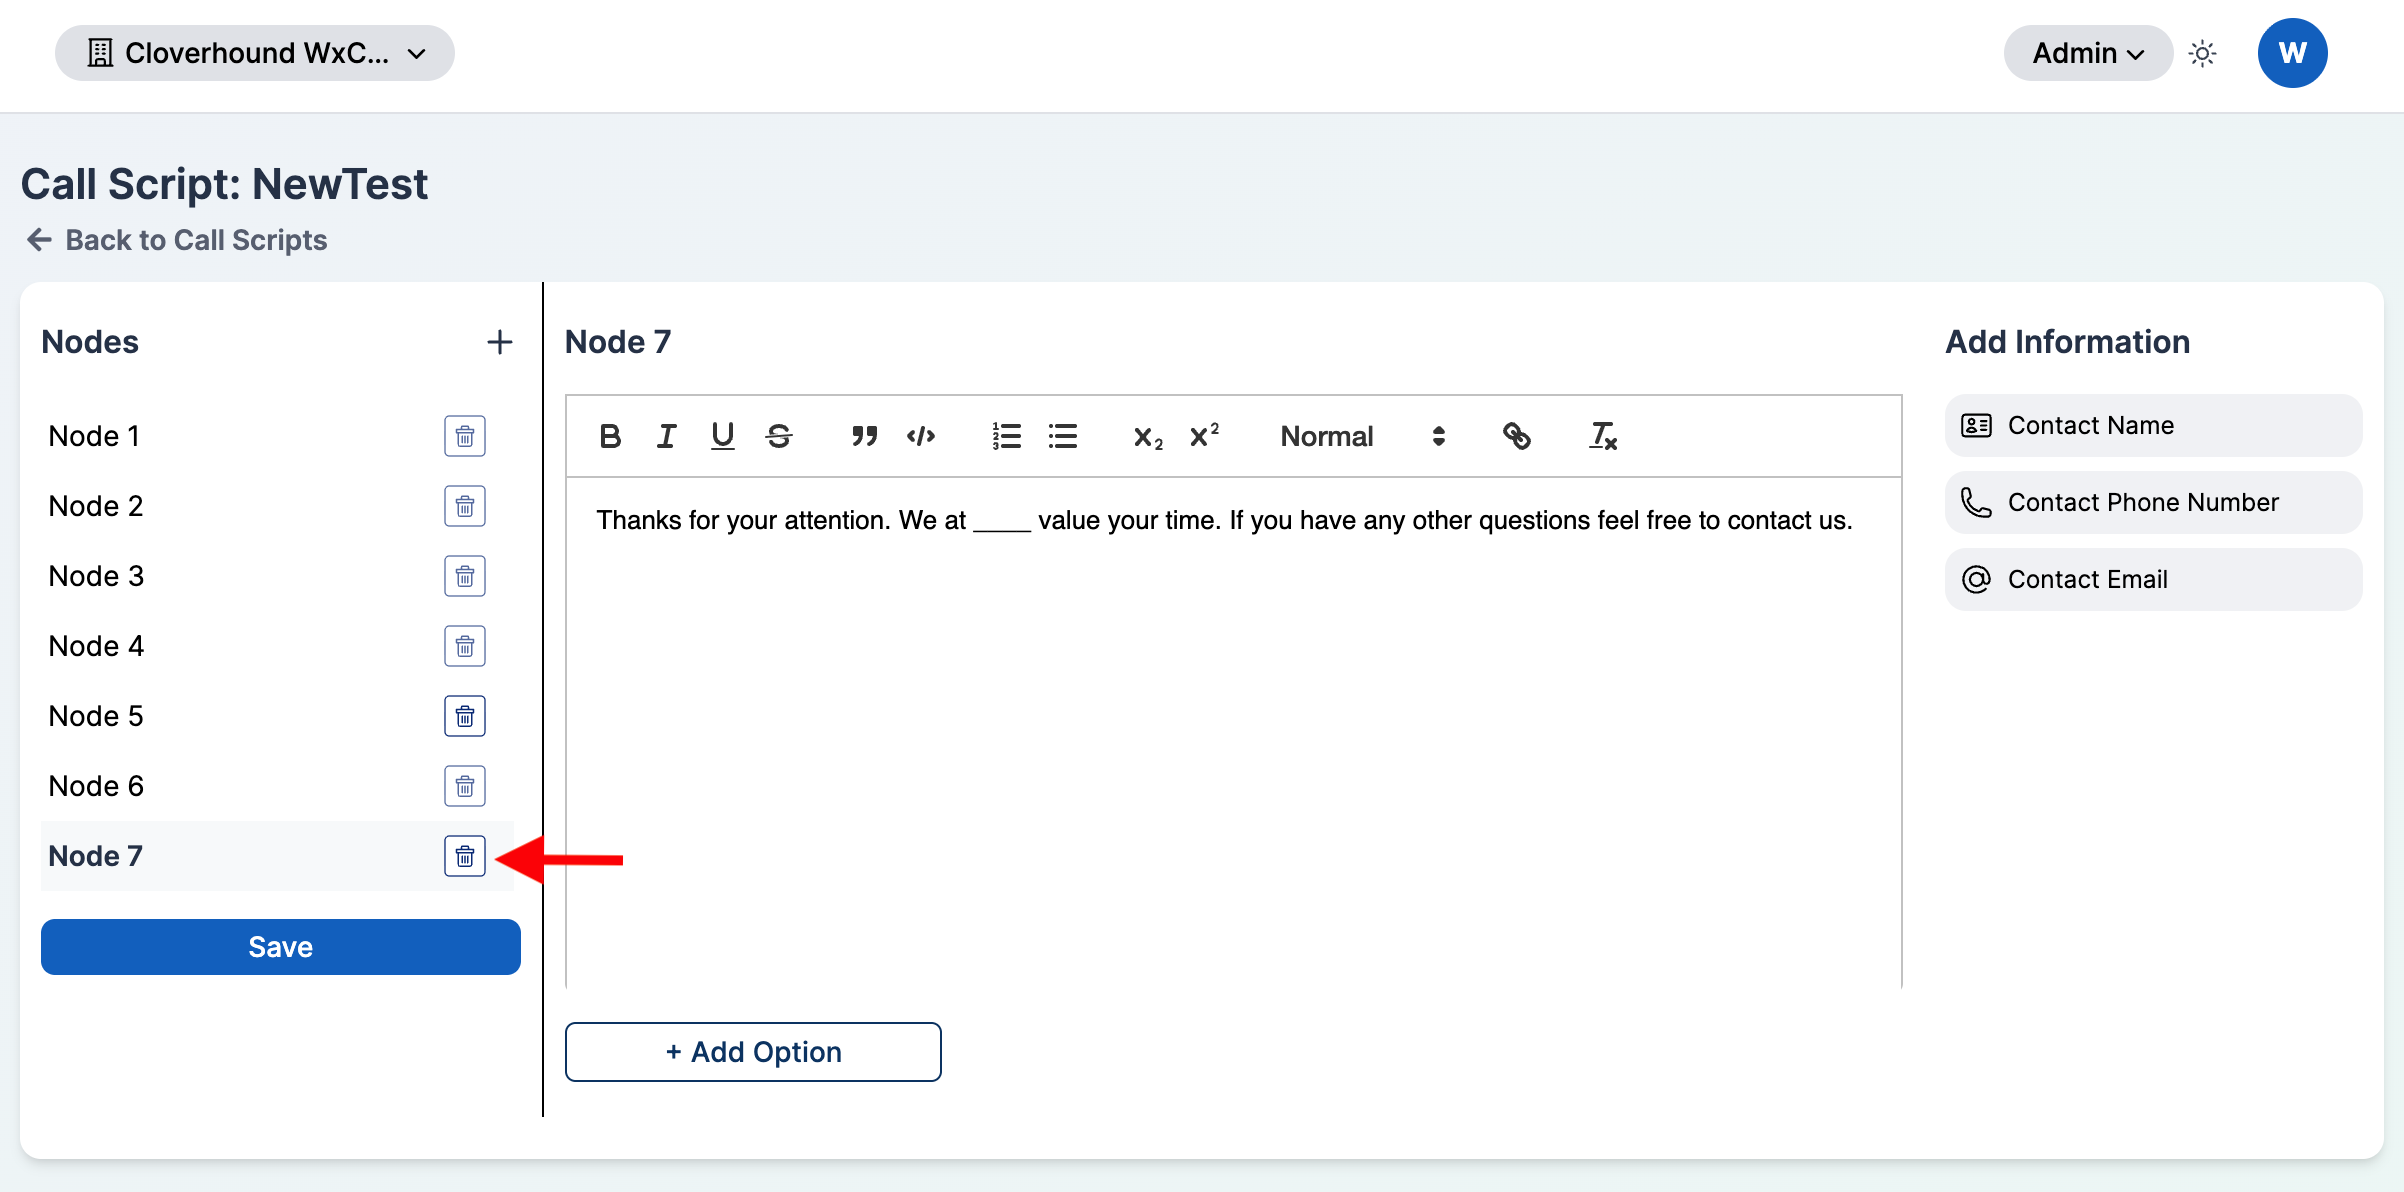
Review the three panels on the show page:
- Nodes (left) — the ordered list of nodes, plus Save and Undo Changes.
- Node <N> (center) — the rich-text editor and options for the selected node.
- Add Information (right) — insertable contact variable tokens.
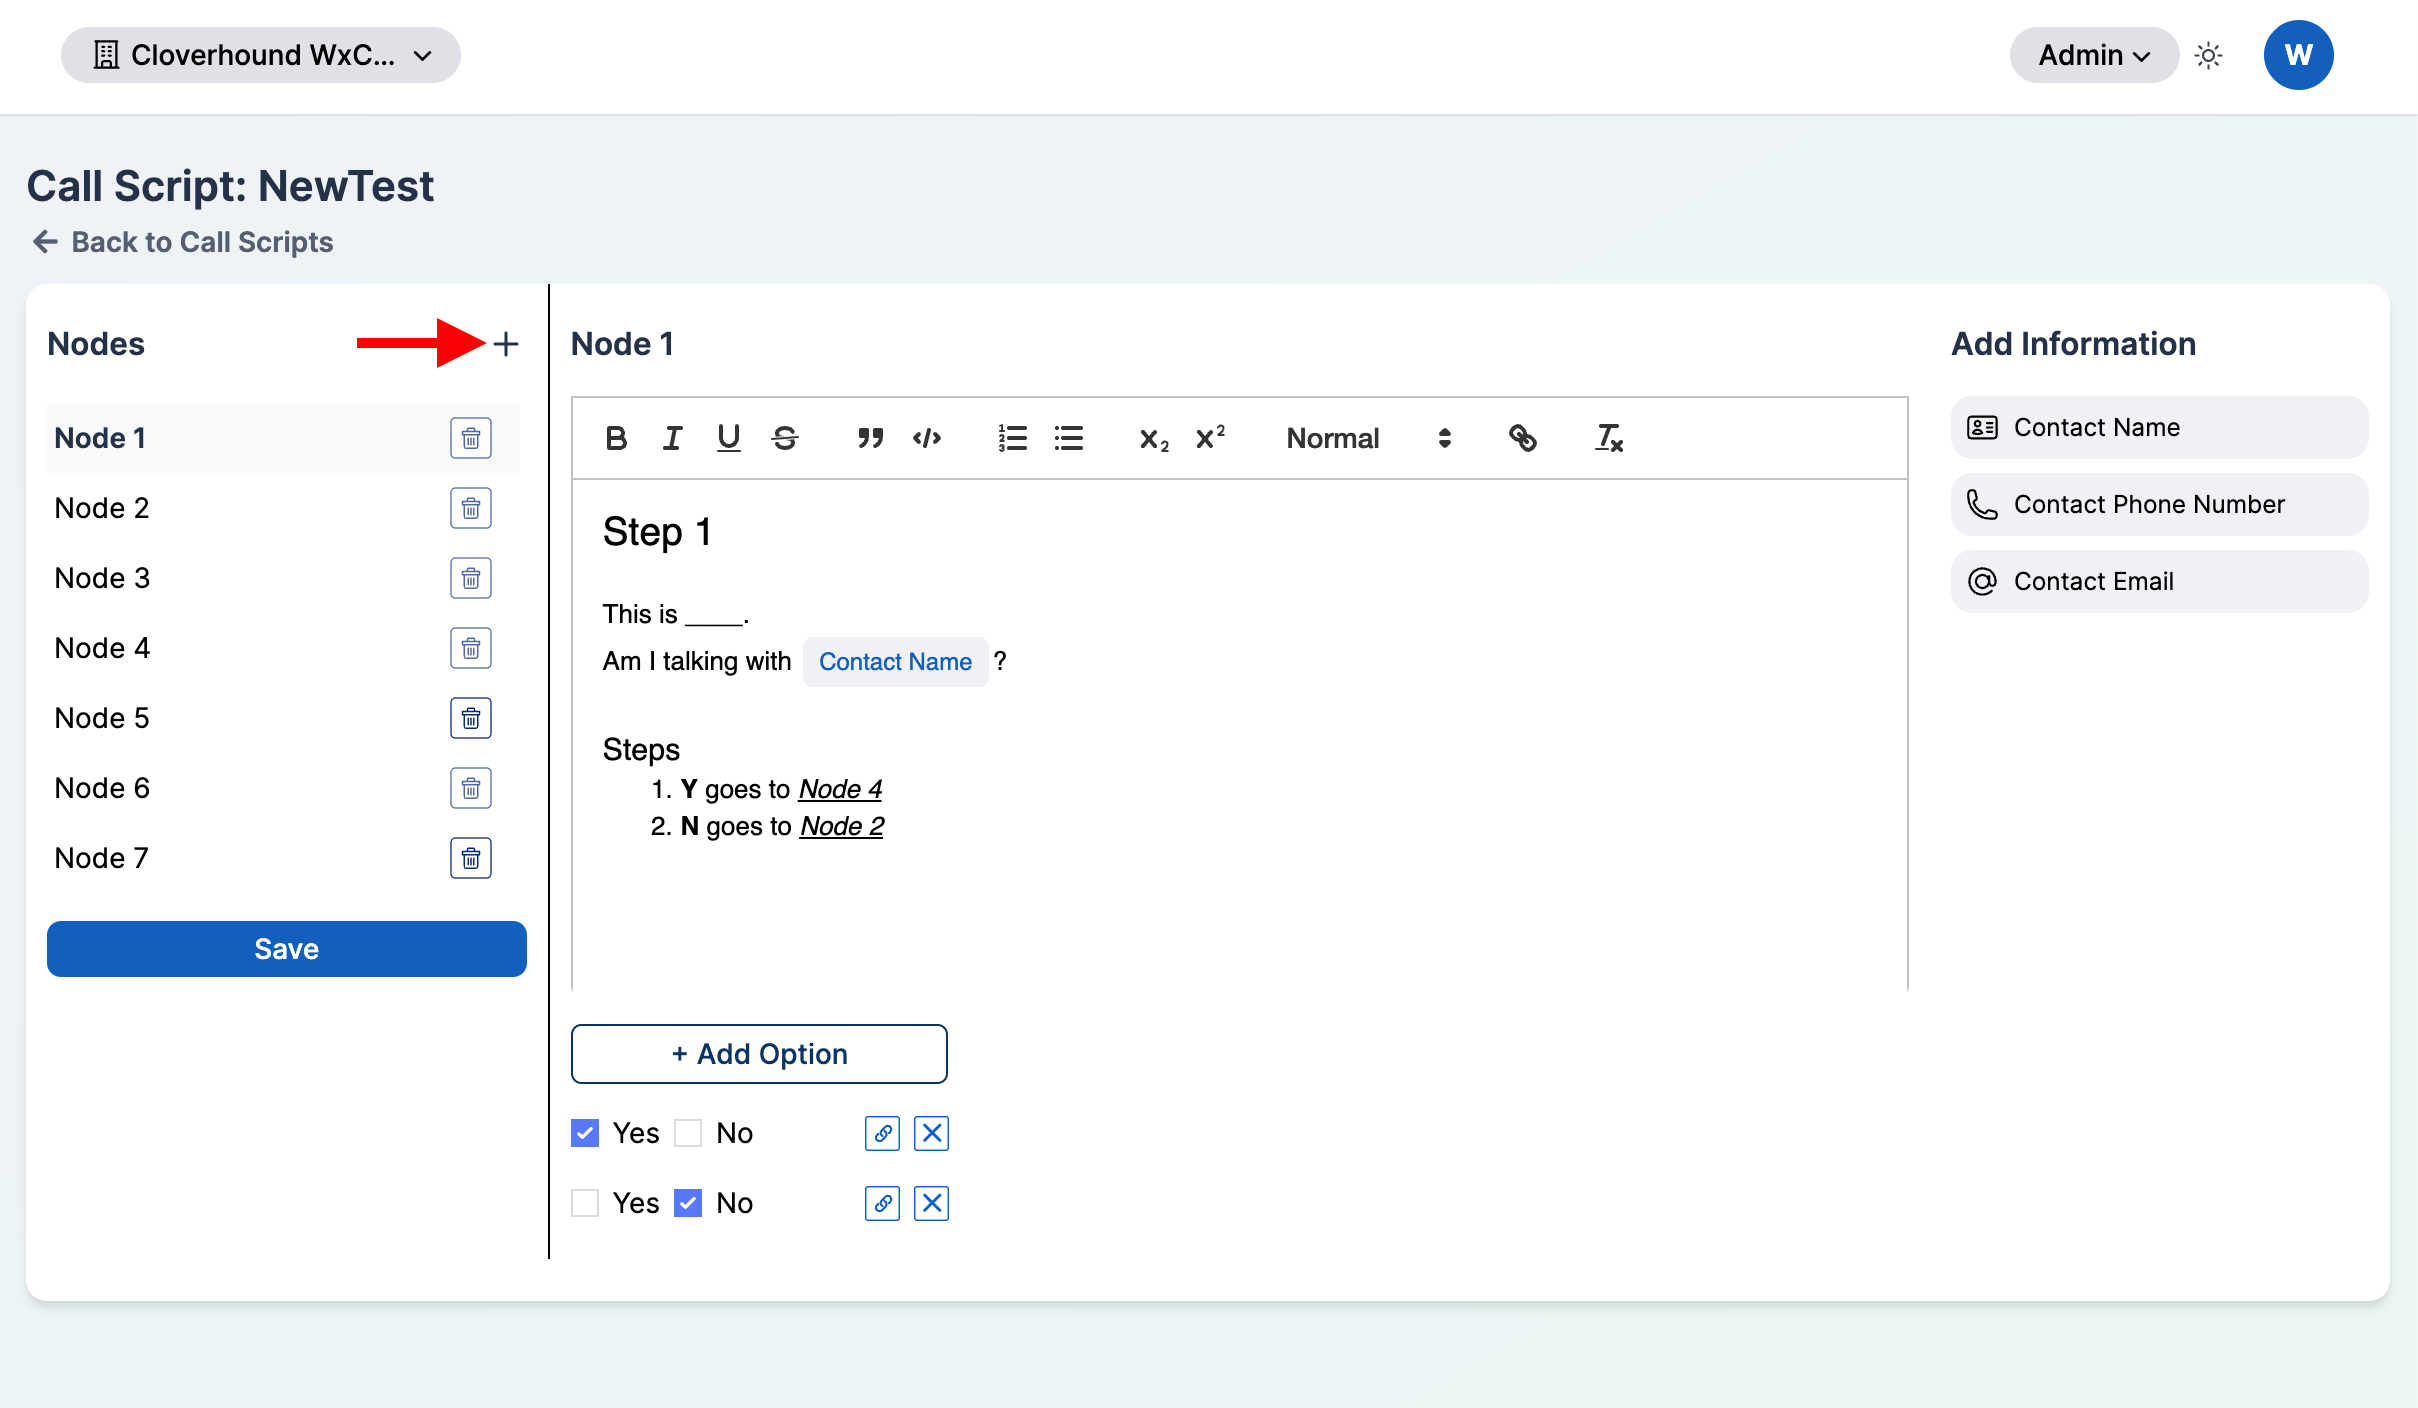
Adding a Node
-
Click the + icon in the Nodes panel header.
-
Select the new node in the list. It is appended to the end and named Node <N> automatically.
-
Write the content in the editor in the center panel.
-
Click Save at the bottom of the Nodes panel to persist the changes.
A brand-new Call Script always starts with an empty Node 1. You cannot save a node with empty content.
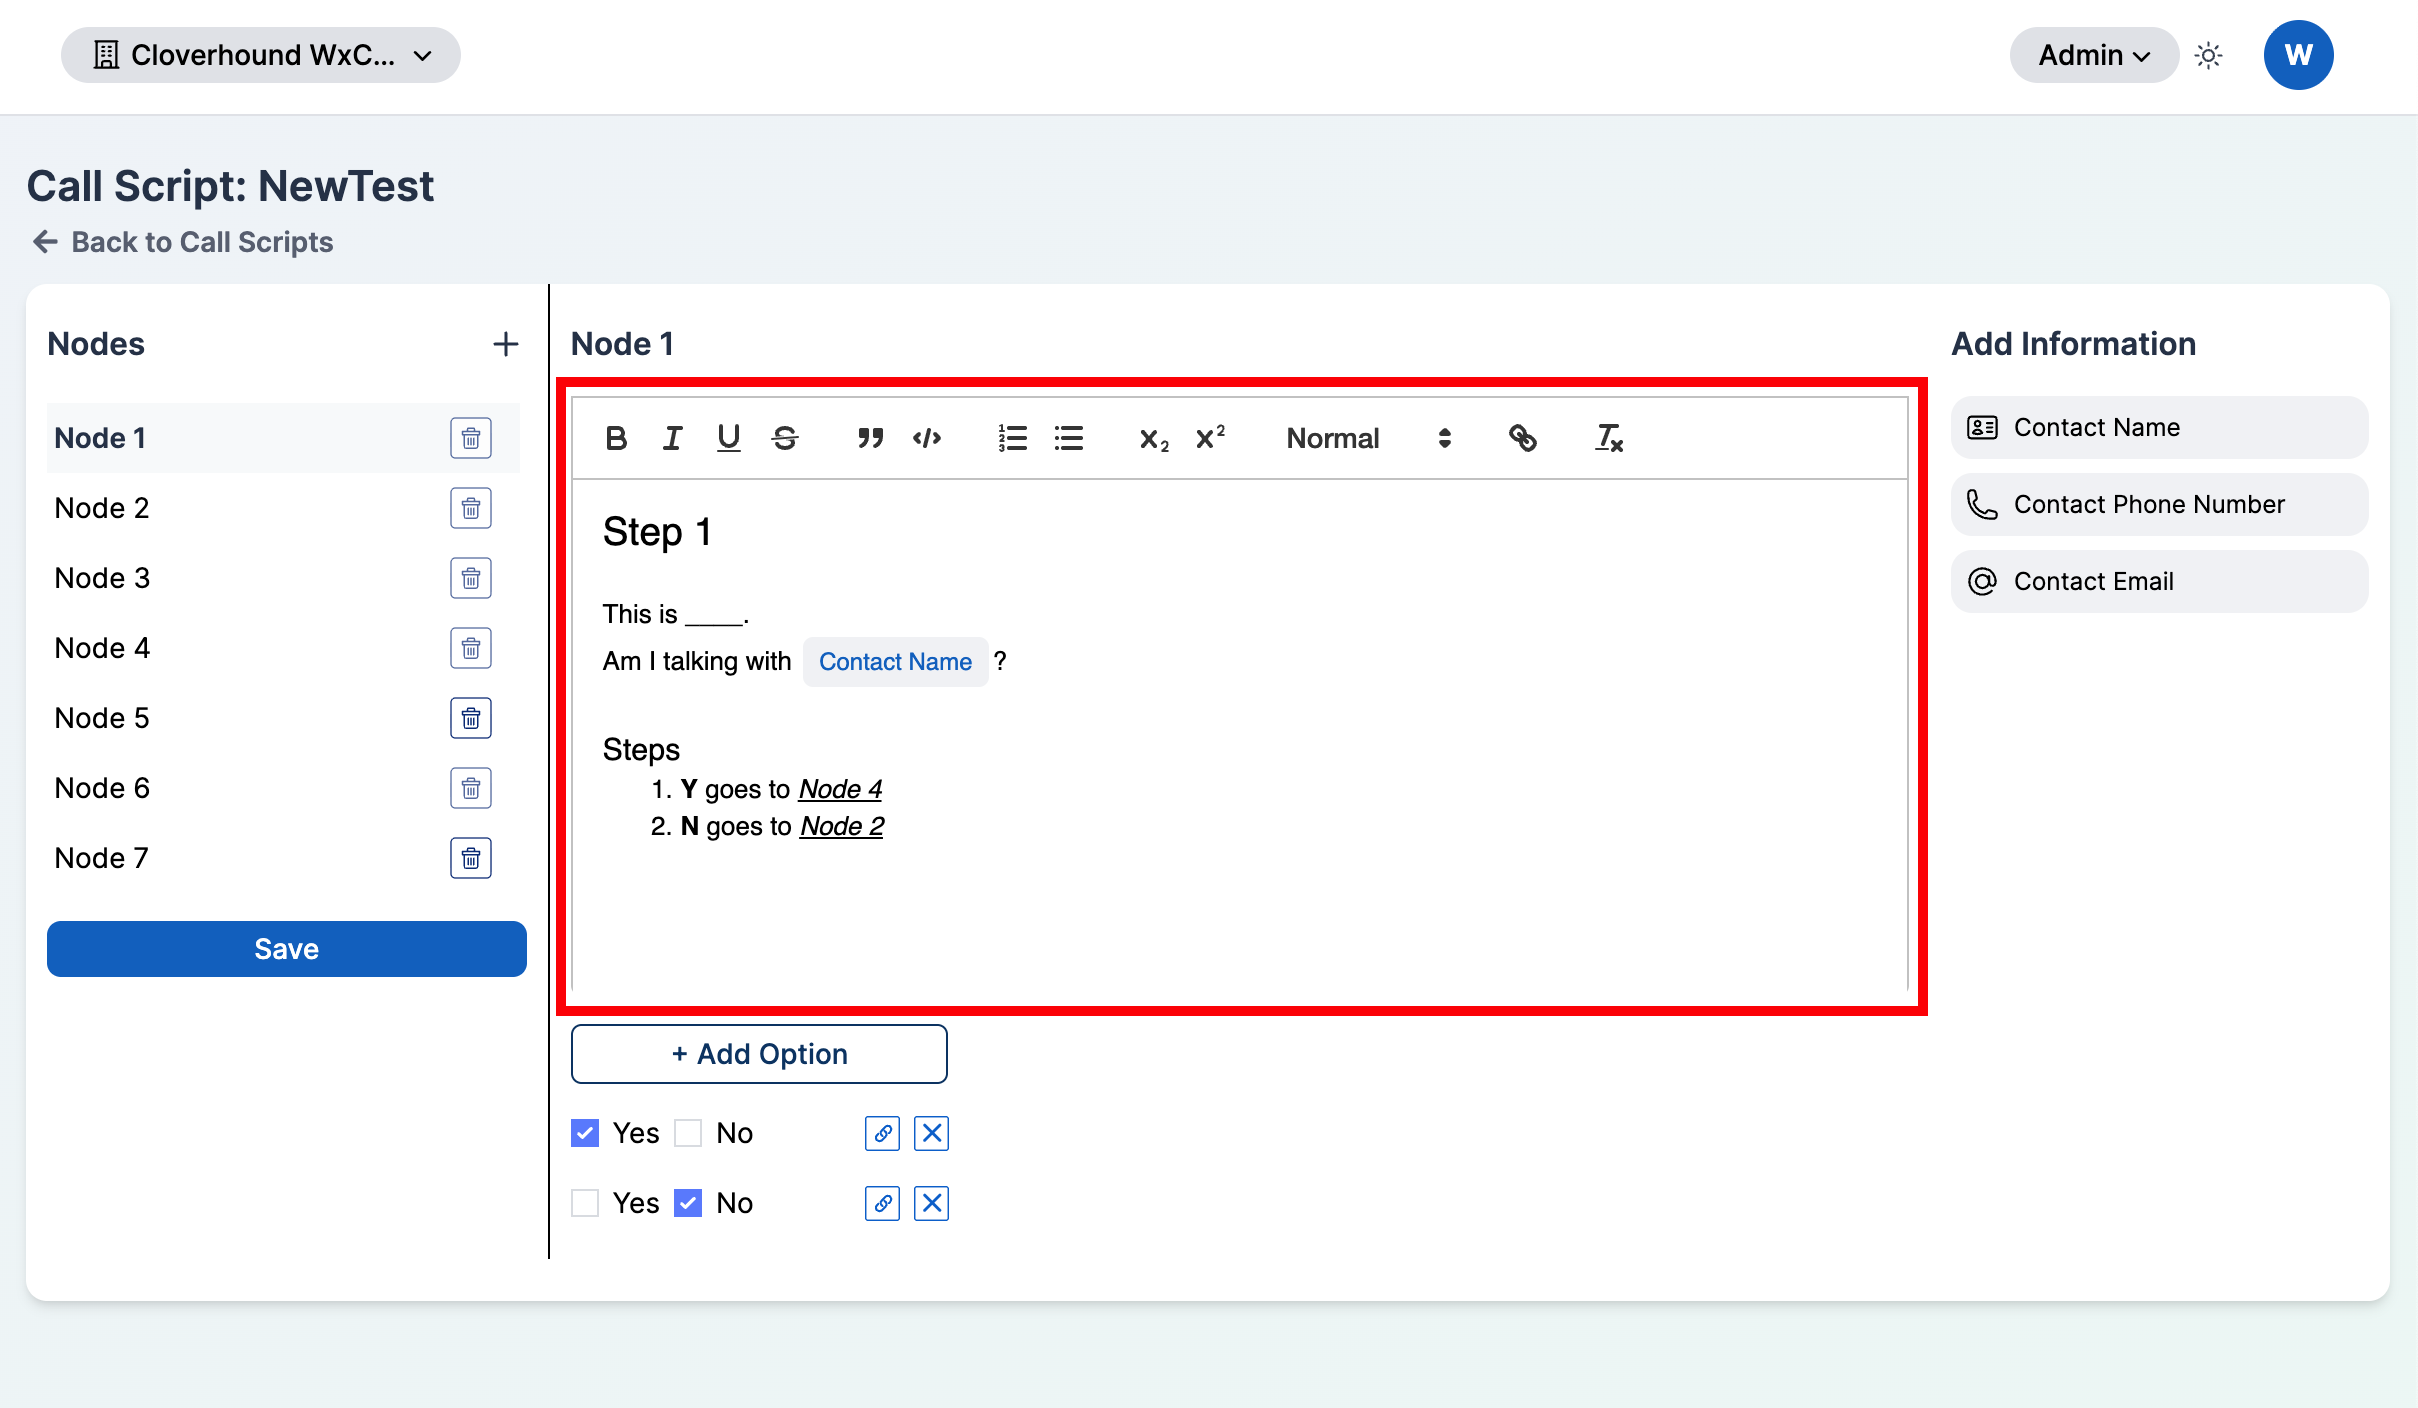
Editing Node Content with Rich Text
The center panel uses a rich-text editor with a formatting toolbar.
-
Select the node you want to edit from the Nodes list.
-
Use the toolbar to format the selected text:
- Headers — choose a level from H1 through H6, or clear the header.
- Inline formatting — Bold, Italic, Underline, Strikethrough.
- Blocks — Blockquote, Code block.
- Lists — Ordered list, Bullet list.
- Script — Subscript, Superscript.
- Link — select text, click the link button, and enter a URL.
- Clean — remove all formatting from the selected text.
-
Click Save to persist the changes.
Inserting Contact Variables
The Add Information panel on the right lists tokens that Cloverhound Cloud replaces with the contact's data at runtime.
-
Place the cursor where you want the token to appear in the editor.
-
Click one of the tokens in the Add Information panel:
- Contact Name
- Contact Phone Number
- Contact Email
-
Continue writing. The token is rendered as a styled chip and stays a single unit when the agent reads the script.
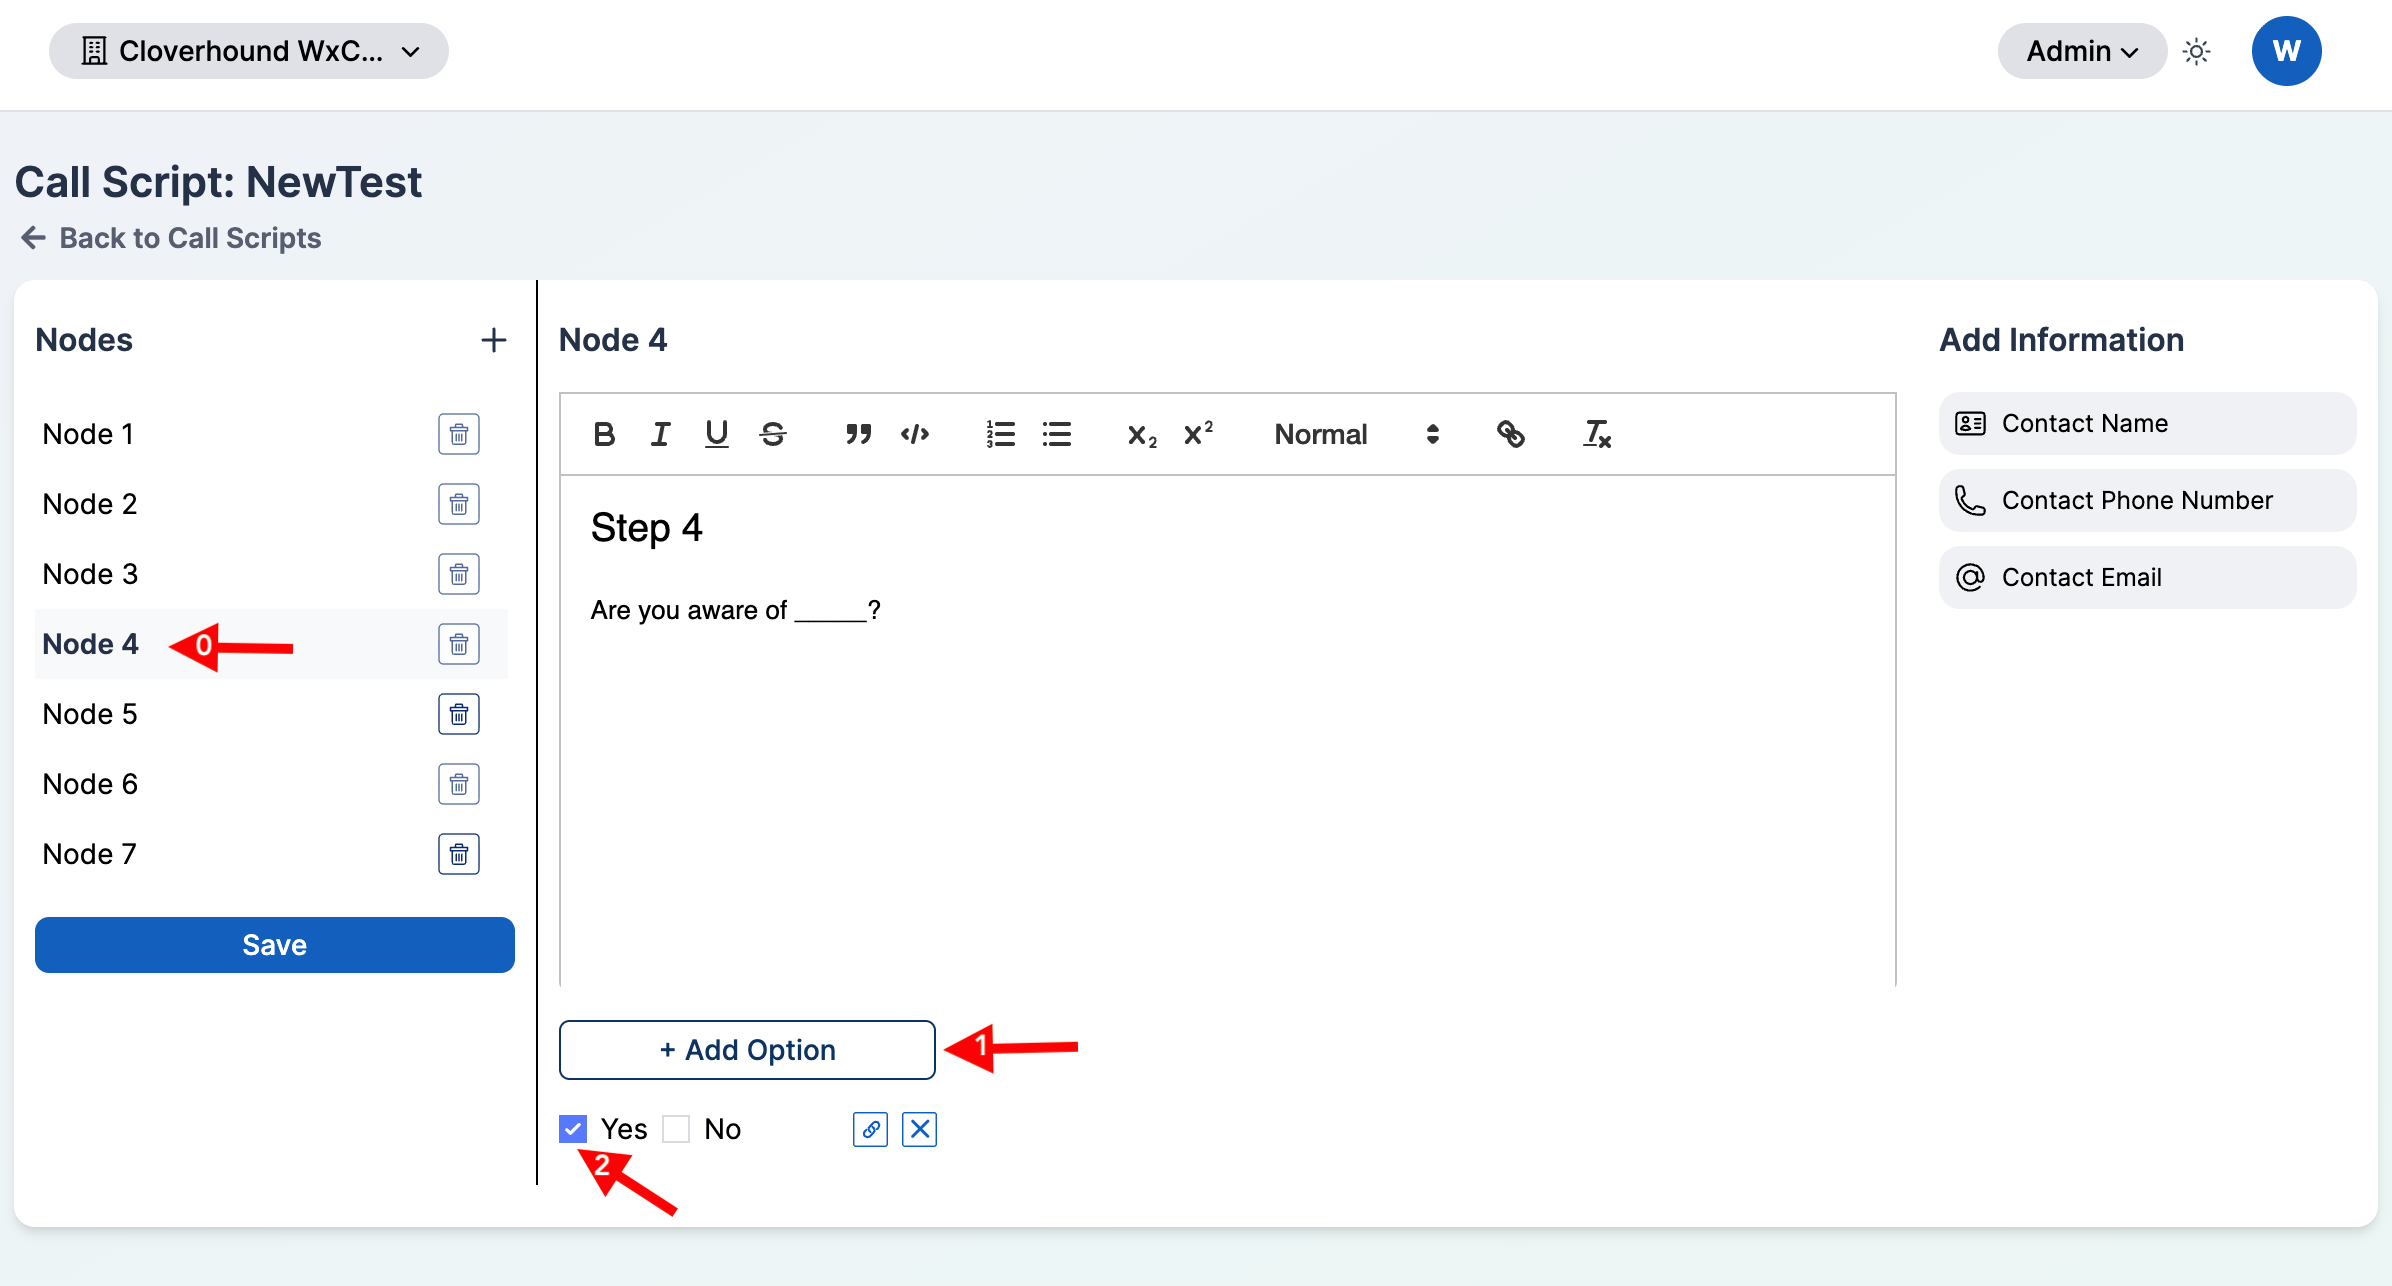
Branching with Yes/No Options
Options let an agent route to a different node based on how a contact answers a question. Each node supports up to two options, and each option destination must be a node with a later position.
-
Select the source node.
-
Click + Add Option. A new row appears below the editor with Yes and No checkboxes.
-
Check either Yes or No on the row. Only one value per row is allowed, and the other rows cannot reuse the same value.
-
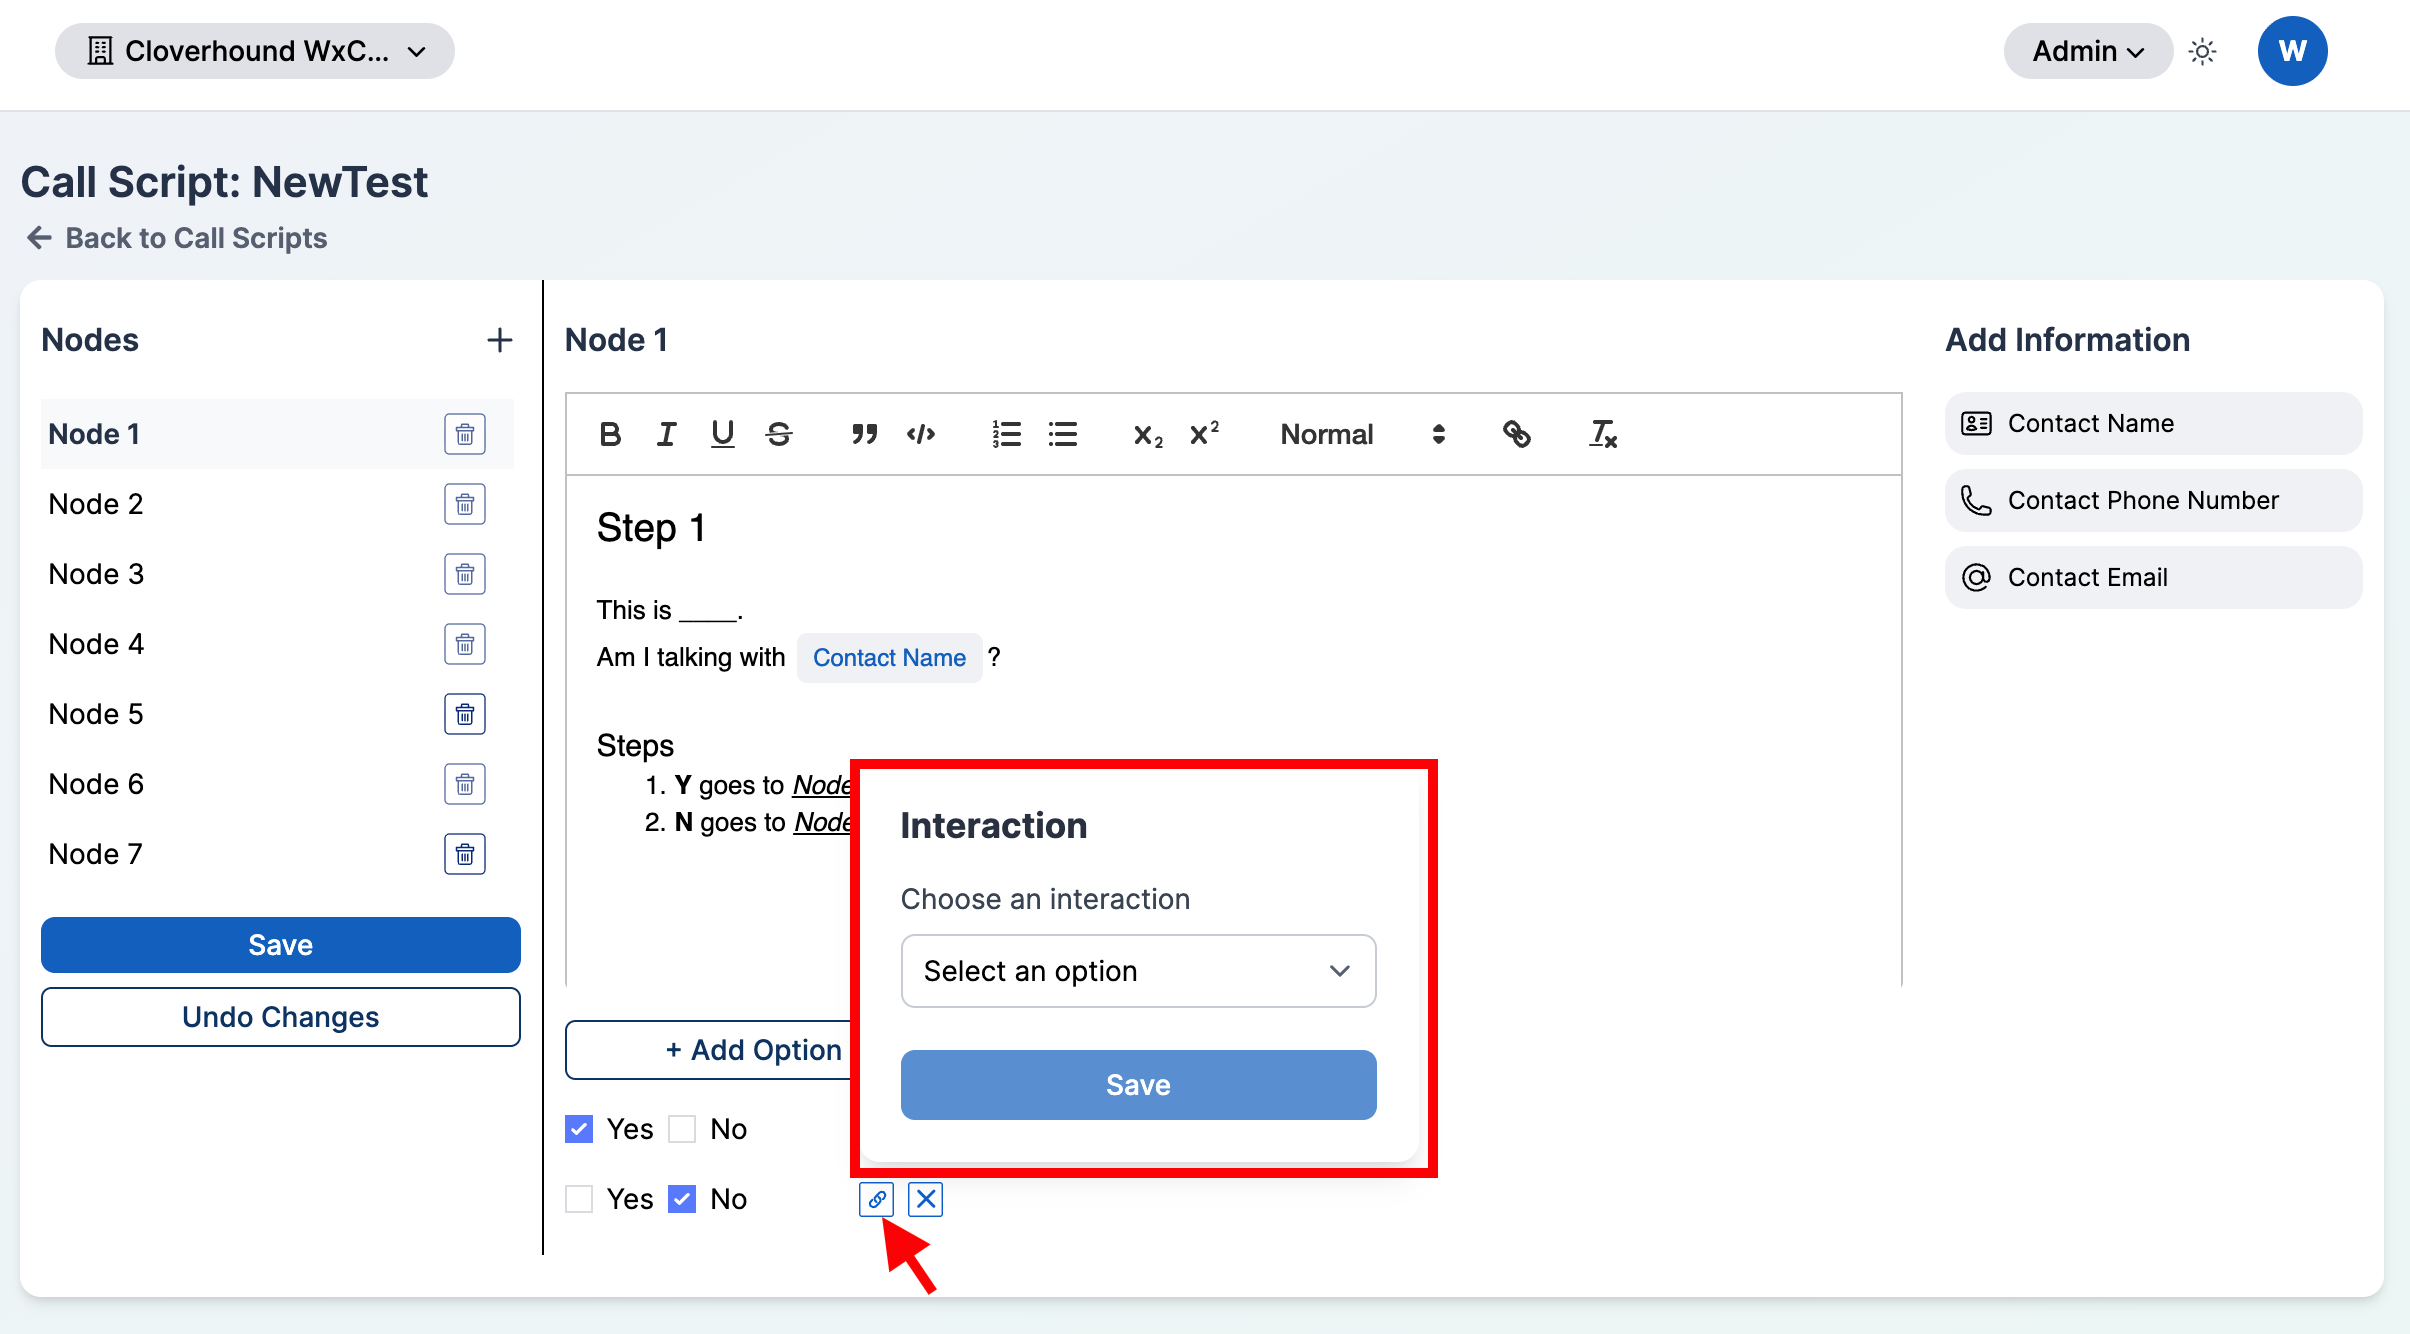
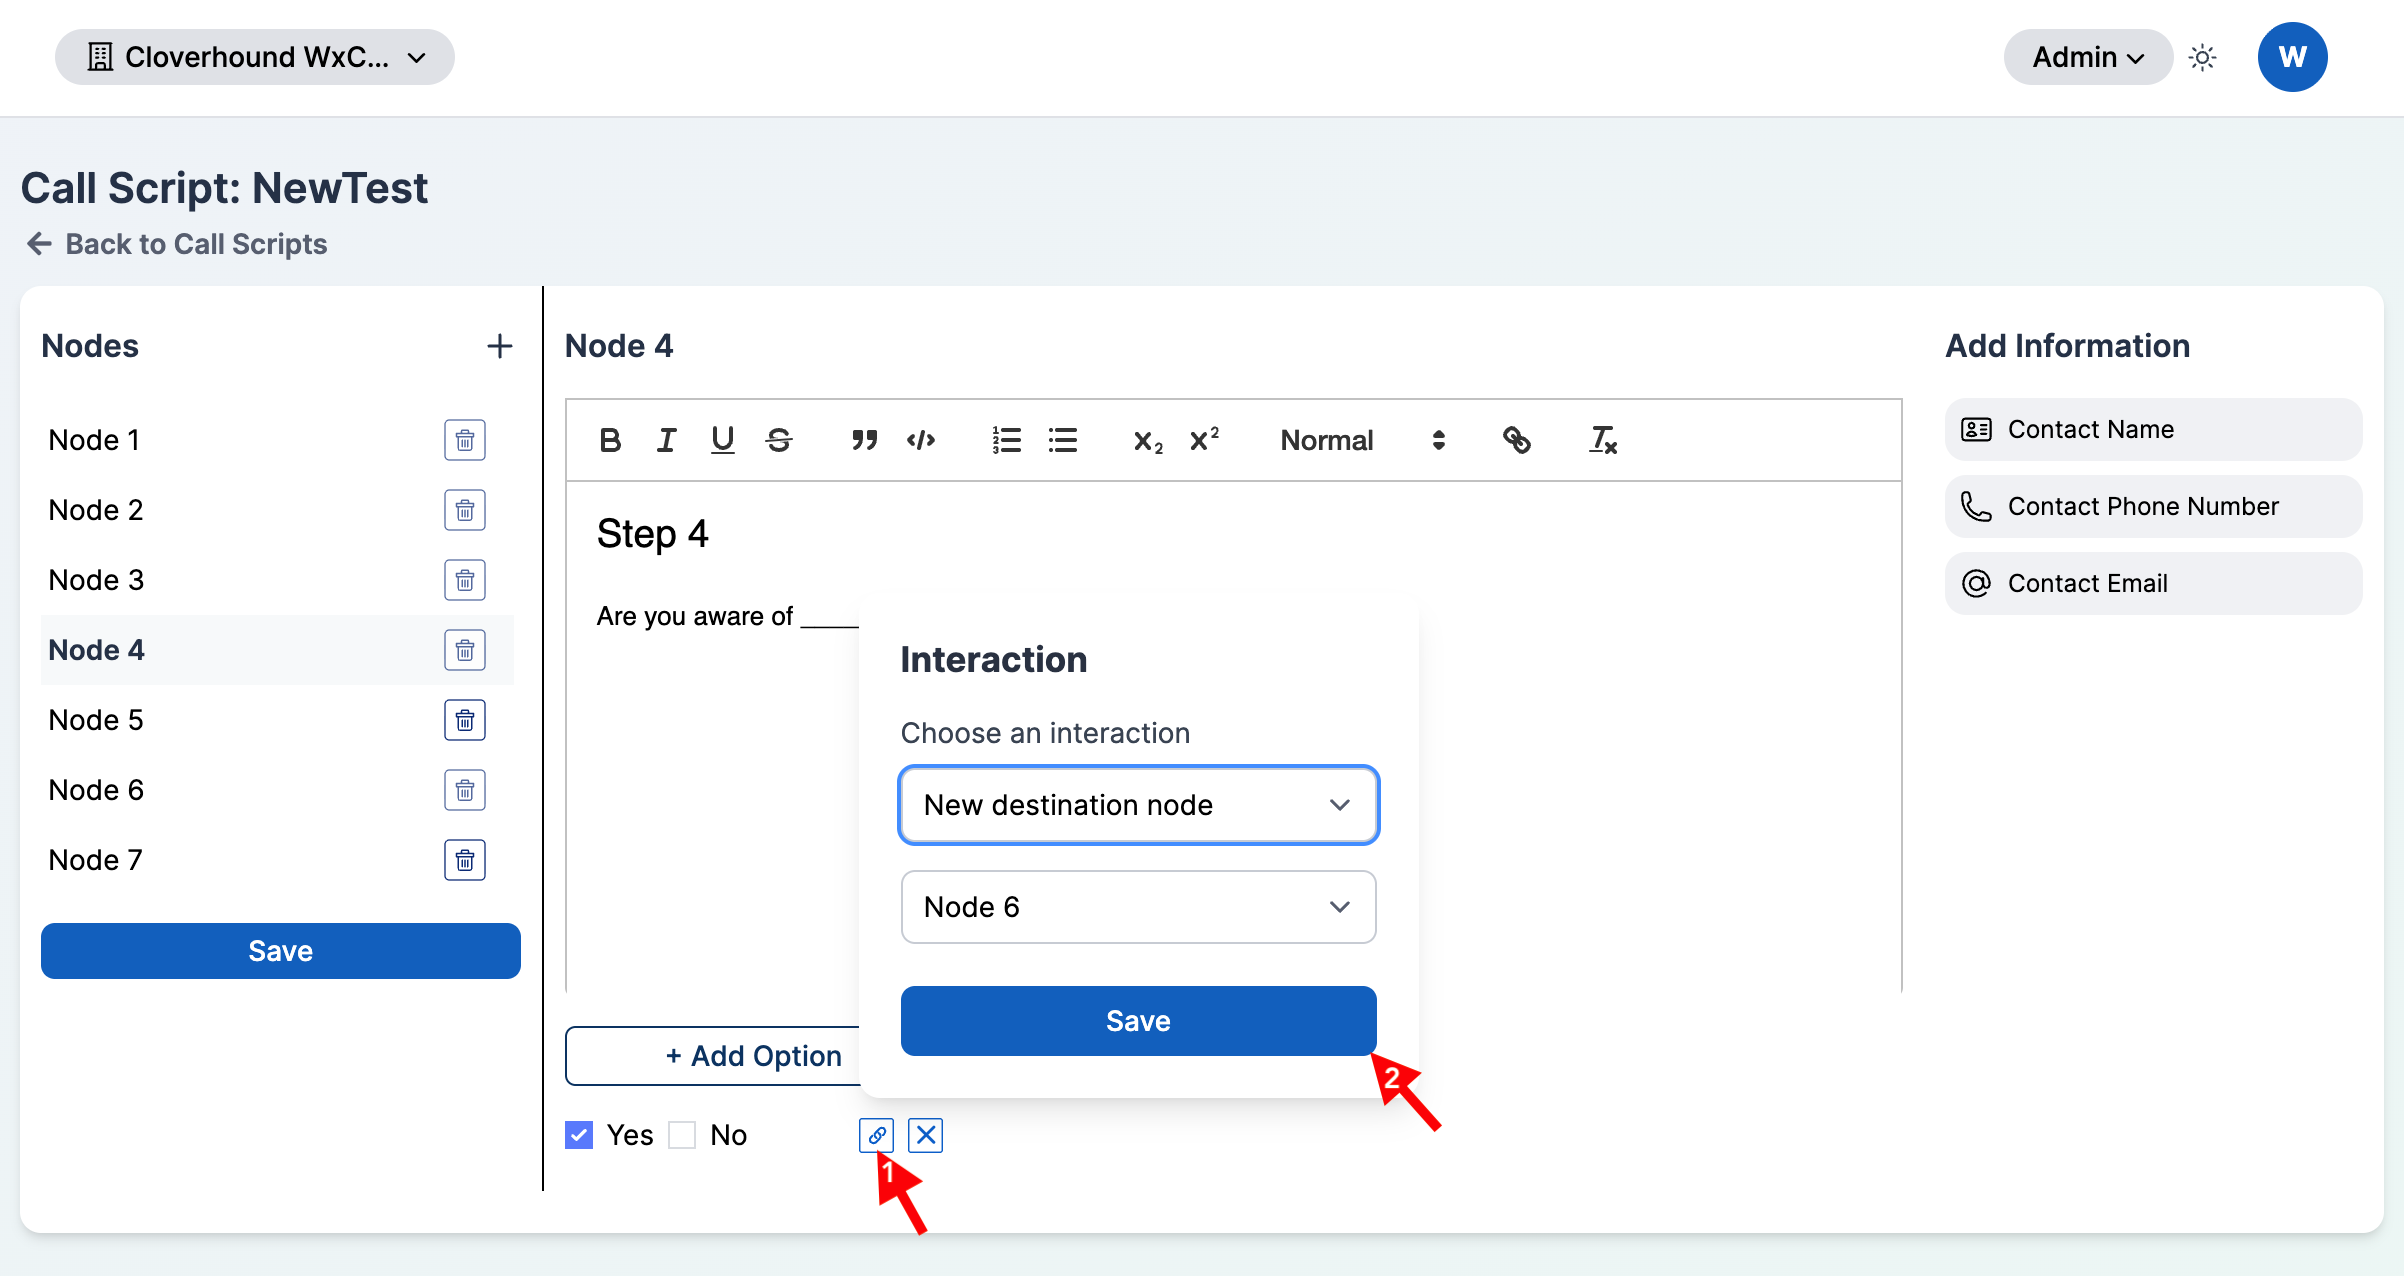
Click the interaction/link icon on the right side of the option row to open the Interaction picker.
-
Choose an interaction:
- Add node — create a new node and point this option at it. Cloverhound Cloud names the new node Node <N+1>.
- New destination node — pick an existing later node from the dropdown. Nodes earlier than the current node, and the current node itself, are disabled.
-
Click Save inside the Interaction picker, then Save in the Nodes panel.
Two options on the same node cannot point to the same destination node. Cloverhound Cloud shows an alert if you try to save a duplicate destination.
Removing an Option
Click the x icon at the end of the option row to remove it. The Yes/No selection and the interaction are cleared together.
Deleting a Node
-
Click the trash icon on the right side of the node in the Nodes list.
-
Click Save in the Nodes panel. Remaining nodes are renumbered so there are no gaps.
The trash icon is disabled when any of the following is true:
- The node is the only node in the script.
- The node has an option with a destination node configured.
- Another node's option points at this node.
Remove its options or others options pointing to it first, then delete the node.
Saving and Discarding Changes
All edits in the three panels are held locally until you save.
- Save — click Save at the bottom of the Nodes panel to persist every change in the script.
- Undo Changes — appears when there are unsaved edits. Click it to revert the script to its last saved state.
If you try to navigate away with unsaved changes, Cloverhound Cloud blocks the navigation and prompts you to save or undo first.
With the node editor, you can write branching call flows, format them with rich text, insert contact variables, and link Yes/No answers to later nodes in the script.