Managing Access Requests
Access requests let people join an existing Cloverhound Cloud organization without waiting for an admin to invite them first. When someone signs in with Webex and their organization already has a Cloverhound Cloud account, they can send an access request to your organization's admins. From the Access Requests page you can review those requests and either approve them, which sends a Cloverhound Cloud invitation, or reject them.
How an Access Request Is Created
Access requests originate from the signup flow, not from inside the admin UI.
-
A user signs in with Webex from the Cloverhound Cloud home page.
-
Cloverhound Cloud detects that their Webex organization is already linked to an existing Cloverhound Cloud organization and shows a Could not create account dialog listing your organization's name and the admin contact.
-
The user clicks Request Access.
-
Cloverhound Cloud records the request and emails every admin in your organization with a link back to the Access Requests page.
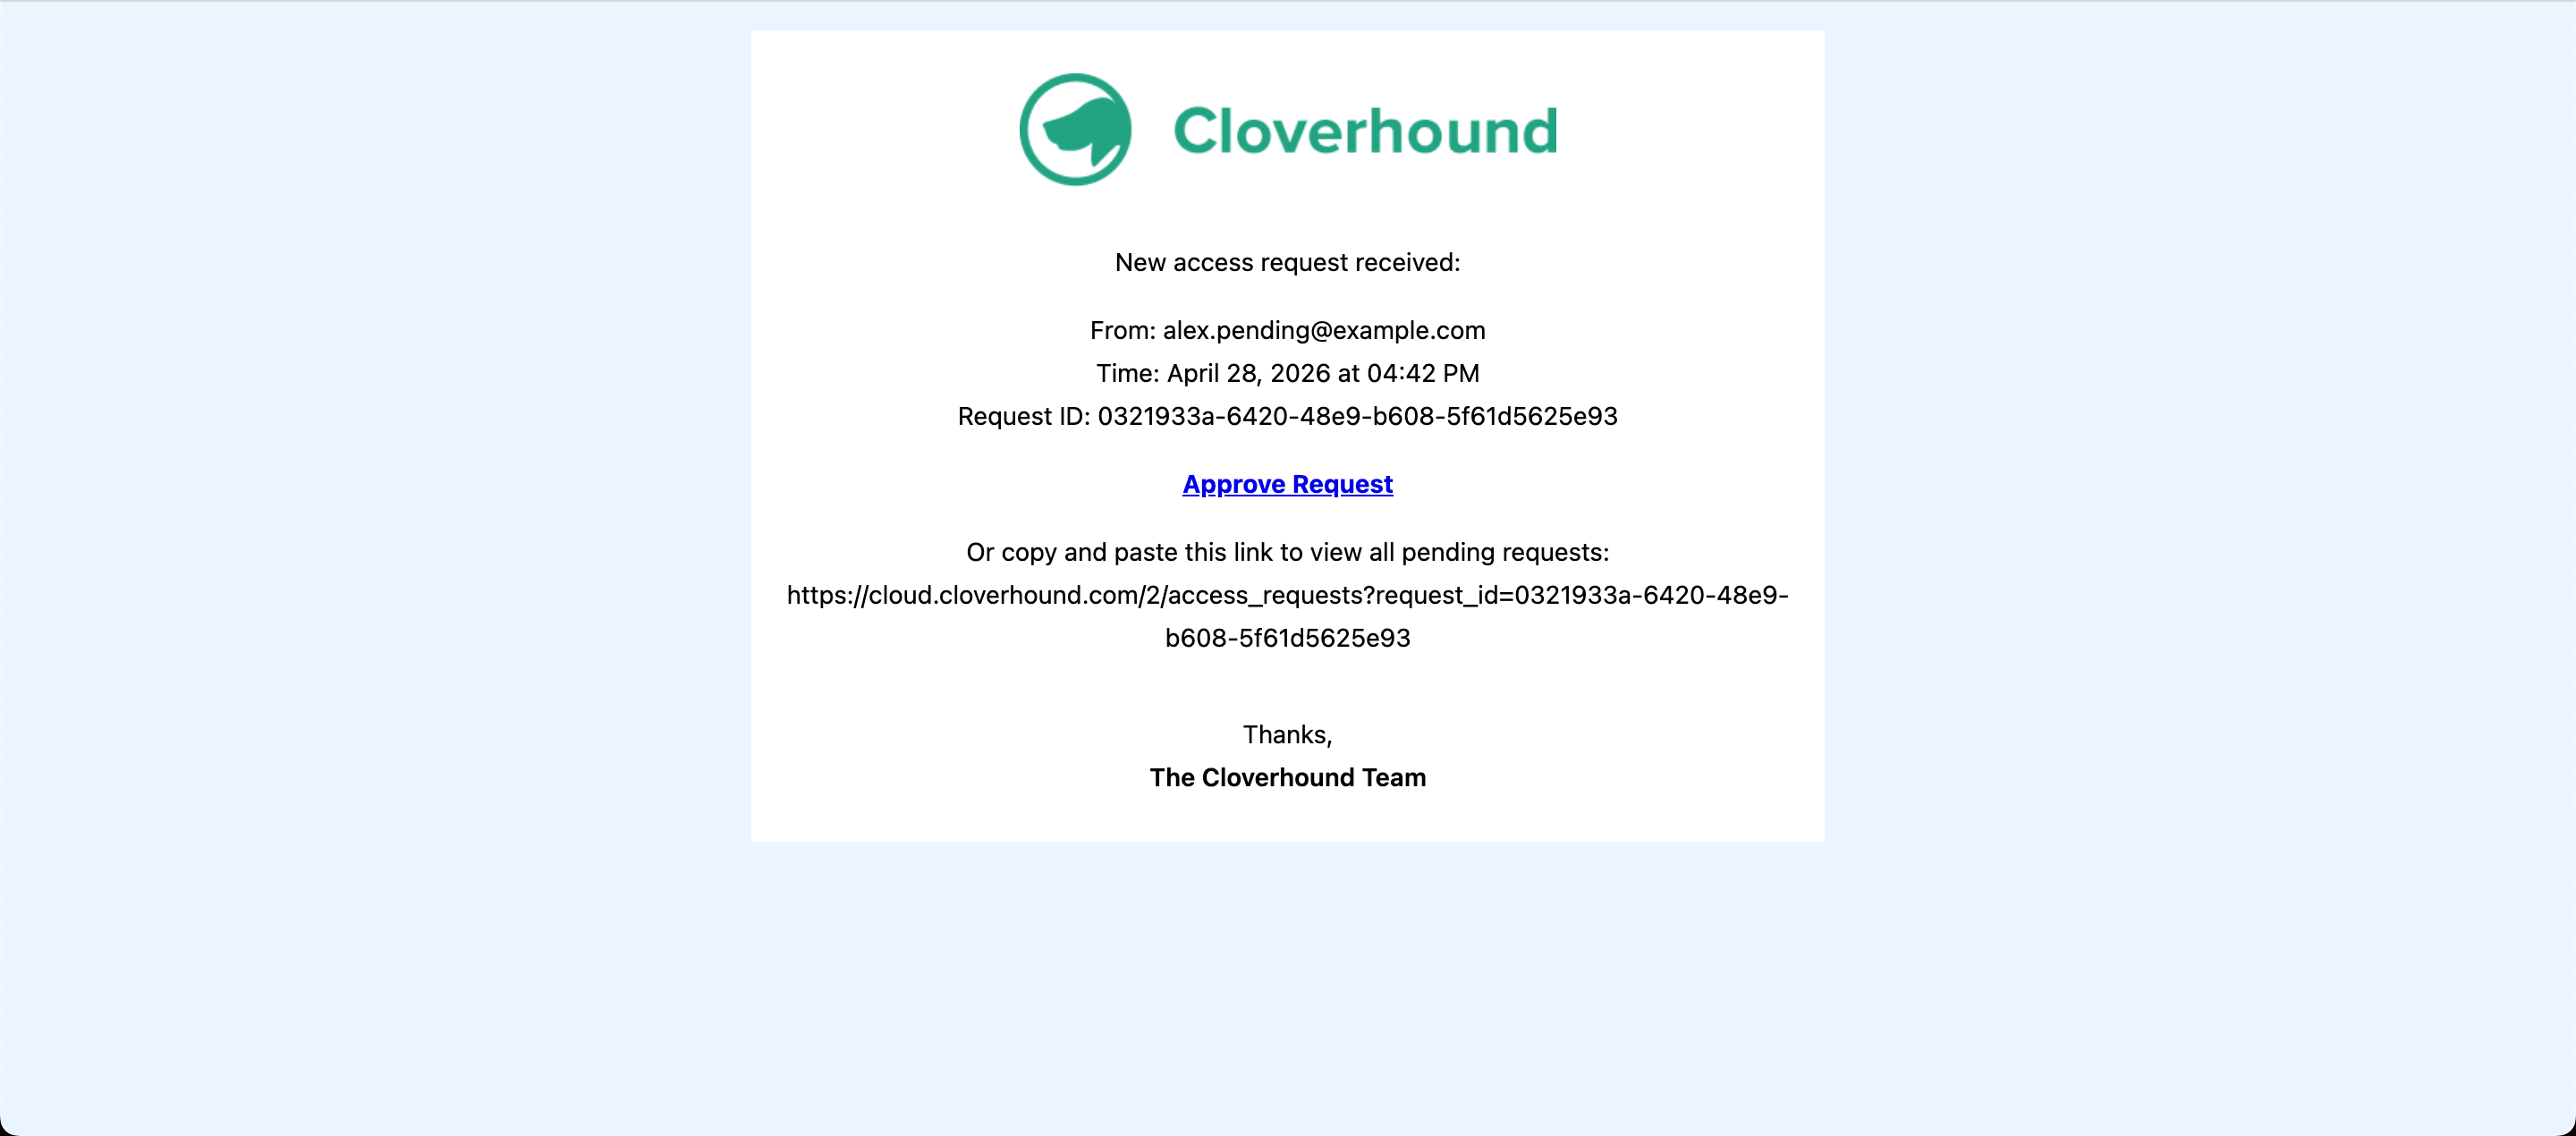
Each request stores the requester's email, the time it was submitted, and a unique request ID.
Viewing Pending Requests
-
Open the access request email and click Approve Request, or navigate to the Access Requests page directly at
/<your-organization-id>/access_requests.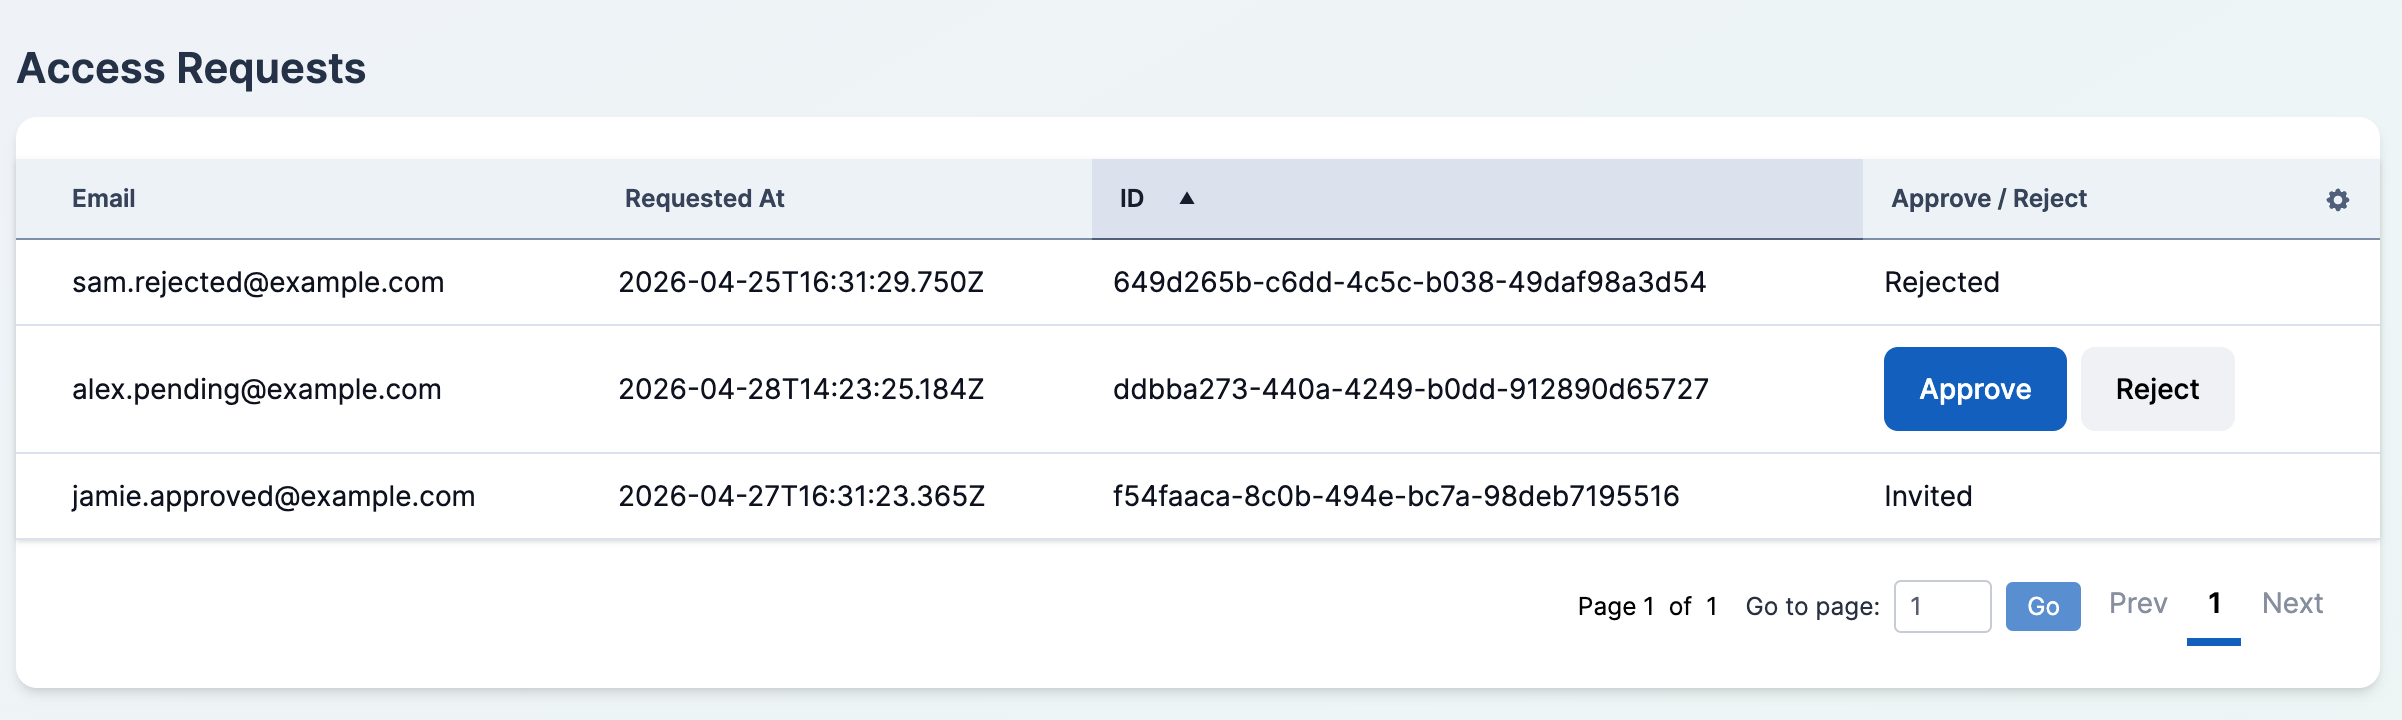
-
Review the table. Each row shows:
- Email — the requester's email address.
- Requested At — when the request was submitted.
- ID — the unique request ID.
- Approve / Reject — actions for requests that have not yet been handled. Handled requests show Invited or Rejected instead.
If you followed a link from the email, the request that triggered the notification is pre-selected so you can act on it immediately.
Approving a Request
Approving a request sends a Cloverhound Cloud invitation email to the requester and marks the request as Invited.
-
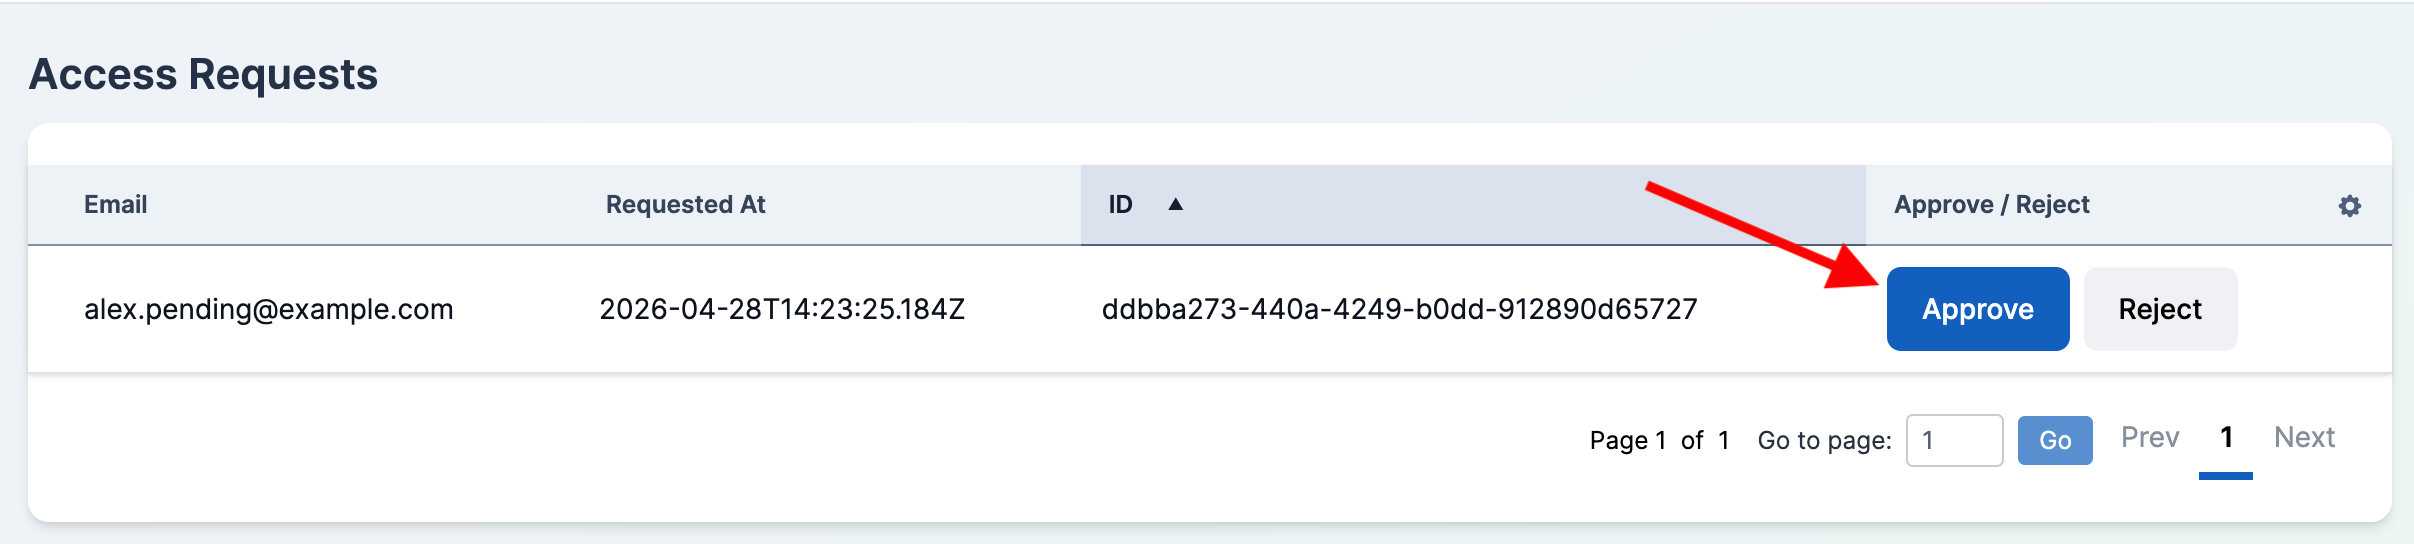
Click the Approve button in the row for the request you want to approve.
-
Review the confirmation modal. It shows the requester's email and explains that an invitation will be sent so they can create an account under your organization.

-
Click the Send Invitation button.
Cloverhound Cloud creates a user record for the requester's email, sends the invitation email, and reloads the page. The request row now shows Invited and the Approve/Reject buttons are no longer available.
The new user lands in your organization with no permissions assigned. After they accept the invitation, set their role from the Users page. See User Management for details.
Rejecting a Request
Rejecting a request closes it out without creating a user or sending an email to the requester.
-
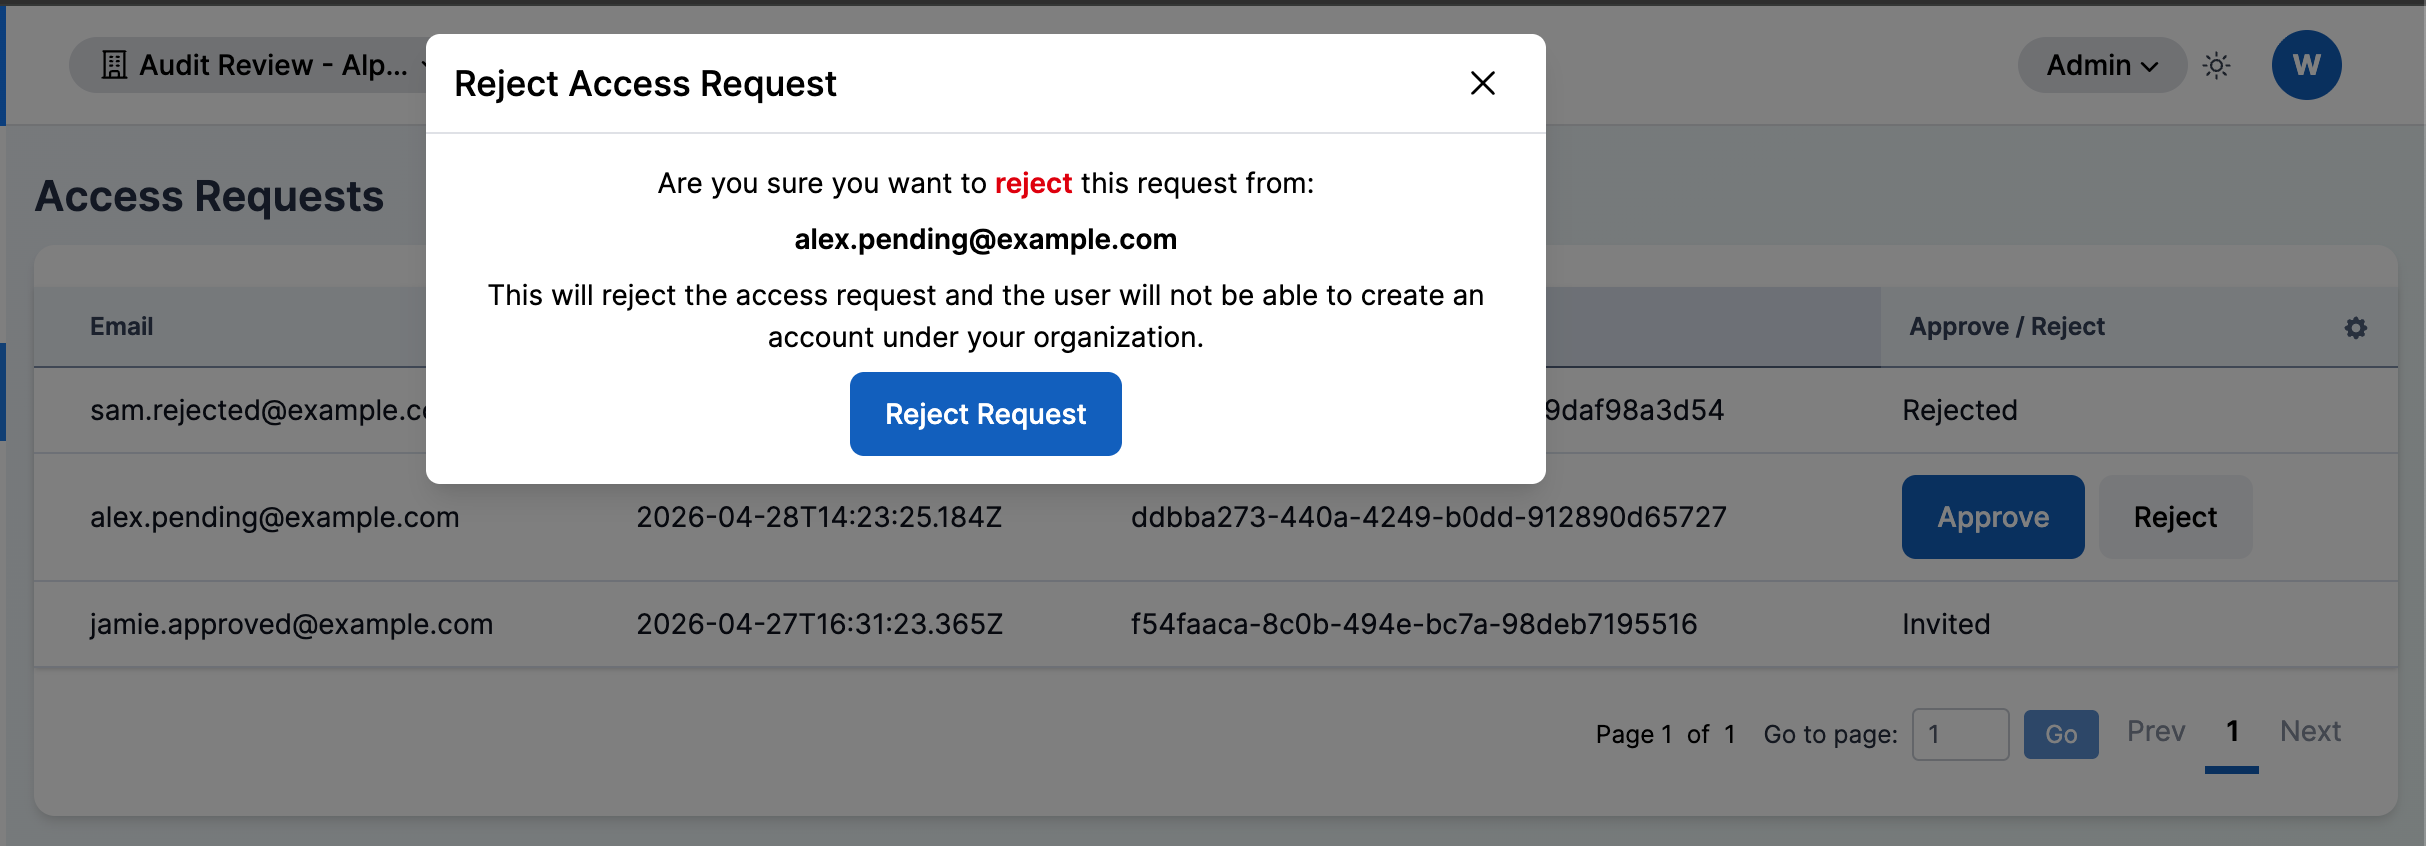
Click the Reject button in the row for the request you want to reject.
-
Review the confirmation modal. It confirms that the requester will not be able to create an account under your organization.
-
Click the Reject Request button.
The page reloads and the request row now shows Rejected.
Rejecting a request is final for that request. If the person should be given access later, invite them directly from the Users page or ask them to submit a new request.
Resending an Invitation
The Access Requests page does not resend invitations. Once you approve a request, it is marked Invited and cannot be acted on again from this page.
To resend an invitation email to someone who has already been approved, go to the Users page and use the Resend Invitation action on their user row. See User Invitations for the full procedure.
From the Access Requests page you can review who has asked to join your organization, approve requests to send invitations, and reject requests that should not be granted.